This post contains the conclusions of the Alioli ROV Submarine Drone and shows images and videos of it in the water. I wrote it as a diary so anybody can understand that Alioli wasn’t a straight project, but it had problems, and I had to resolve them on the way.
There were several points for me to consider in the first version of Alioli ROV Submarine DroneREADY:
Communication improvements:
ACCOMPLISHED – Make Alioli Buoy understand QGroundControlMavlink commands and forward them to Alioli ROV.
ACCOMPLISHED – Make Alioli Buoy answer to QGroundControl using Mavlink Protocol with augmented data from Alioli ROV.
ACCOMPLISHED – Basic Mavlink command to develop:
ACCOMPLISHED – Basic movements
ACCOMPLISHED – Telemetry transmission
DELAYED – Develop a stability system for the Alioli ROV to make it keep direction and depth.
ACCOMPLISHED – Improve the Alioli Buoy board with a couple of Temperature sensors to measure the battery and surface water.
ACCOMPLISHED – Add the camera and configure and solder the OSD Module in Alioli ROV
ACCOMPLISHED – Attach and configure the transmitter in Alioli Buoy (5,8Ghz)
ACCOMPLISHED – Prepare boxing for both systems and test the system in a swimming pool
Firstly the photo finish. This is the video with the final result of the full process of making my own ROV Submarine Drone:
I have accomplished almost everything I wanted, but the road wasn’t empty of stones, and I would like to share my experience with you. A great project is not absent of problems, errors, and mistakes. This is it:
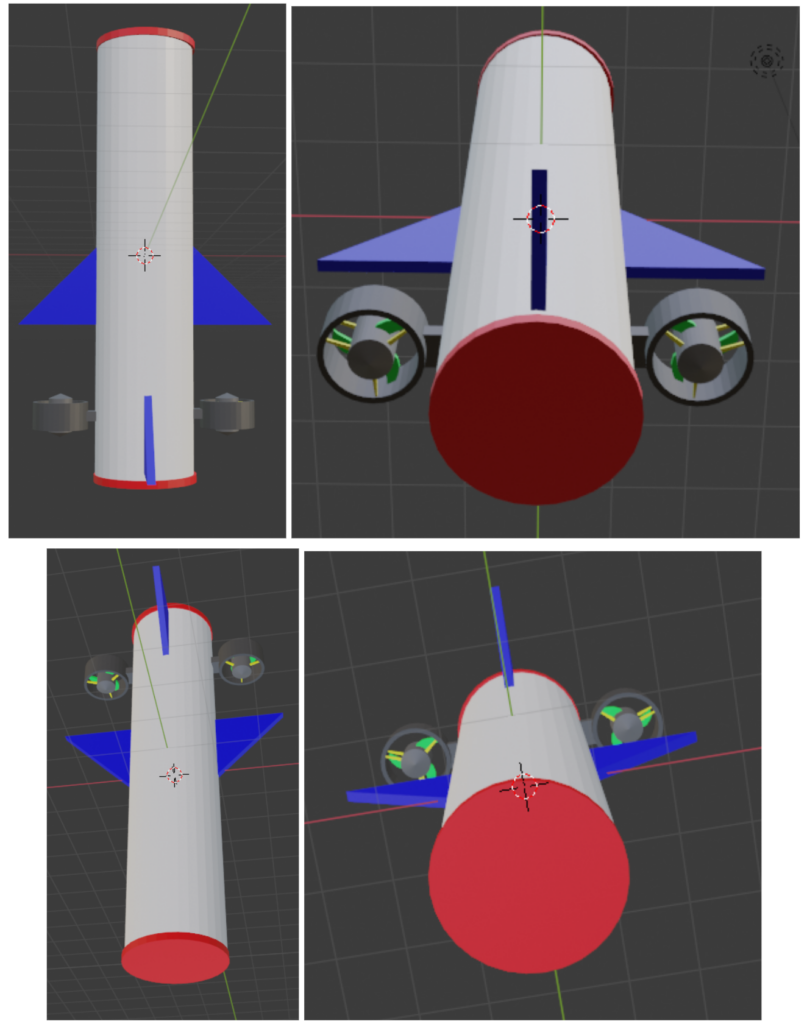
In the beginning, I decided to make a 3D model on Blender about what I was expecting to make to set the ideas about the frame and shape in place. I made two final designs of the frame after reading and checking many Internet websites and reading about engine distribution. This is the last 3D render I made with Blender from my idea.
Concept of Alioli ROV Submarine Drone
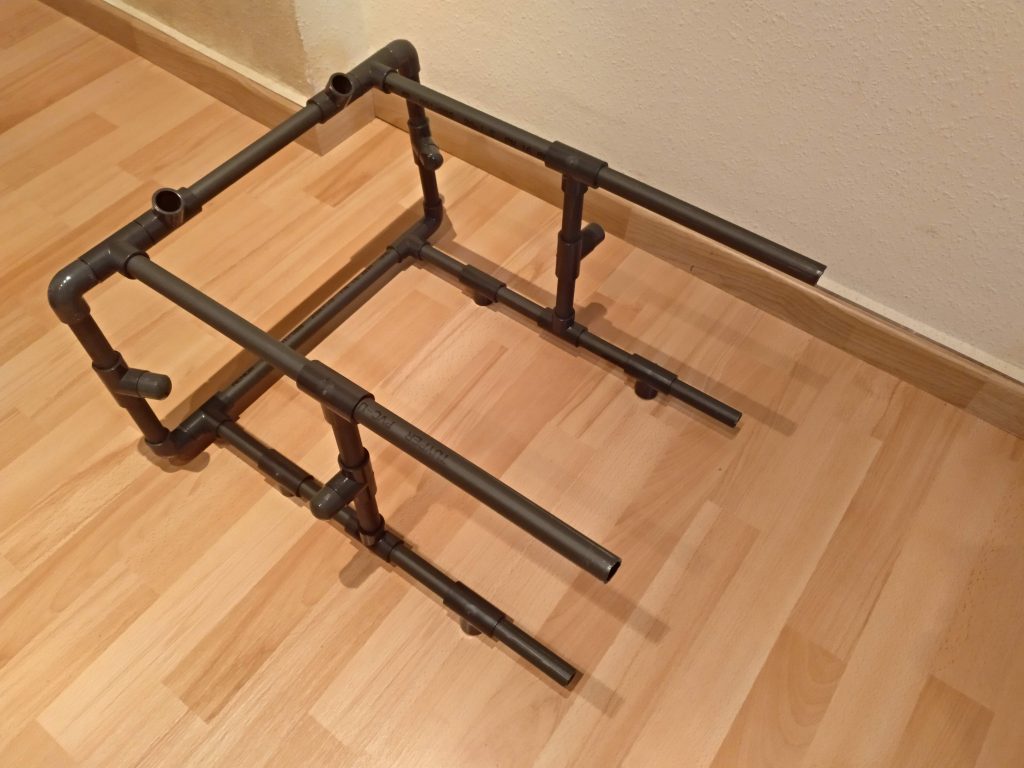
And I started building the frame:
Partial frame of Alioli Underwater ROV Submarine Drone
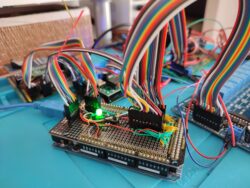
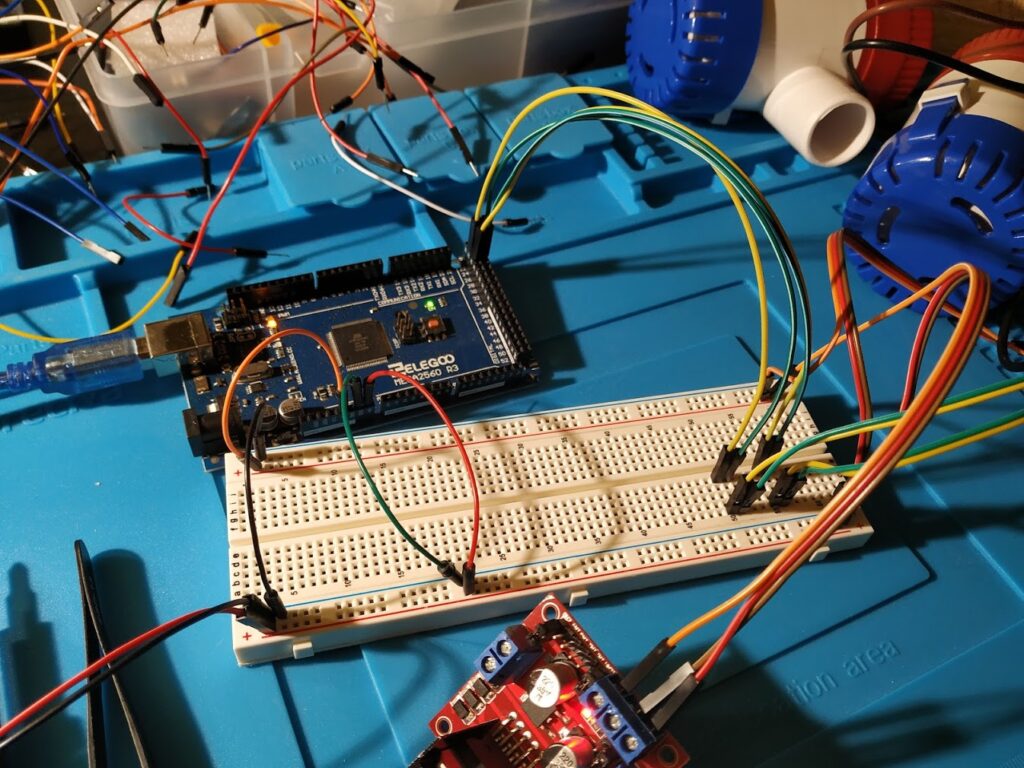
Jan 2019 – I bought my first Arduino Kit
That winter, I practiced with all the sensors I would need, checking all possible programs and getting ideas of how the components would interact. I was pretty sure that Arduino Mega 2560 would accomplish all my requirements.
First tests with Arduino Mega 2560
Alioli ROV Submarine Dron Engines Test
During this process, I learned that connecting everything to the protoboard would bring me a lot of random errors because of noise and problems with wire connections:
Engines tests using protoboard
Mar 2019 – I started soldering
The first version of the sensors board
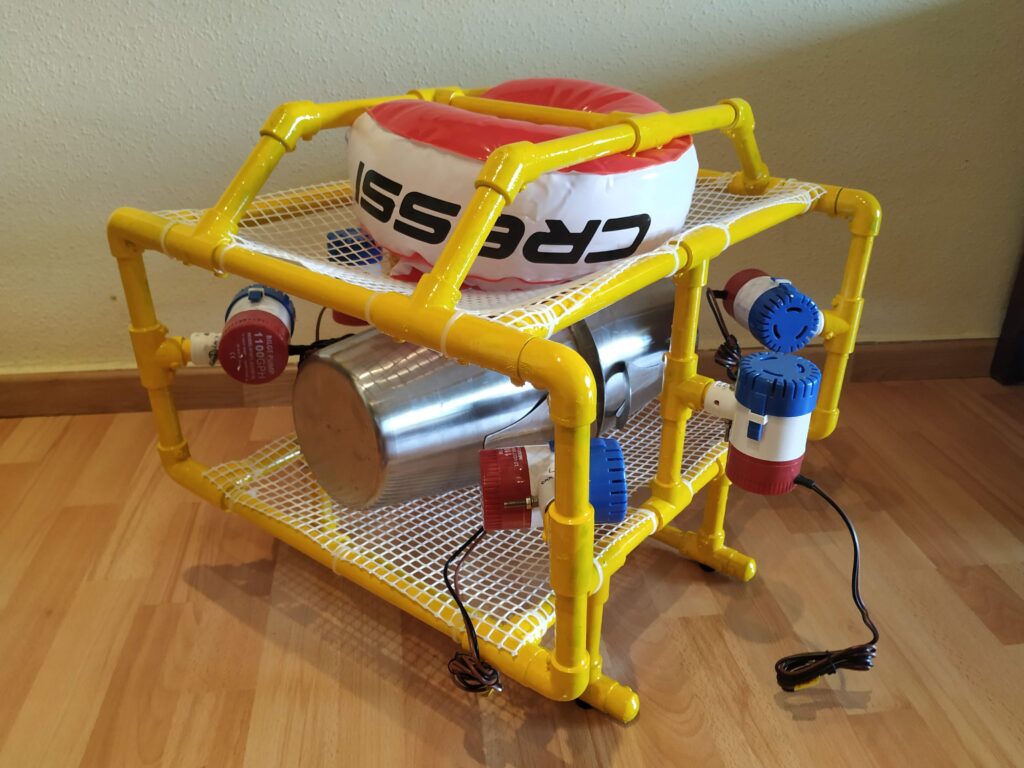
Jul 2019 – The frame was finished
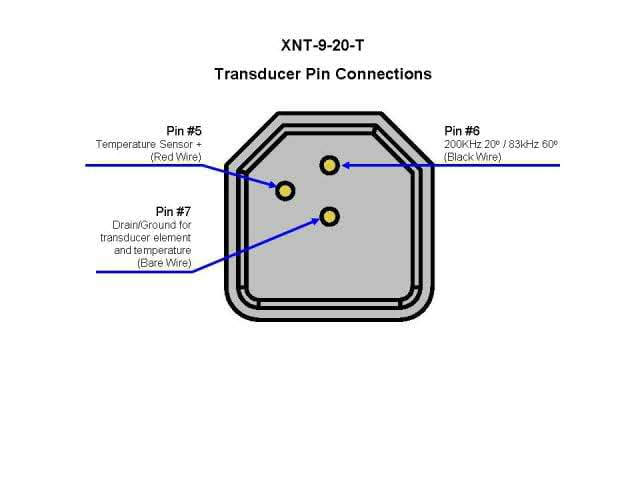
Sep 2019 – Sonar
After reading about sonars and checking prices, I bought a Humminbird Transducer to use as a sonar. However, after trying reverse engineering on it (I didn’t have an oscilloscope then), I decided to drop the idea of using a Sonar to scan the underwater structures for a while until I had some extra time to spend on reverse engineering and oscilloscope.
Humminbird XNT-9-20-T Connector Pinout
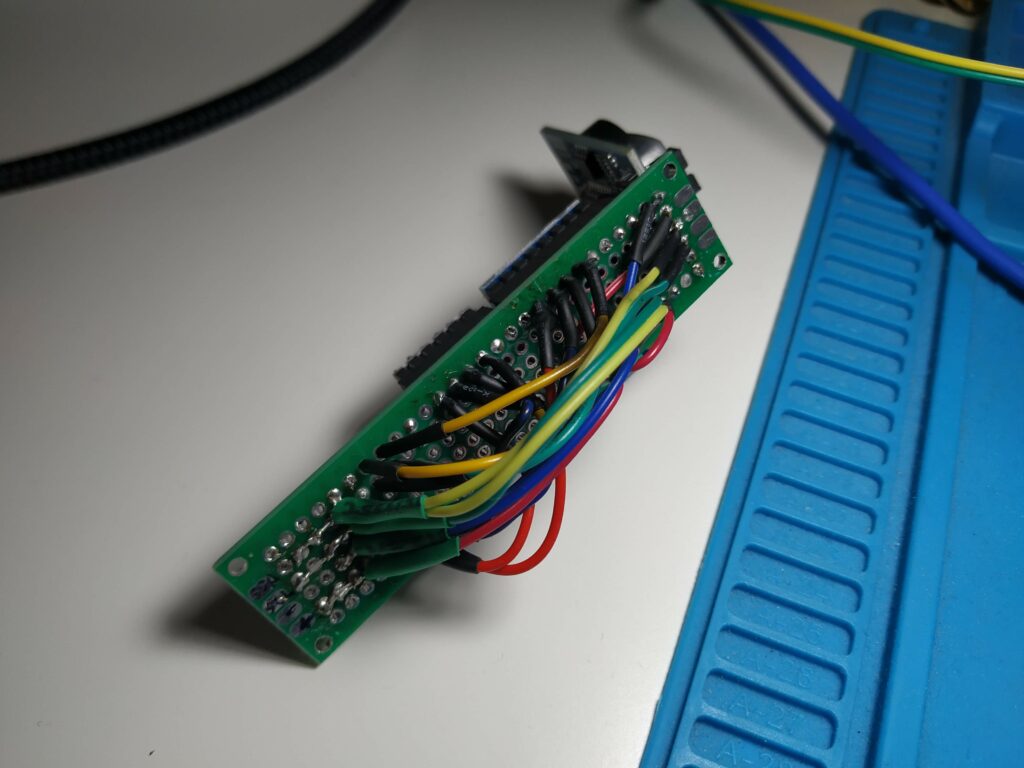
Nov 2019 – I made up a new soldering and wiring way
Instead of soldering on the board and wiring under it, the old way:
Old sensors board
I reverted this and soldered it under the board and wired on it. Then cover the wires with the circuits. The result was much better and more compact, and less sensible:
New sensors board
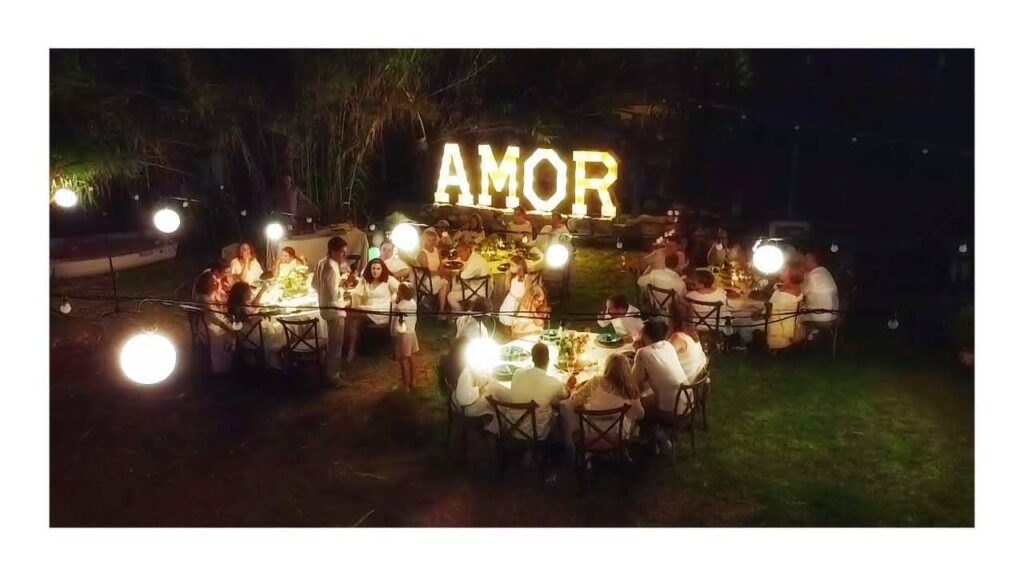
2020 – Pandemia, wedding & new home
We were planning to get married that year (May) with my supportive & lovely wife, and the COVID19 pandemia arrived in our lives, changing everything we knew and any plan we had until that moment. We remember the pandemic as one of the best and sweetest moments in our lives (family time for months, games with kids, enjoying the basic things from life…it was an excellent time for us).
We passed through, and a few months later than we had planned, we got married and changed home:
Views from homeViews from homeFiesta del Amor (Our wedding)
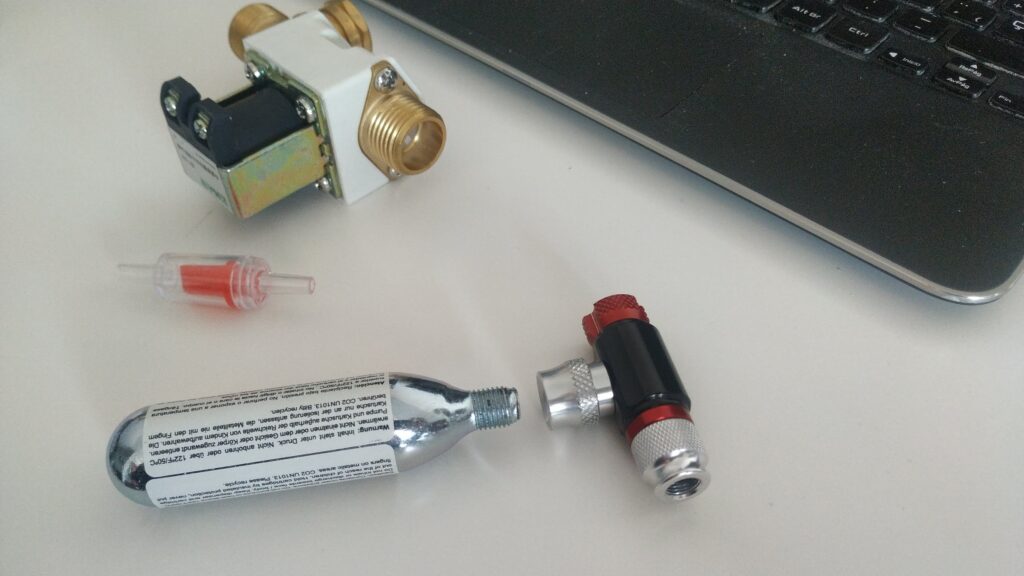
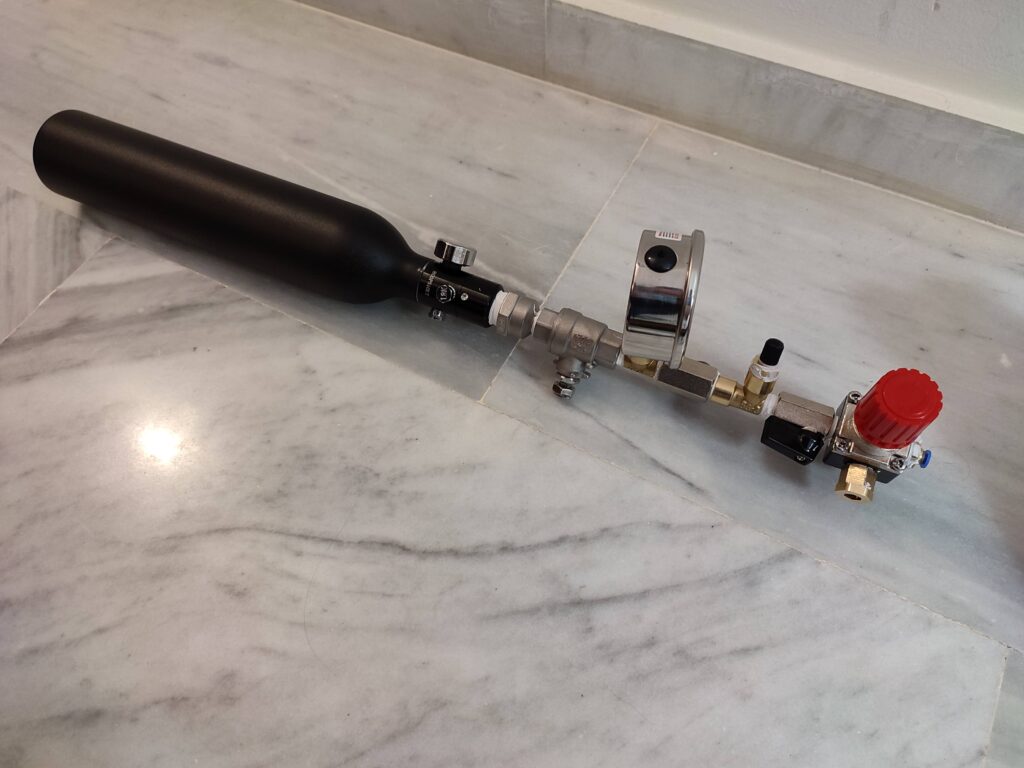
April 2021 – Buoy pressure air system
One of the main ideas I had about Buoyancy was to keep it automatically managed through an automatic electronic buoyancy system based on air pressurized on a bottle and electro valves. The pressurized air bottle was relatively small at the beginning:
Alioli Buoyancy System – Pressurized Air Bottle System with Electro Valves
But soon, I switched to a bigger one, a bottle for pressurized air for paintball guns, and I prepared it to be filled using a car tire inflator until a top of 150psi, the most difficult to find pieces to match ones with each other.
Alioli ROV Submarine Drone Buoyancy System Pressure Air Bottle Filling
Soon I discovered that the bottle of air provided a few liters, which wouldn’t be a good idea after all. So this whole system (Buoyancy through pressurized air got dropped). This was one of the hardest findings since I spent several weeks looking for the materials and connectors to seal it properly.
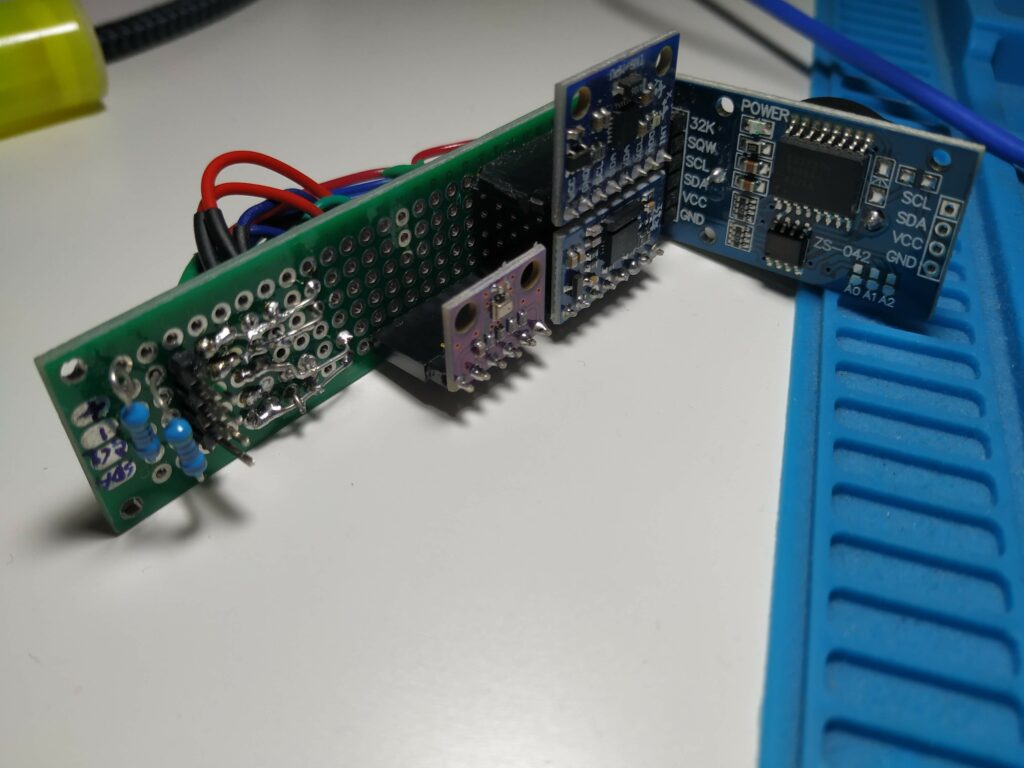
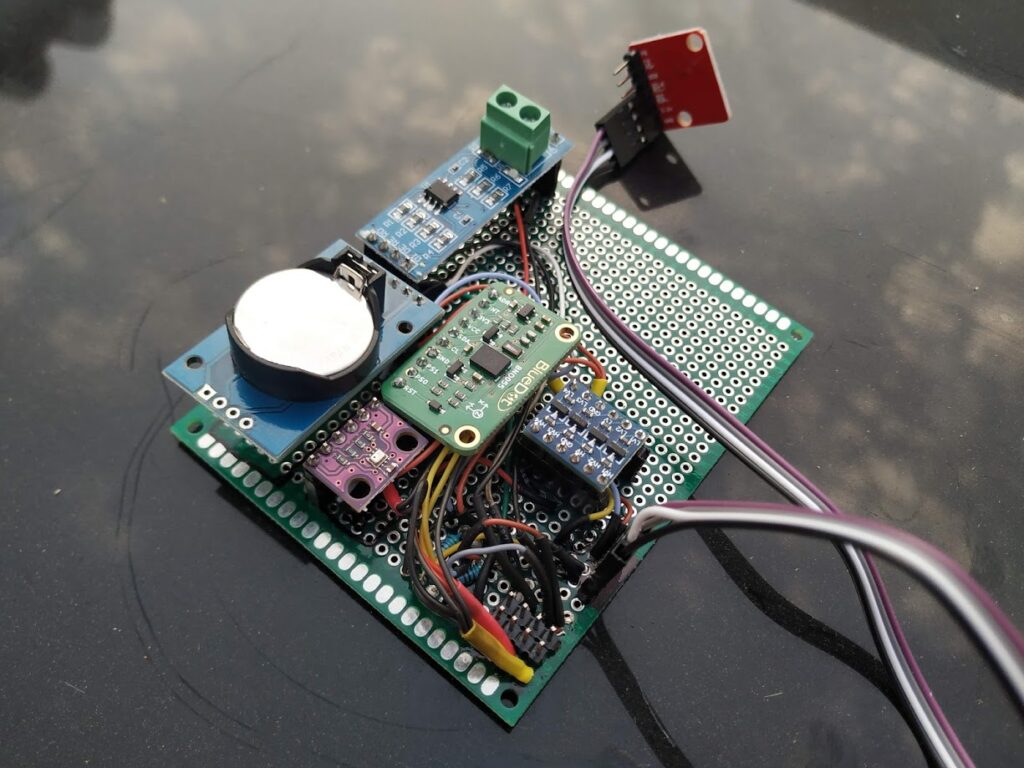
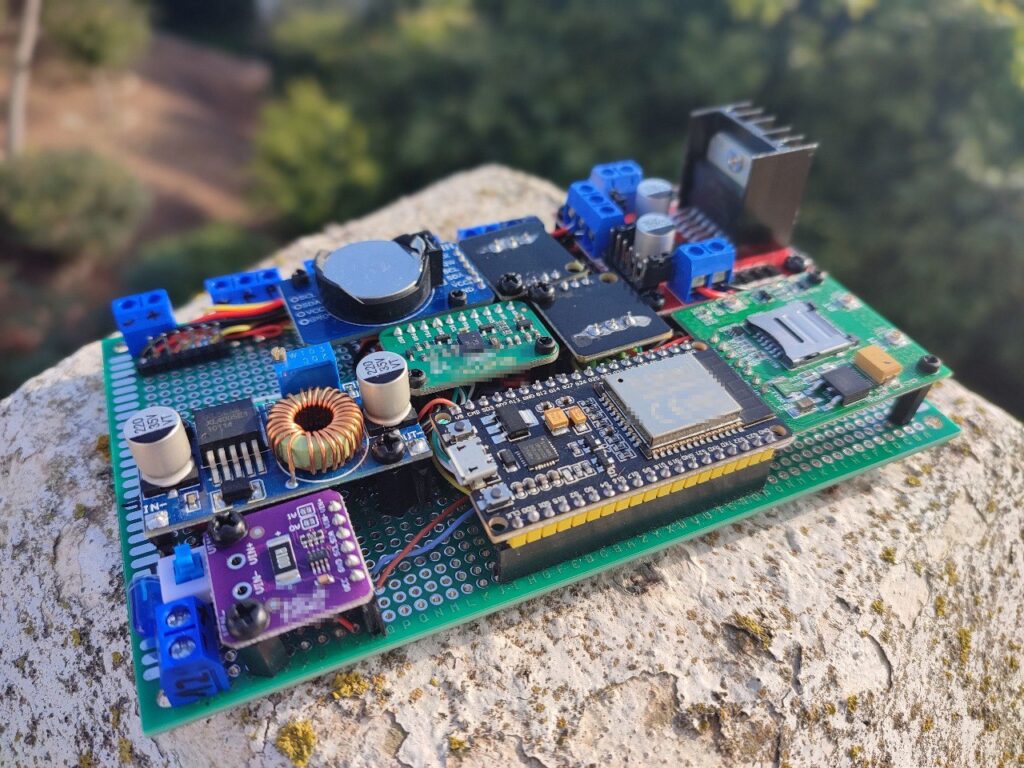
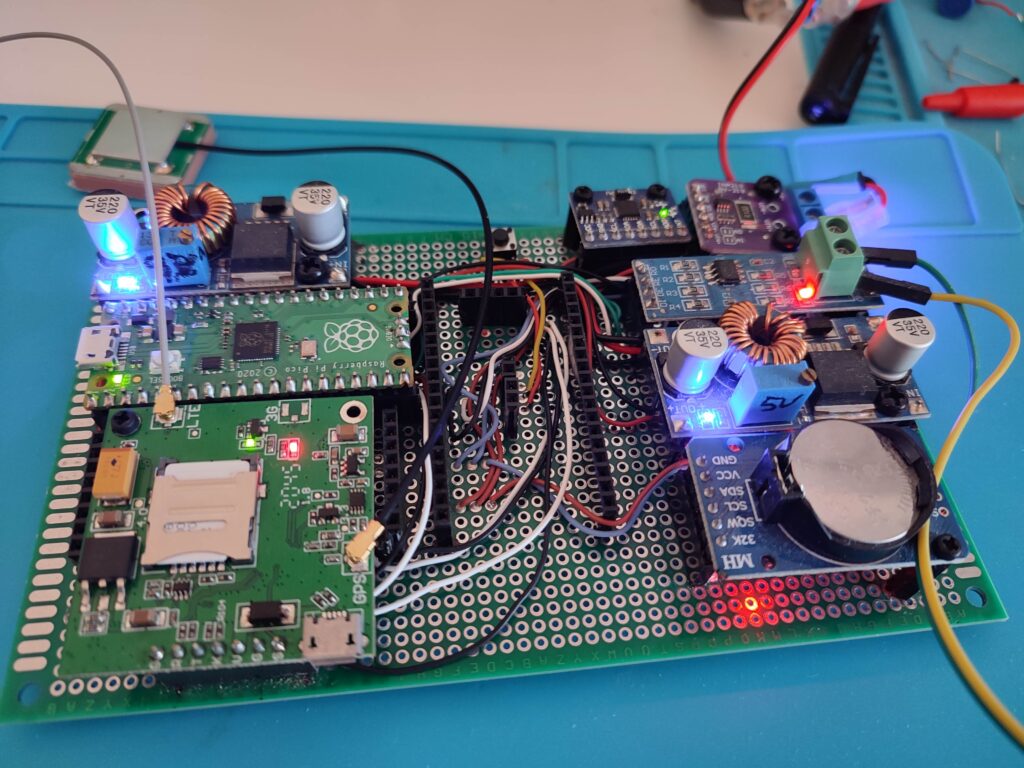
Sep 2021 – First version of the main board for the ROV
Alioli ROV Submarine Dron ROV – MainboardAlioli ROV Submarine Dron – ROV Boards first complete version
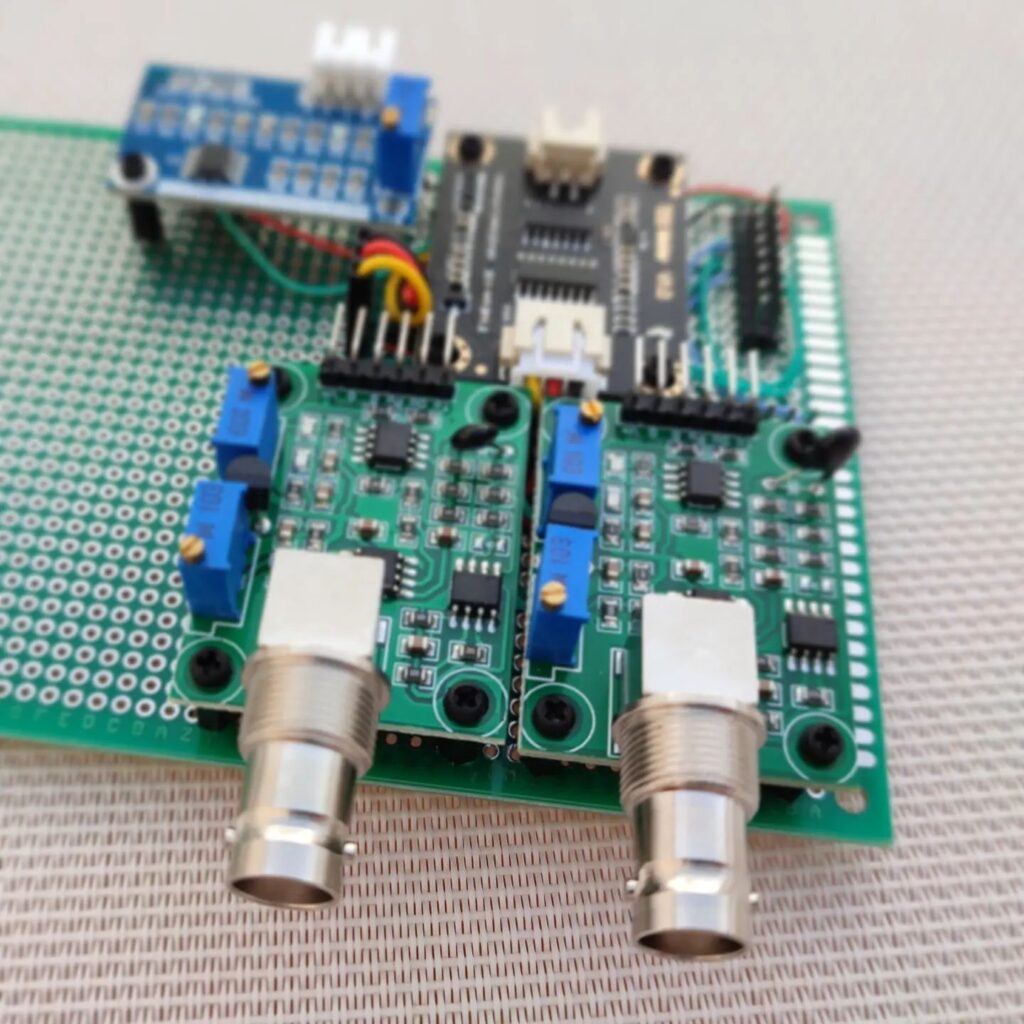
Oct 2021 – Torpedo and Water Analysis (this is an Easter Egg)
Since during this period, I was also focused on getting data for analytics purposes, I got involved in a second project (Torpedo, a glider for water analysis) which can gather data from the water, and it is another fantastic project I am making with my good friend Juan Soler. Torpedo can analyze water: Temperature, Conductivity, Turbidity, PH, Redox, and Salinity at different layers of water and in other places since its auto guidance system is based on GPS positioning.
Torpedo DesignTorpedo Mother BoardTorpedo Water Analysis Board
This project will get published in a few months when we already get valid and usable results.
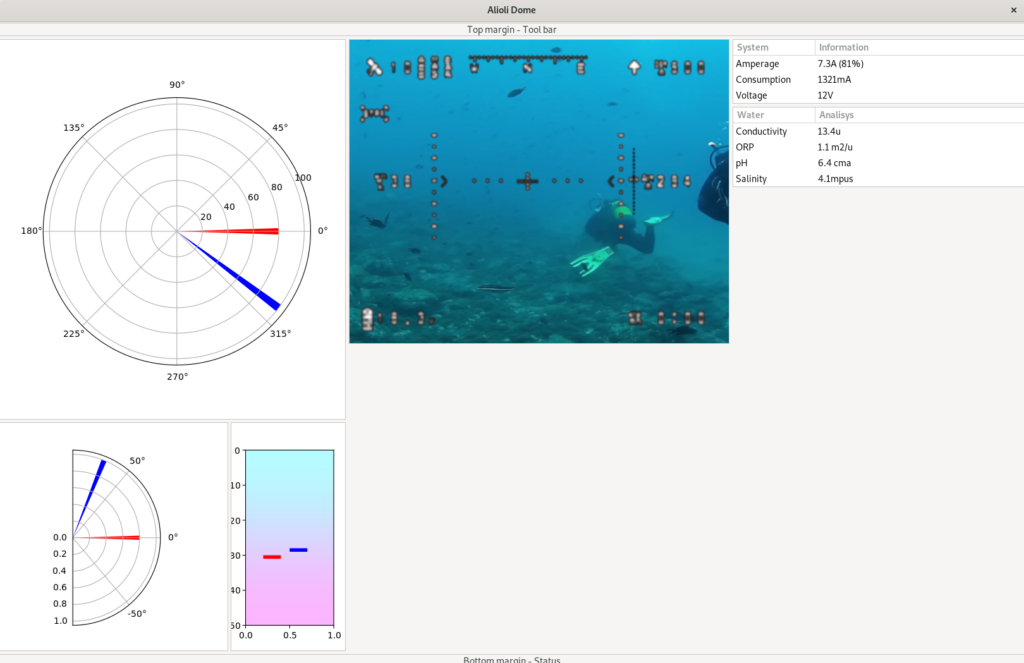
Oct 2021 – Dome software and how I started the making of the Buoy Board
The Dome software supposes to be the software to manage the ROV remotely, I started making it in Python and Gtk, and it got pretty far away going through several different versions of the software:
Python + Gtk + PS4 Controller working togetherDome Software First version
Python + Gtk + PS4 Controller + OpenCV working togetherDome Software Latest version
Soon I was working on the Dome Software, I met QGroundControl and the Mavlink protocol, and I decided to communicate using Mavlink and replace Dome with QGroundControl, which was a great decision.
But this was another hard learning during the process of making the system. Although I initially wanted the Buoy to be just a gateway and the ROV to do all the complex jobs, I soon discovered that Arduino Mega 2560 didn’t have enough memory to manage the ROVs software together with the Mavlink library. This was a big jar of cold water on me since I had to remake the ROVs board or switch the Mavlink management communication to the Buoy. However, I didn’t want to mess up with the ROV, so I accepted that the Buoy would manage the Mavlink communication and send simple messages to the ROV (to reduce memory consumption there).
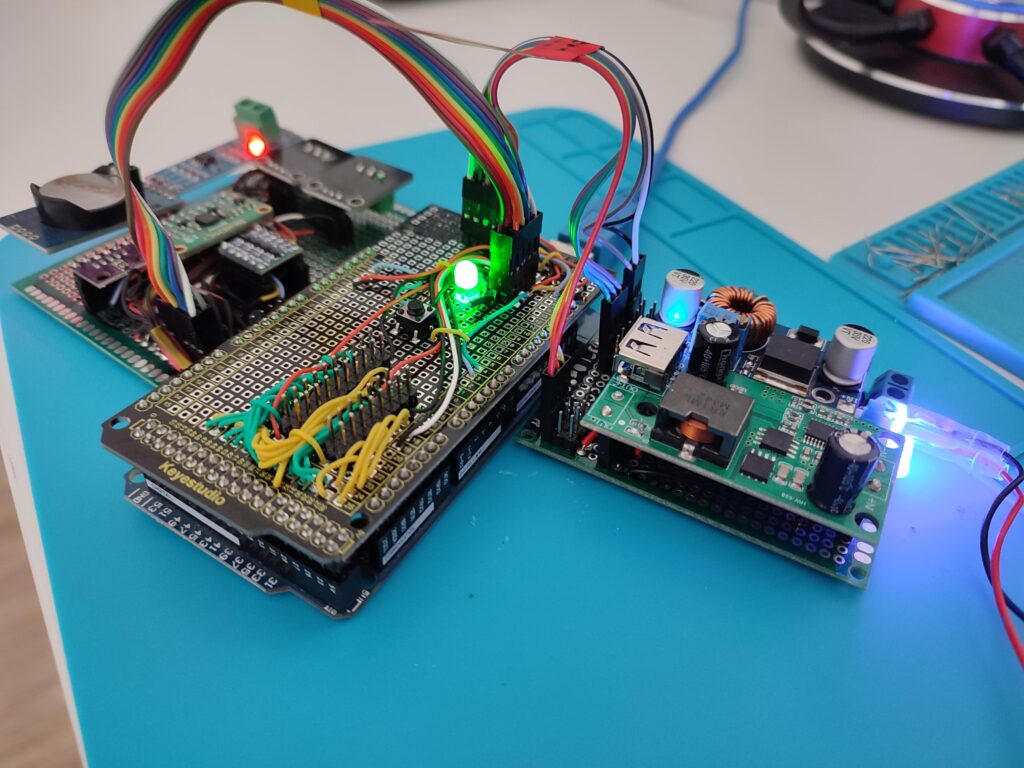
Oct 2021 – 1st making of the Buoy Board with ESP32
For the Buoy, I decided to go with ESP32 since I didn’t need so many connectors and so big board. ESP32 also seemed a great microcontroller (two cores), so I got the board built:
Alioli ROV Submarine Dron – Buoy Board ESP32
After my first tests, I started getting weird problems during communication with the GPS. There was some watchdog that was firing and rebooting the board. I was still programming it in C to keep libraries and protocols compatible from ROV to Buoy. What a pity I couldn’t resolve the hangout because of the watchdogs.
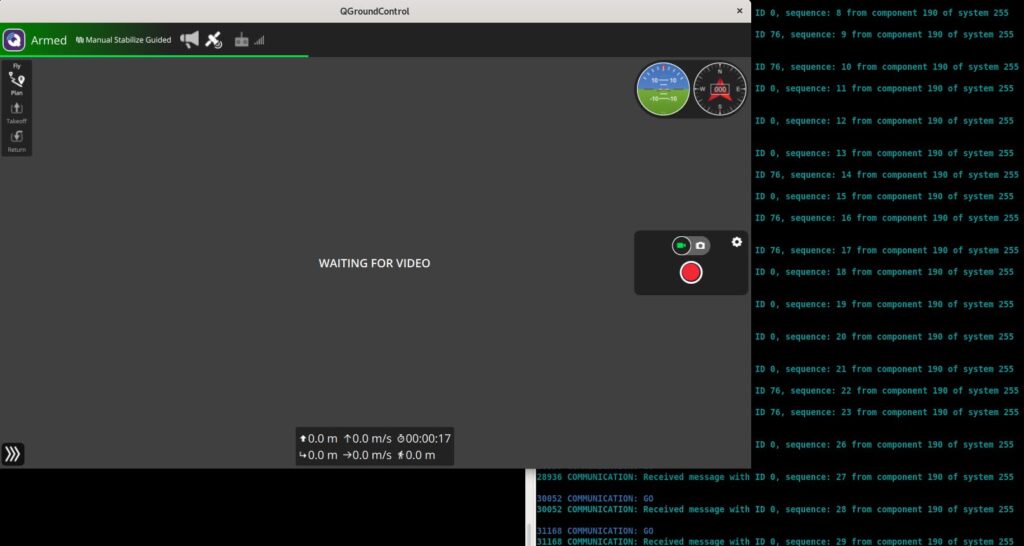
Feb 2022 – Mavlink protocol was working with QGroundControl
Alioli ROV Submarine Dron – QGroundControl working with information from the Buoy in Mavlink Protocol
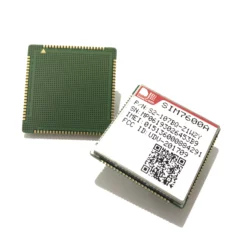
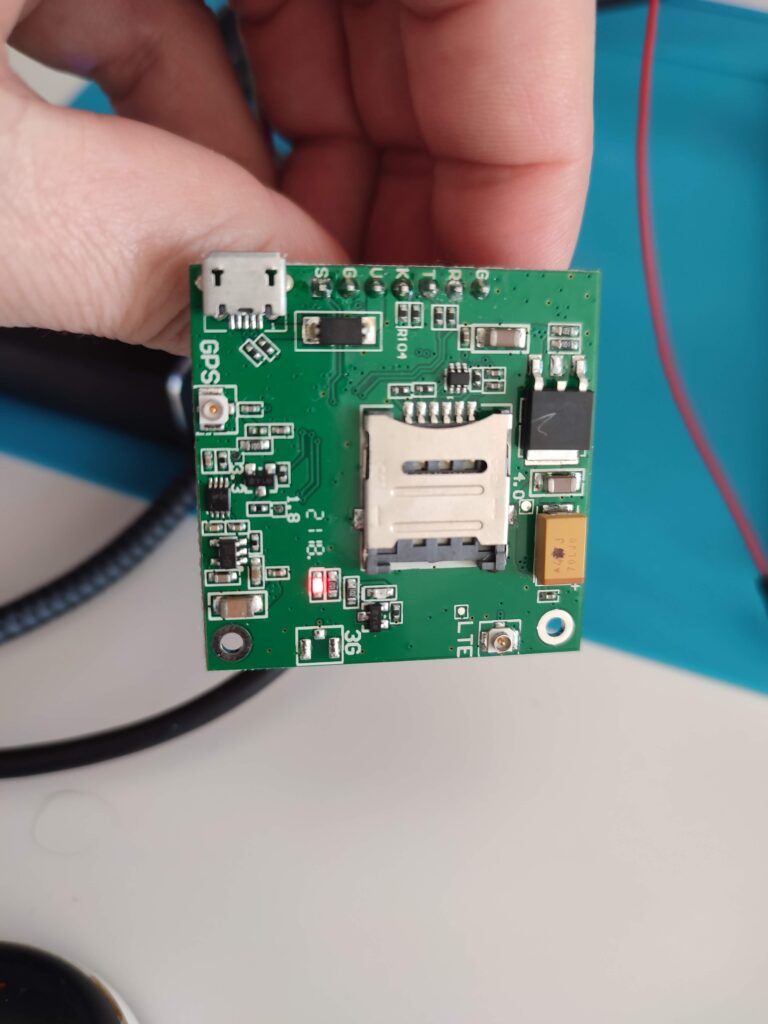
Mar 2022 – The GSM, GPS, GPRS, 4G module
This was my Achilles Heel. It delayed the evolution of the project for several months. This all happened when the GSM/GPS/GPRS/4G module I was using got burned by a polarity mistake I made. So I bought another one, and neither the seller nor any of my dear friends, who know much more about electronics than I didn’t, know why the module was resetting during boot time.
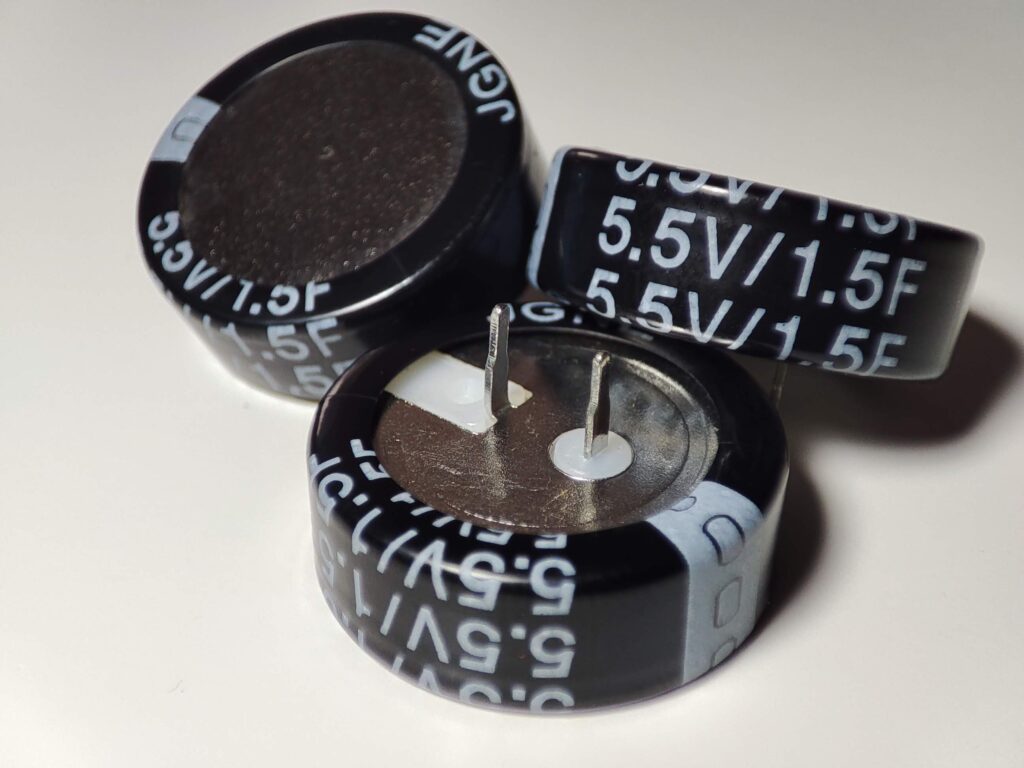
I was reading over and over, learning about the powering of these modules and how they are built, checking commands, voltage difference, and amperage requirements but with no success for several months, I almost dropped the project on that point. Until I got to a place they named Super Capacitors to power on these 4G modules, I confirmed with a friend, and he explained how they are used.
Super Capacitors
Finally, I got the module to work. The issue was a mix of low power and low voltage that produced collateral problems during the module’s boot, which was resolved with a blend of supercapacitors and a diode.
GSM – GPRS – 4G Module working
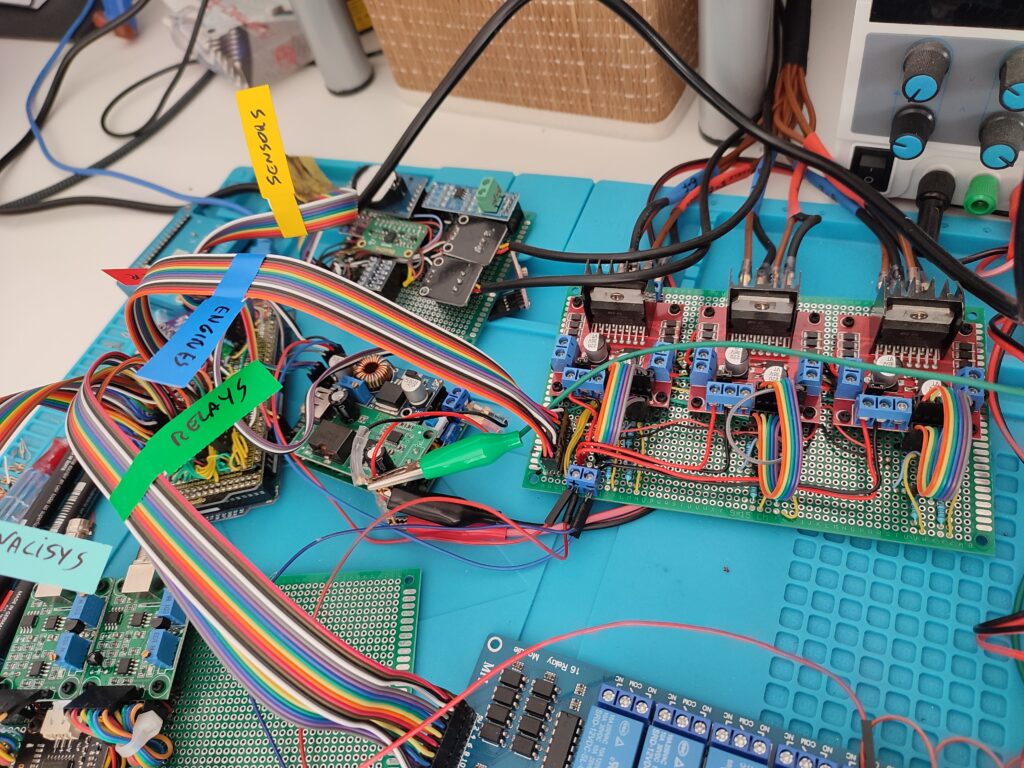
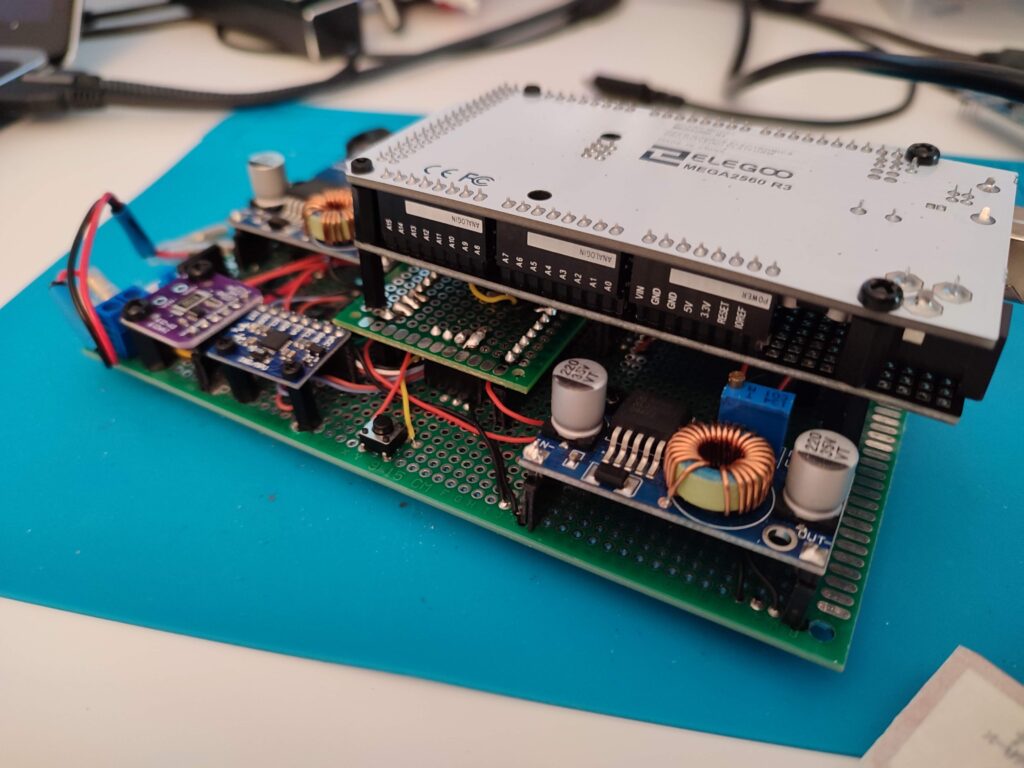
Mar 2022 – 2nd making of the Buoy Board with Arduino Mega
I decided to go with what I already knew (even if the board was bigger), so I built an adapter for the existing Buoy board, and I plugged in a second Arduino Mega:
Alioli ROV Submarine Dron – Buoy Board with adapter and Arduino Mega 2560 R3
It didn’t take long to find out that Arduino Mega didn’t have enough RAM for everything I needed to work on the Buoy, so I started another research about microcontrollers. Finally, I got to the marvelous Raspberry Pi Pico.
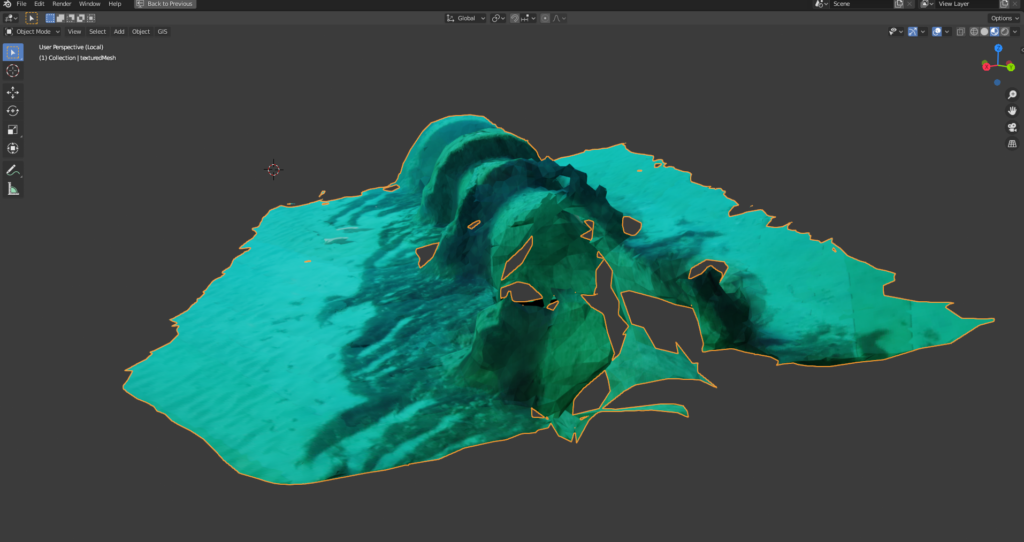
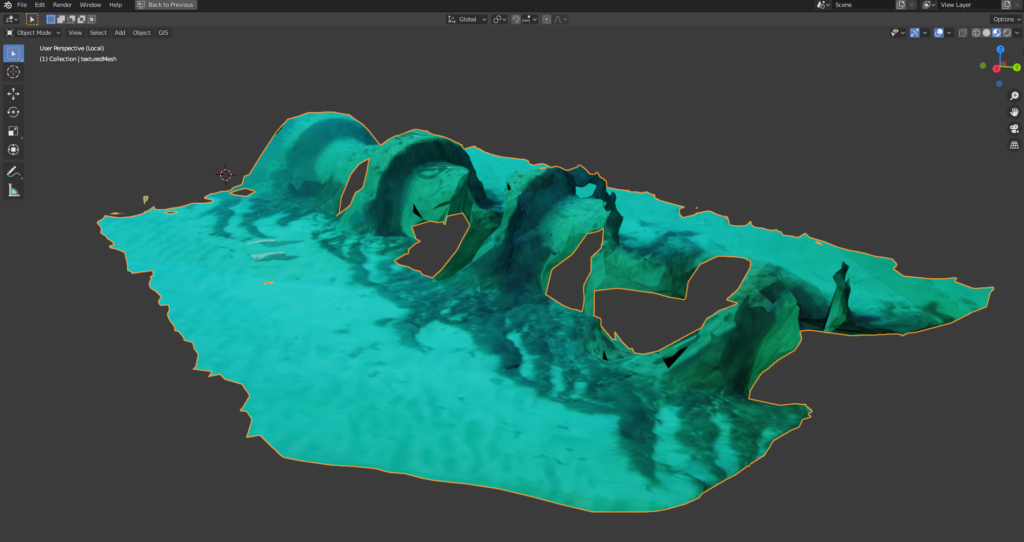
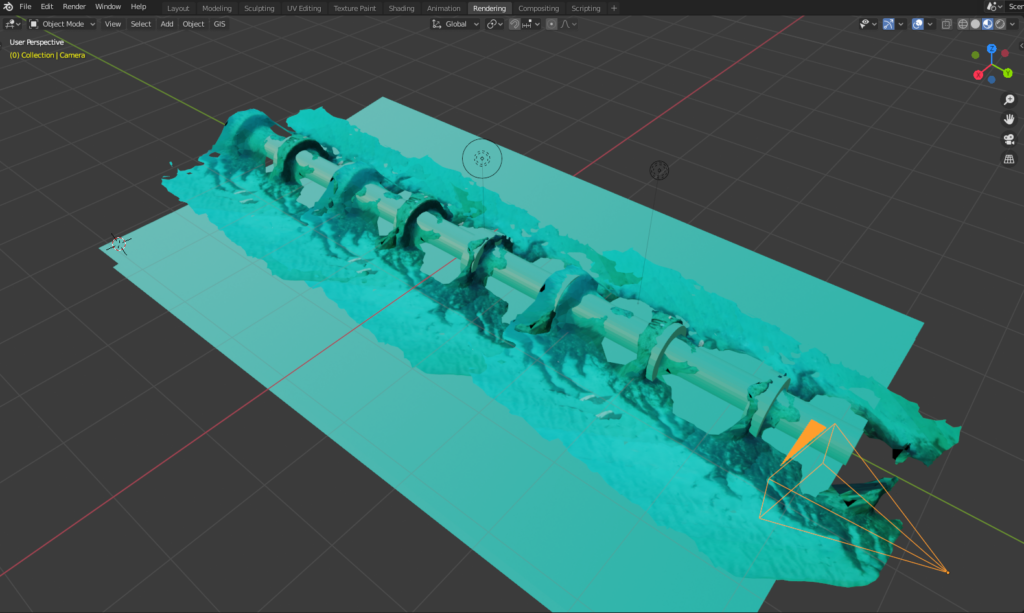
July 2022 – Photogrammetry
This month, I spent a lot of time rendering 3D models using photos. This technique is named photogrammetry and is the new replacement for sonar. As a result, it will be easier to record videos while diving and make 3D renders. Some of my experiences are left in the post “Photogrammetry“.
Sewage outfall we recorded during one of our underwater operations
After experimenting with photogrammetry, and thanks to my previous experience with Blender, I rendered the following images:
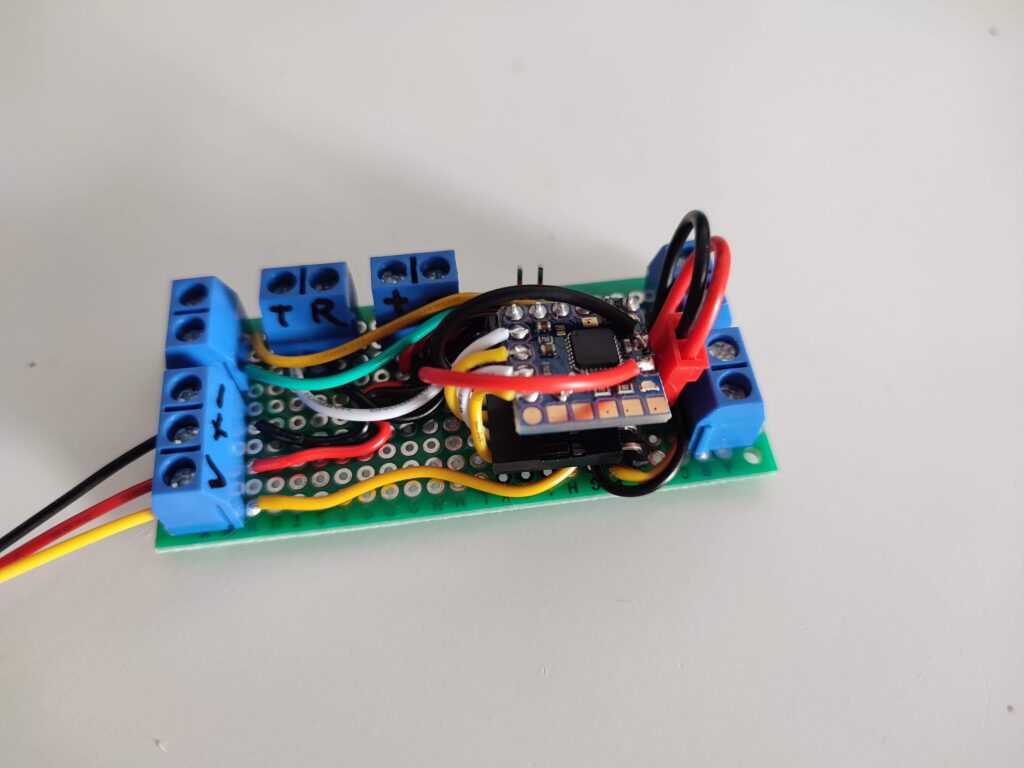
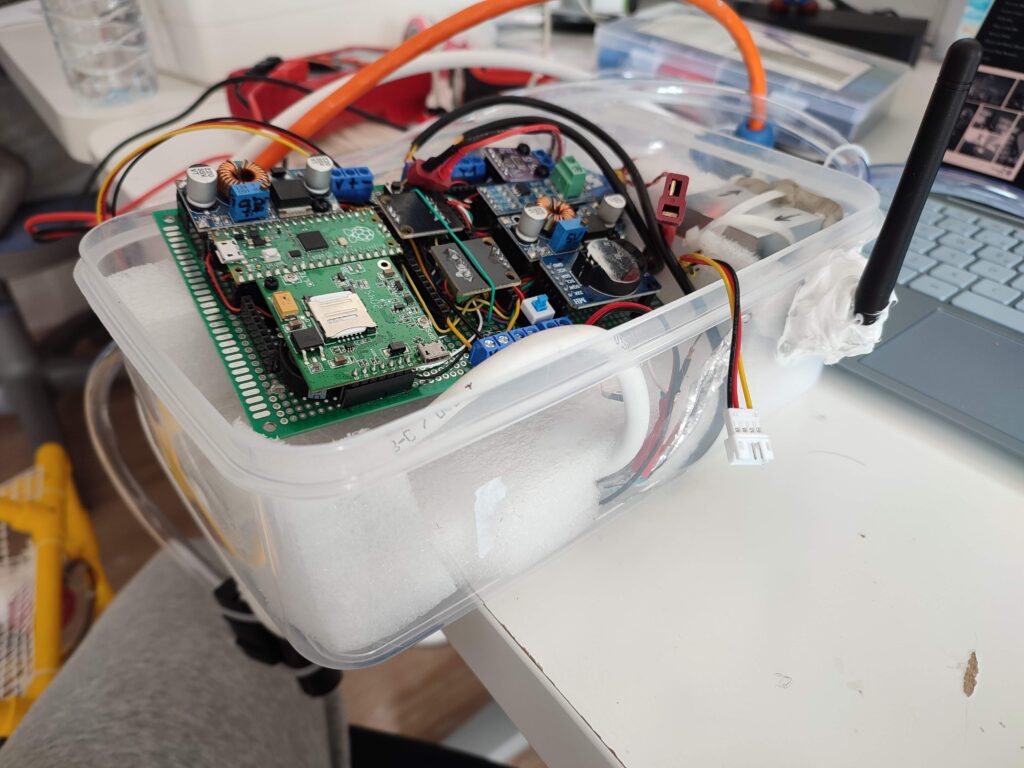
Aug 2022 – 3rd making of the Buoy Board with Raspberry Pi Pico
Alioli ROV Submarine Dron – Buoy Board with Raspberry Pi Pico
I have to say that switching to Raspberry Pi Pico was horrible in the beginning because nothing from what I had before was compatible, but Platform IO got into my life and changed my perspective. Suddenly all my software was compatible with most of the microcontrollers on the market, and this was great news to me. Of course, I still had to communicate the Buoy and the ROV using a customized protocol, but in my experience, that wasn’t a problem.
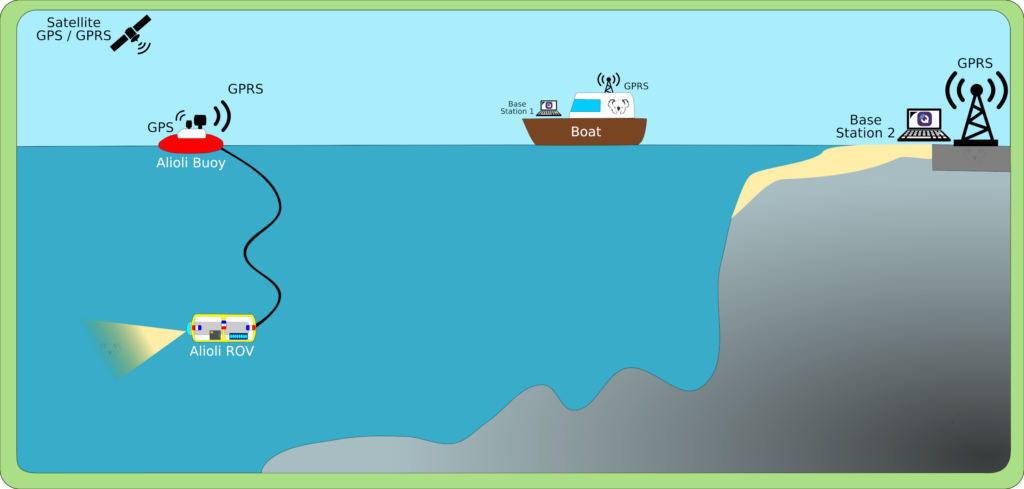
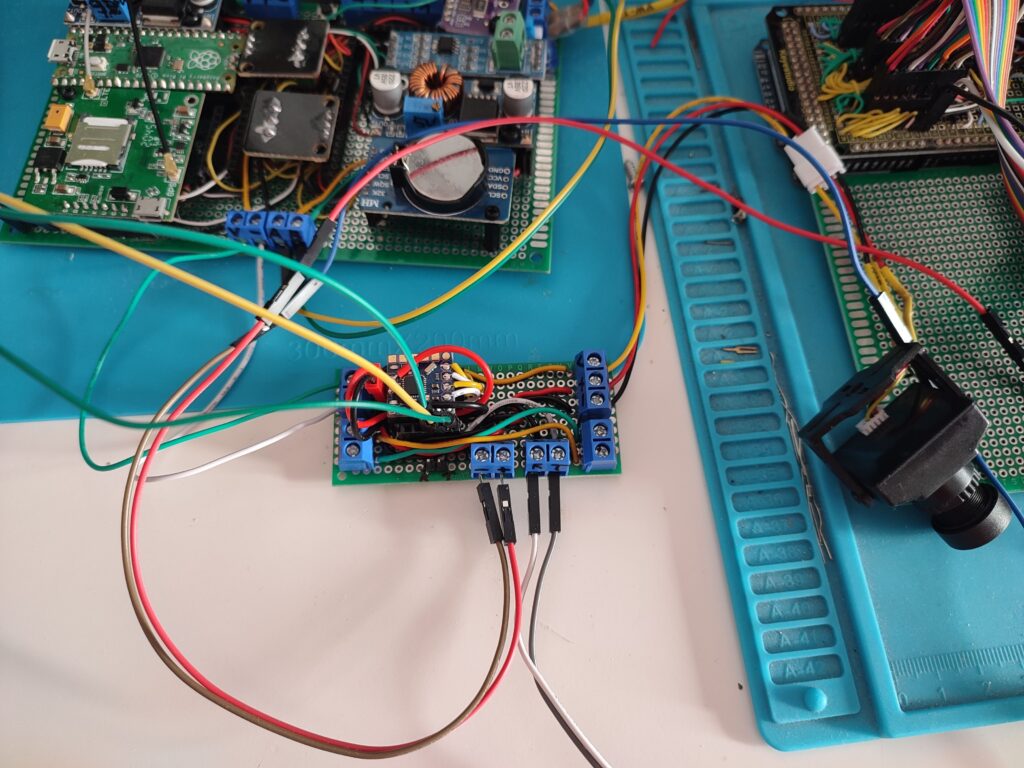
Sep 2022 – Diagram & video
Schema of Alioli ROV + Alioli Buoy + Base Station (boat & ground)
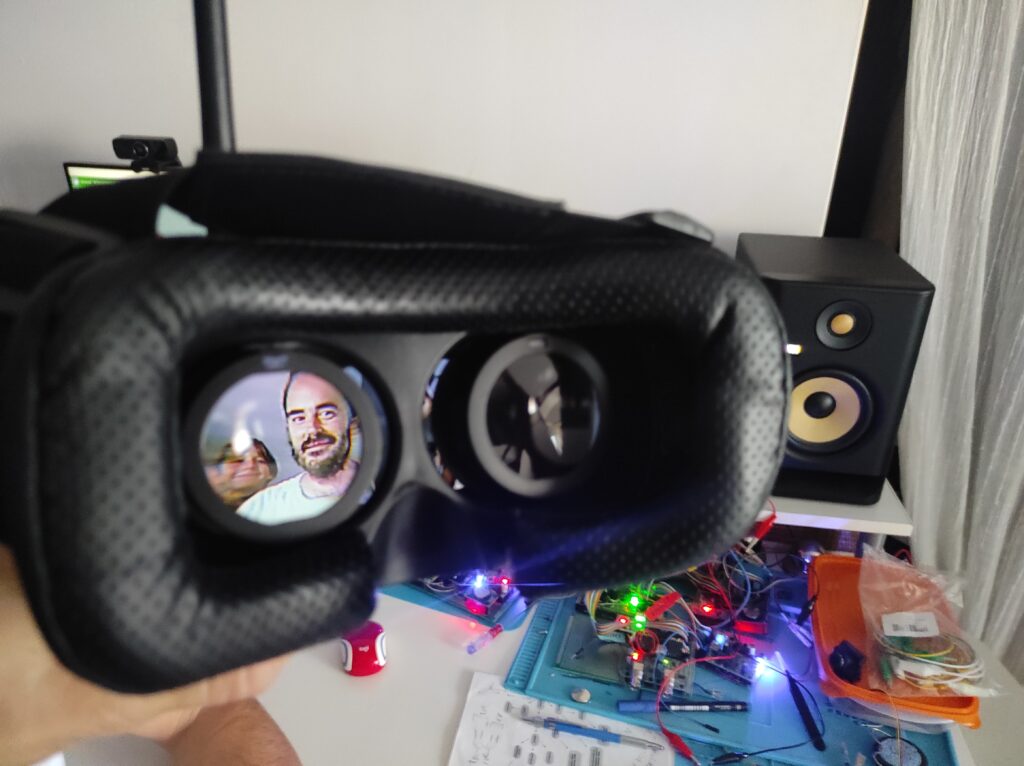
All the system was almost ready, but I still didn’t have eyes. I needed to work on the video system. The video was an easy task, connected and ready to work, but I got some problems making it work without losing signal for over 50 meters of cable.
Alioli Video QGroundControlAlioli Video VR GlassesAlioli Video VR Glasses
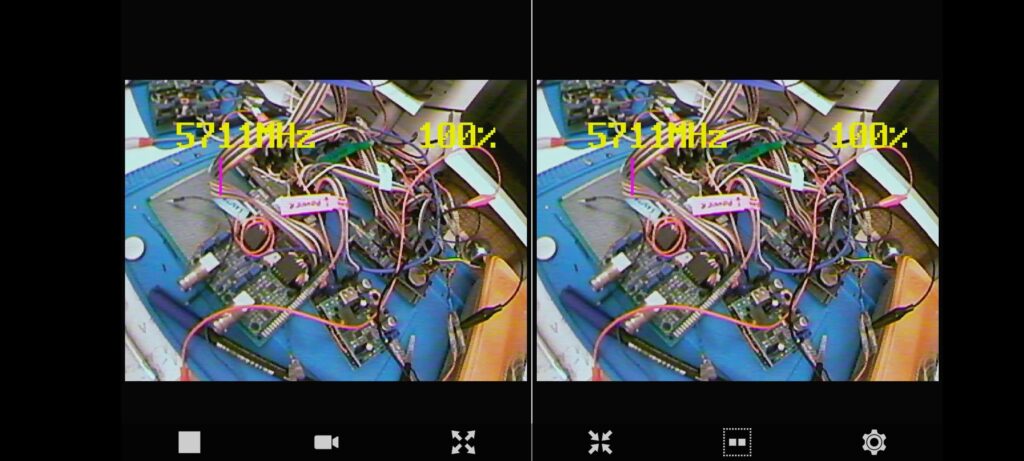
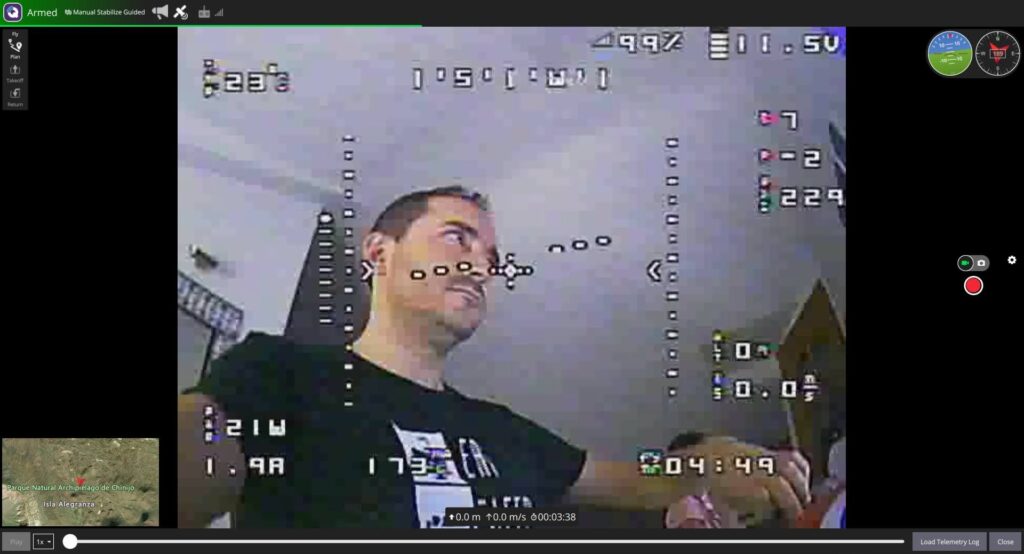
Oct 2022 – OSD board
I still was missing information on the screen about positioning, power usage, the temperature of batteries, and some other things. Finally, I had to get my hands on the programmable OSD board.
Alioli OSD BoardAlioli OSD BoardAlioli OSD BoardAlioli OSD in QGroundControl and real-time Telemetry
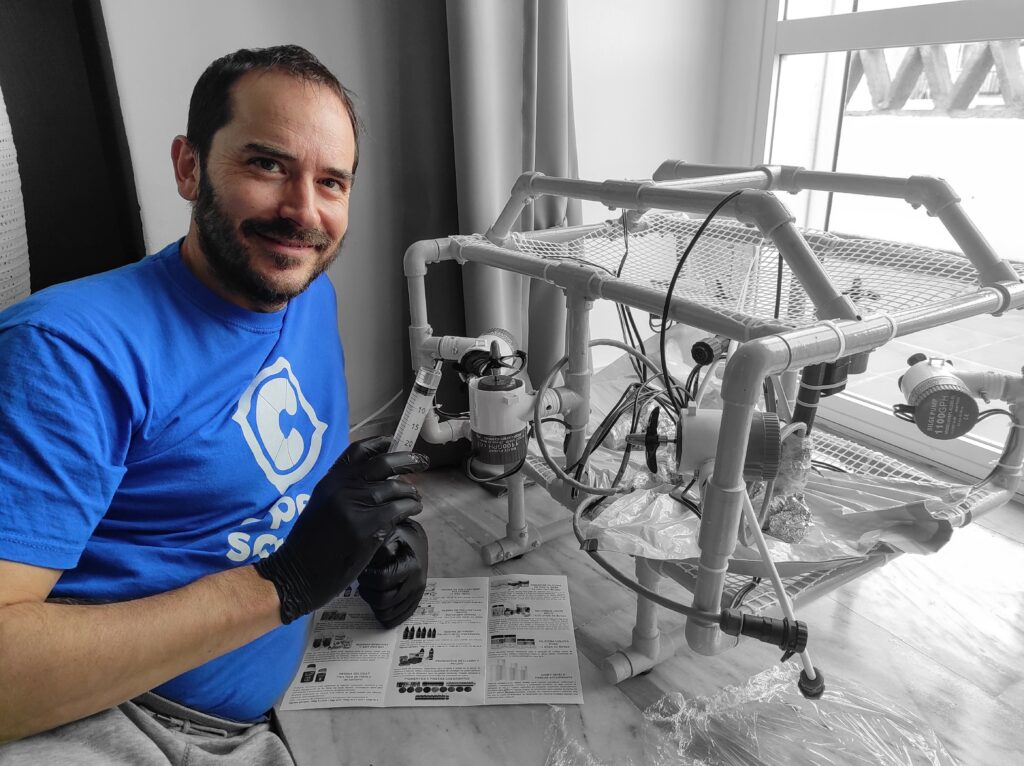
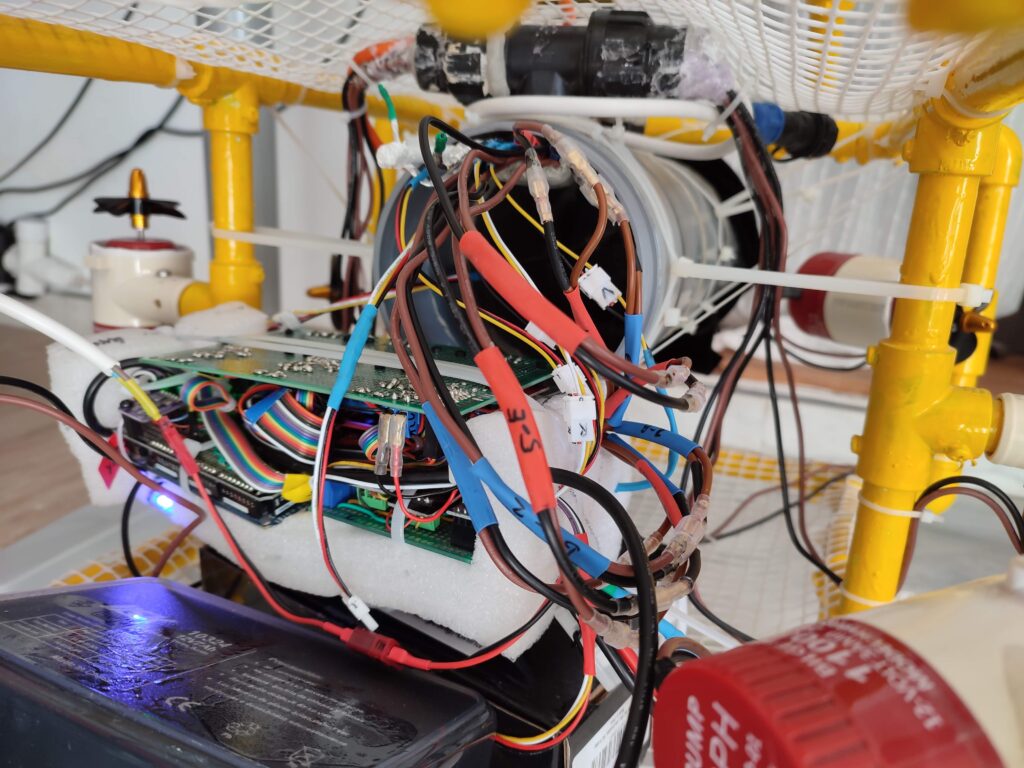
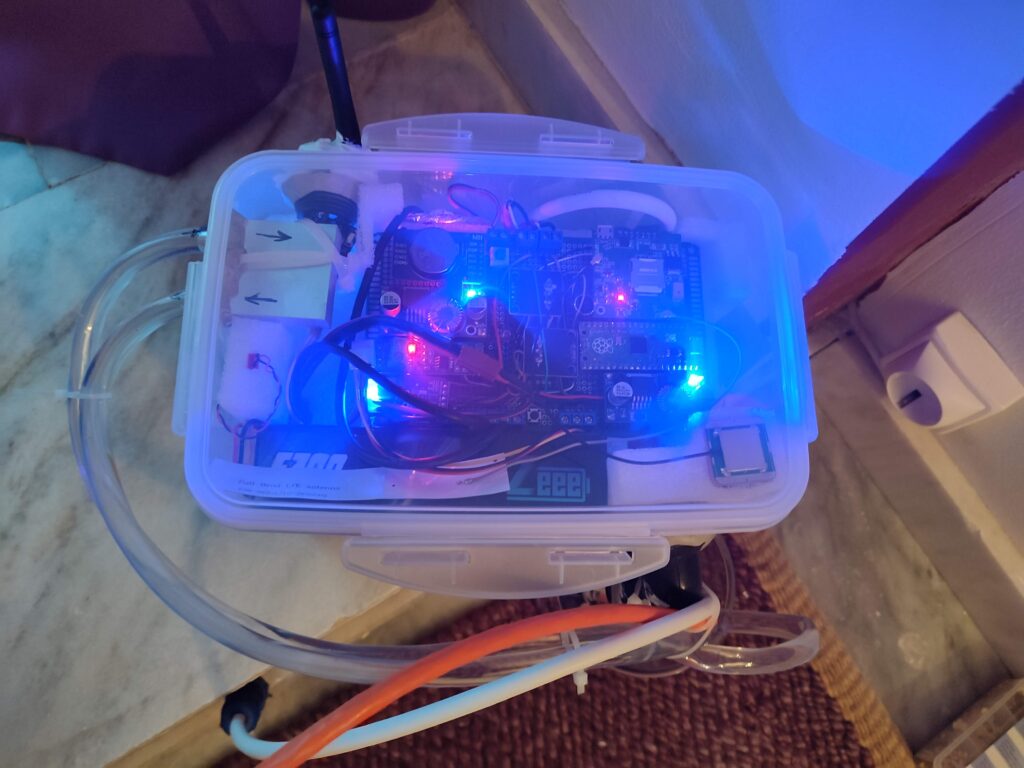
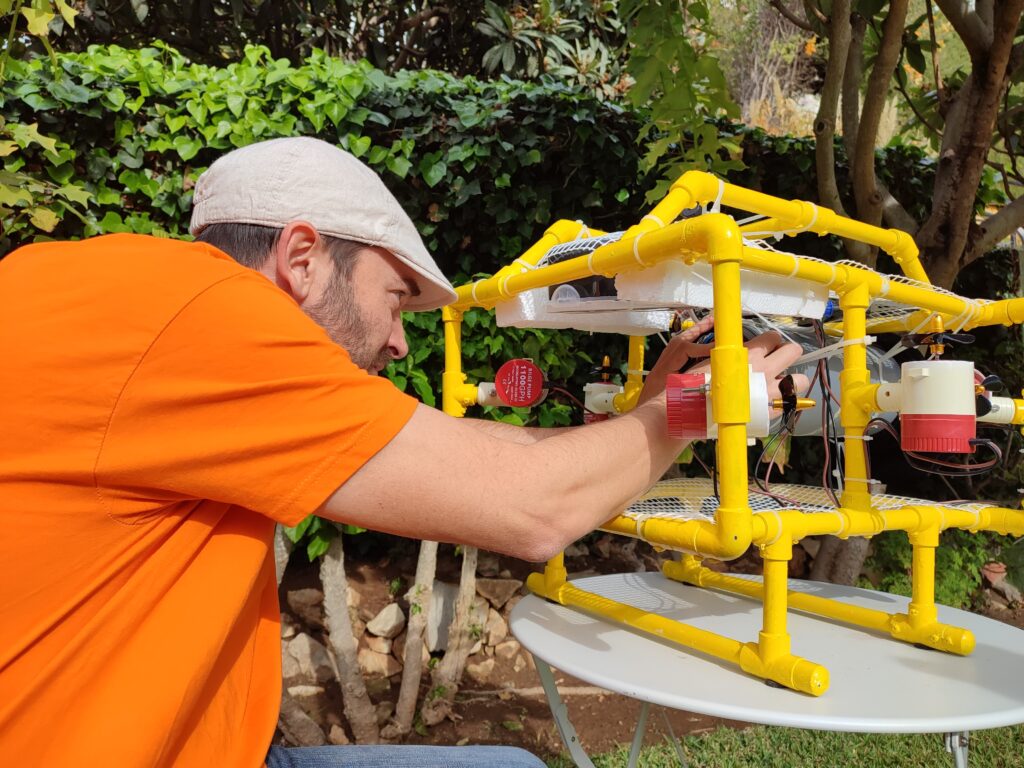
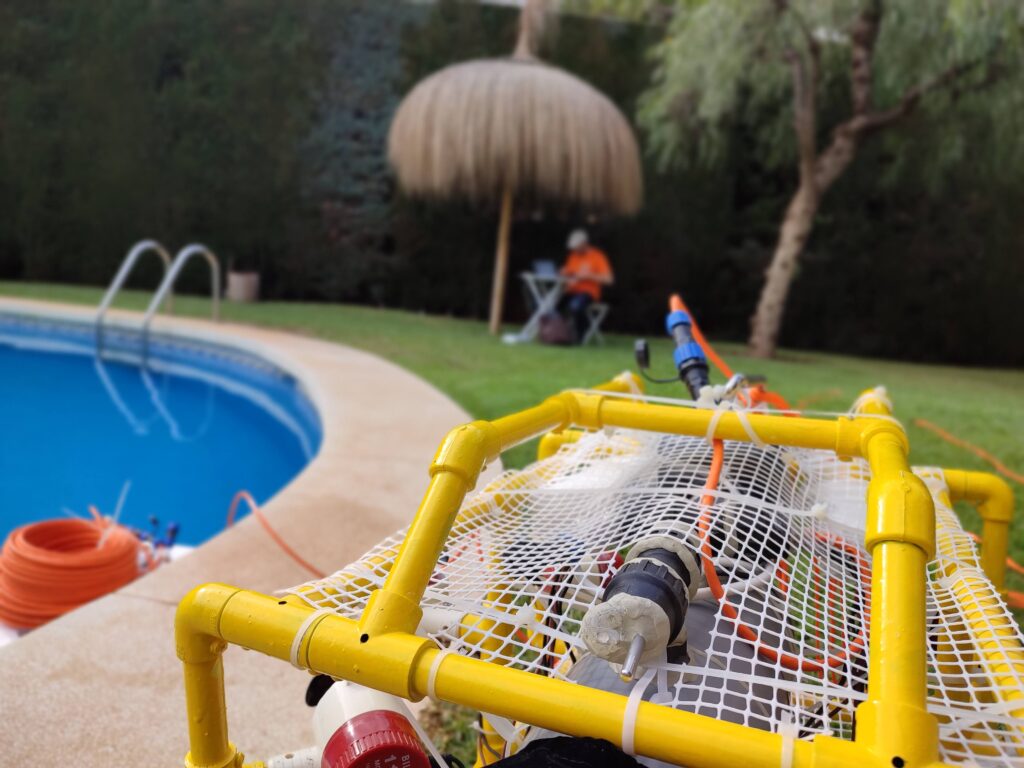
Nov 2022 – Final assemble
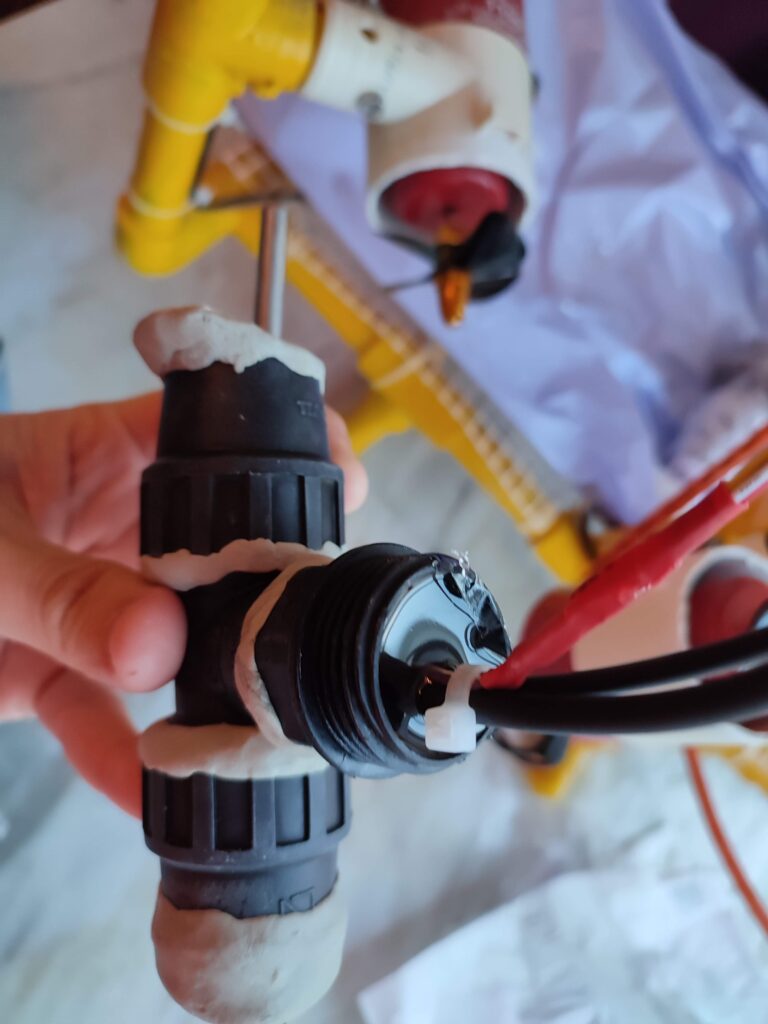
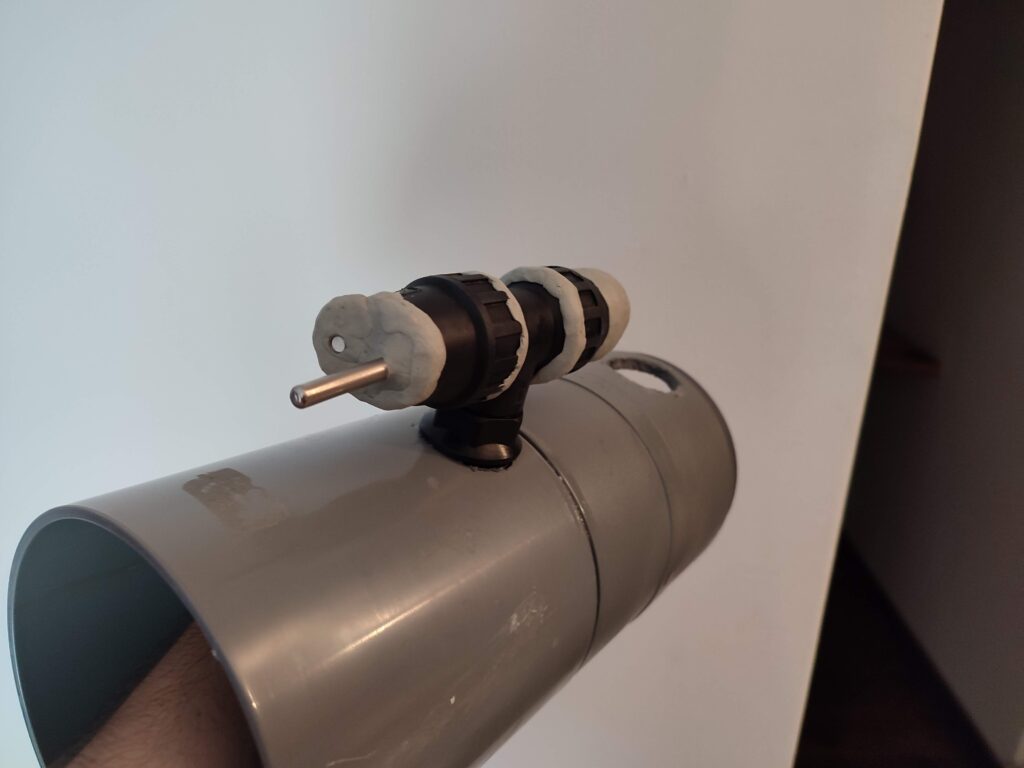
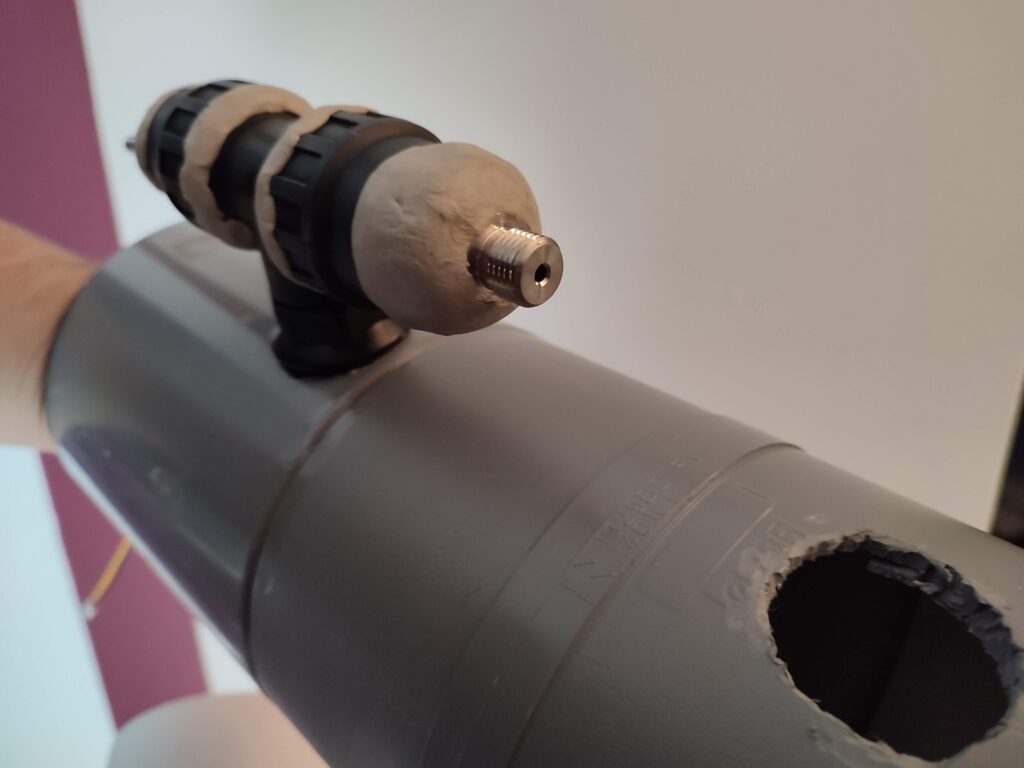
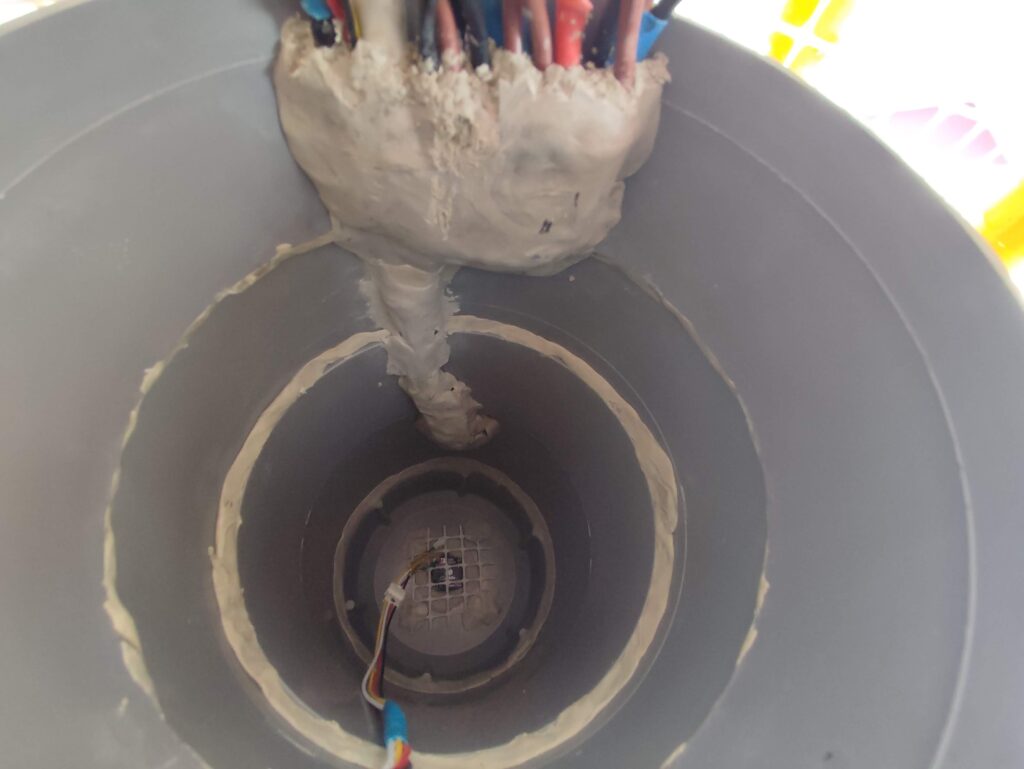
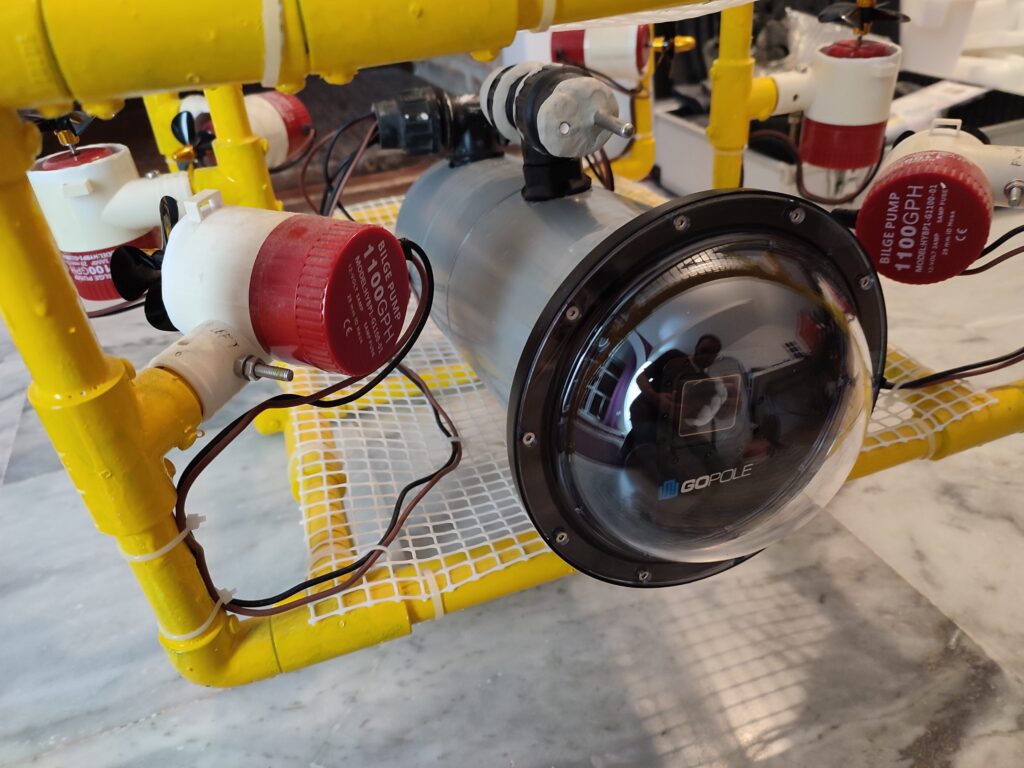
November was a hectic month. Finally, all the electronics and software were ready, and we got to the moment to pack everything and get it ready for the water. The ROV was packed inside a pipe, and everything was stuck with Poxilyn, PVC glue, and Expoxy Resin.
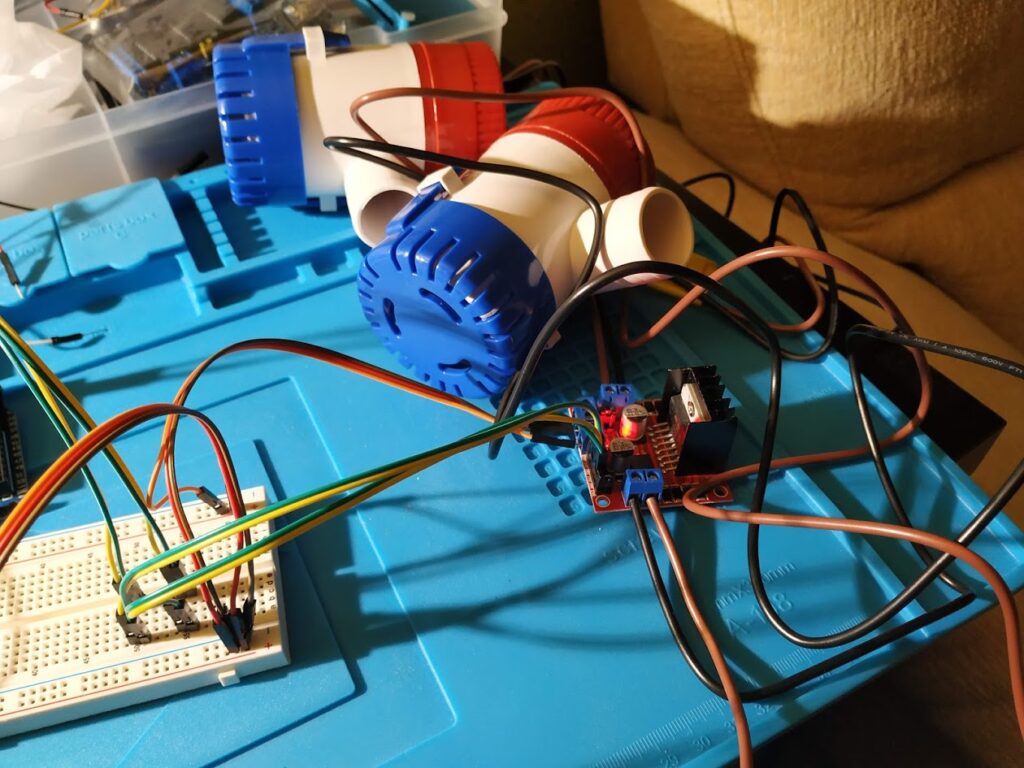
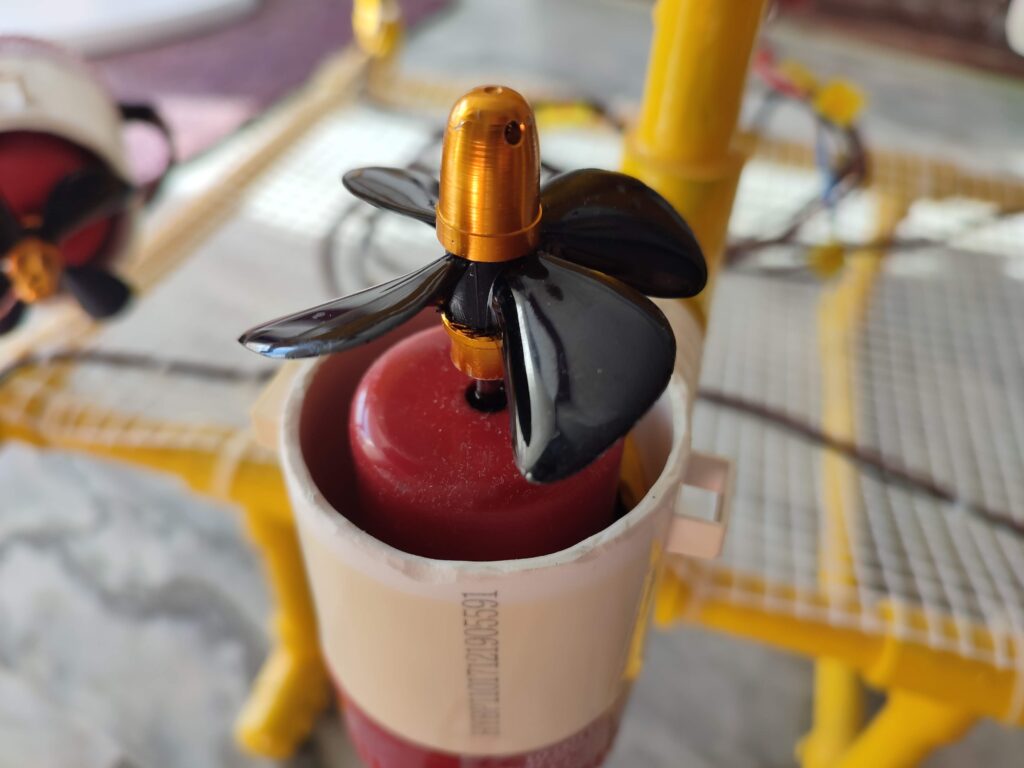
First, I mounted the propellers into the power pump’s axis. Next, I used Epoxy Resin to fill pipes that contained any cable. This would avoid any water leaks inside the lines. On junctions, I used Epoxilyn to give shape, adequately cover the connections, and fix parts and cables to where they belonged.
PropellersEpoxy Resin on PipesEpoxy Resin on PipesTemperature and pressure 14 atmCar’s pressure sensorInside camera view
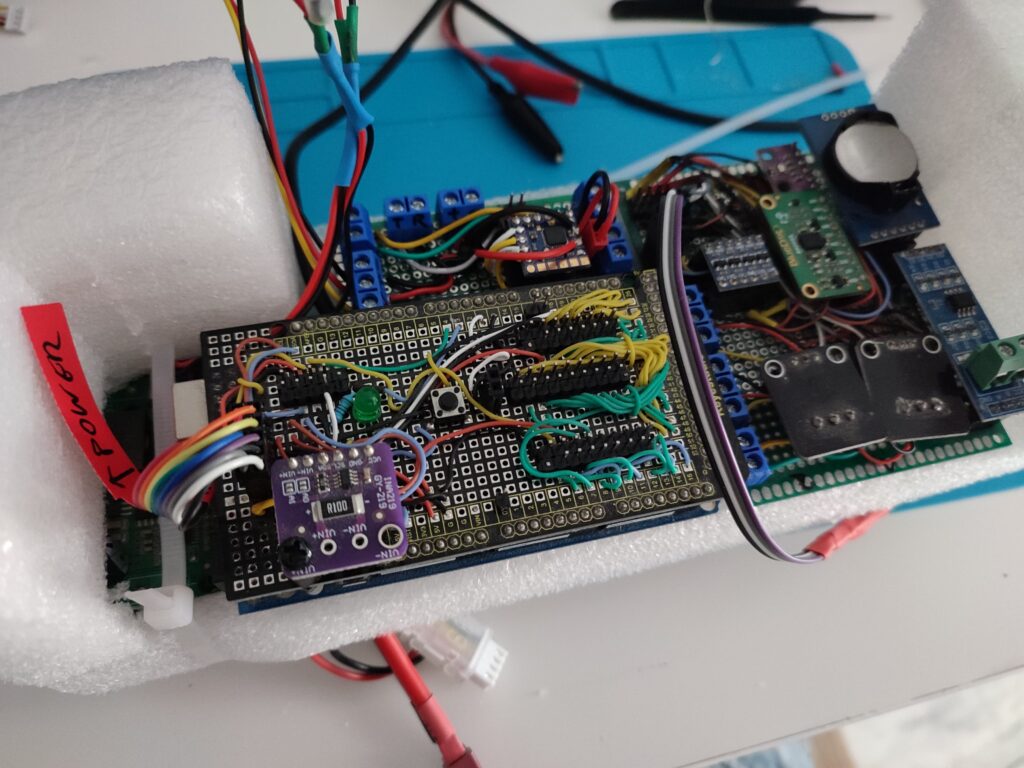
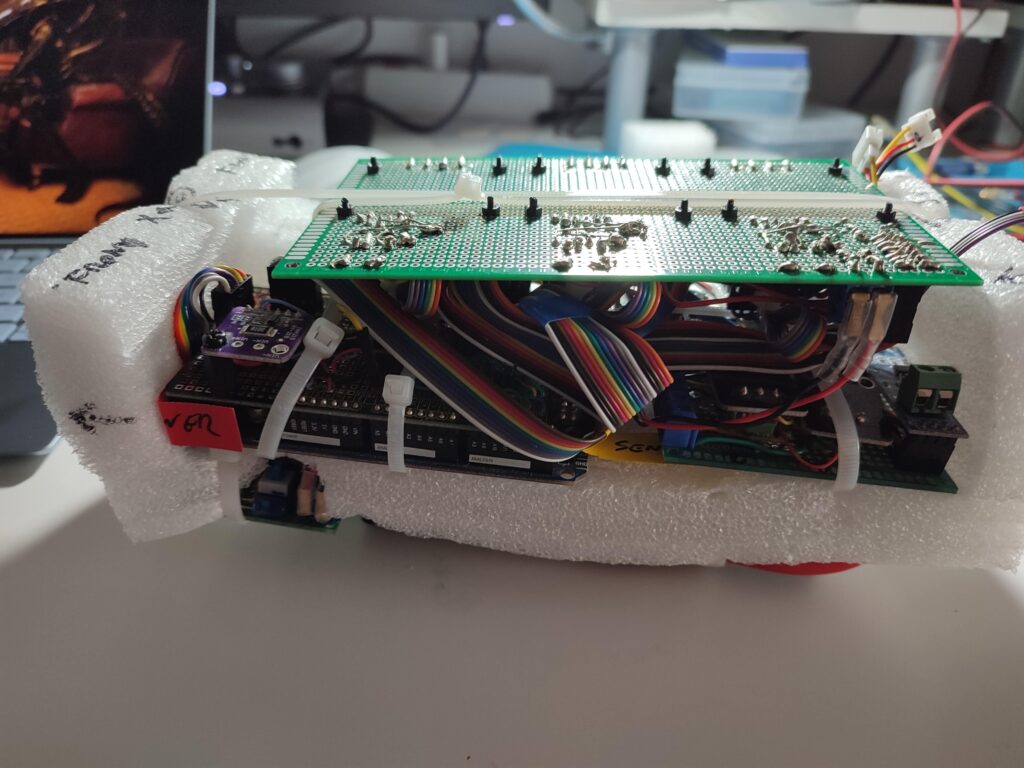
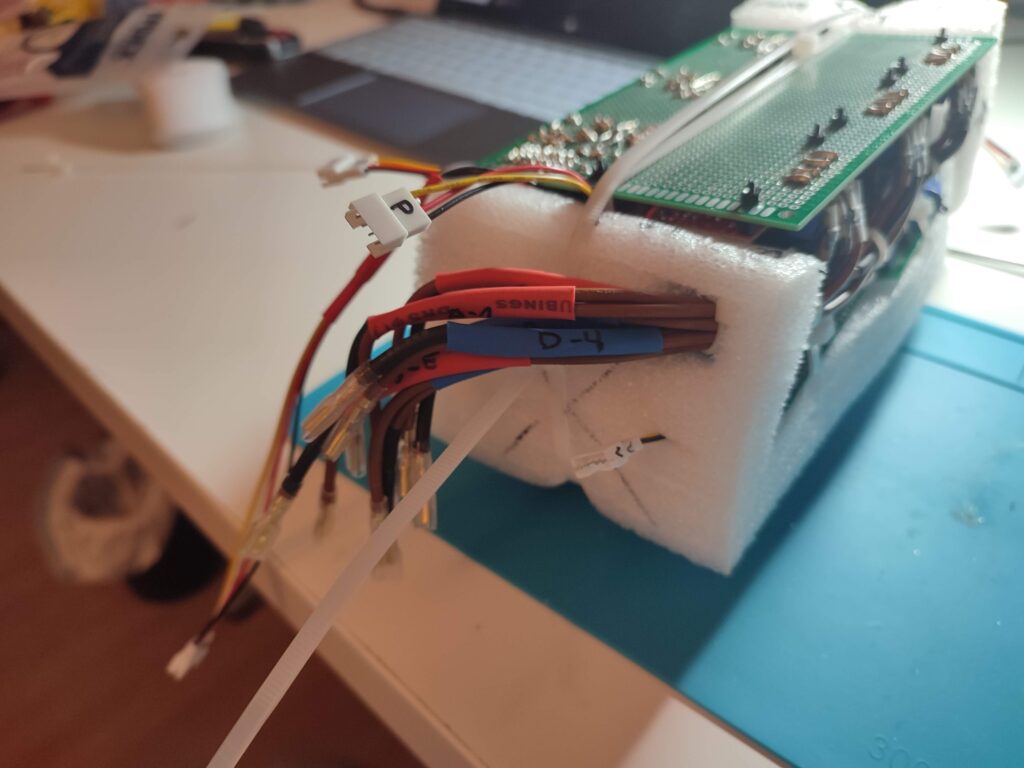
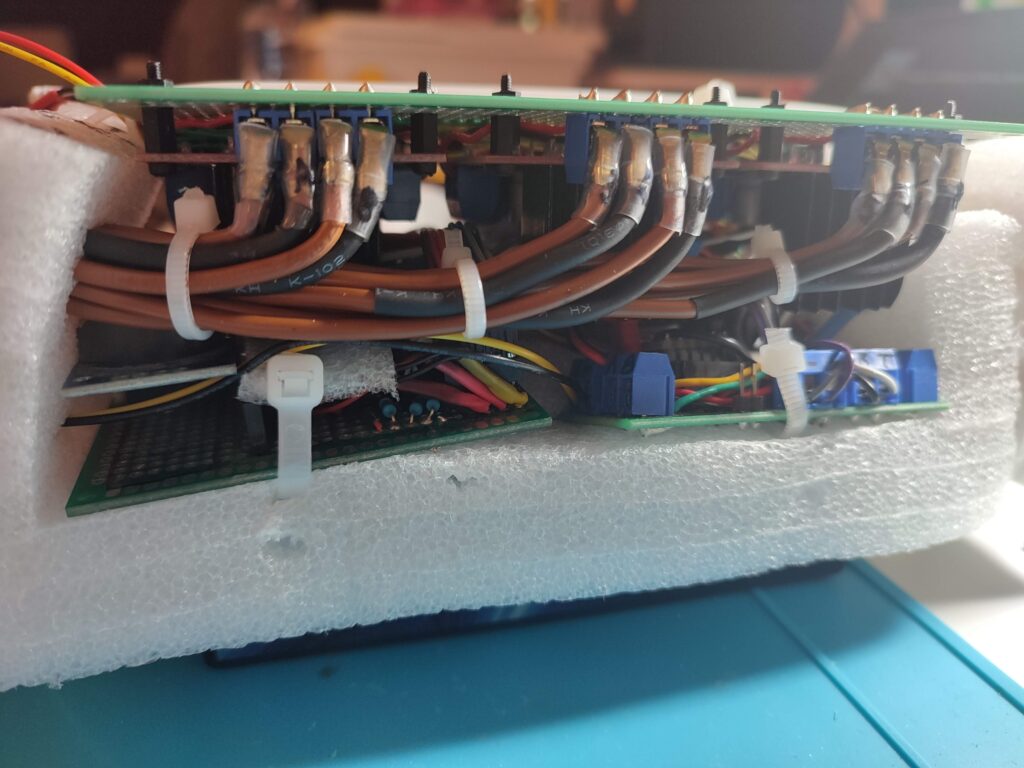
Then I had to pack all the circuits together to fill inside the pipe, and I had to set the glass.
Main board, sensors, and OSDEngines drivers set on the topAll cables coming from behindEvery line put in placeMany cables to connectThe glass that covers the camera
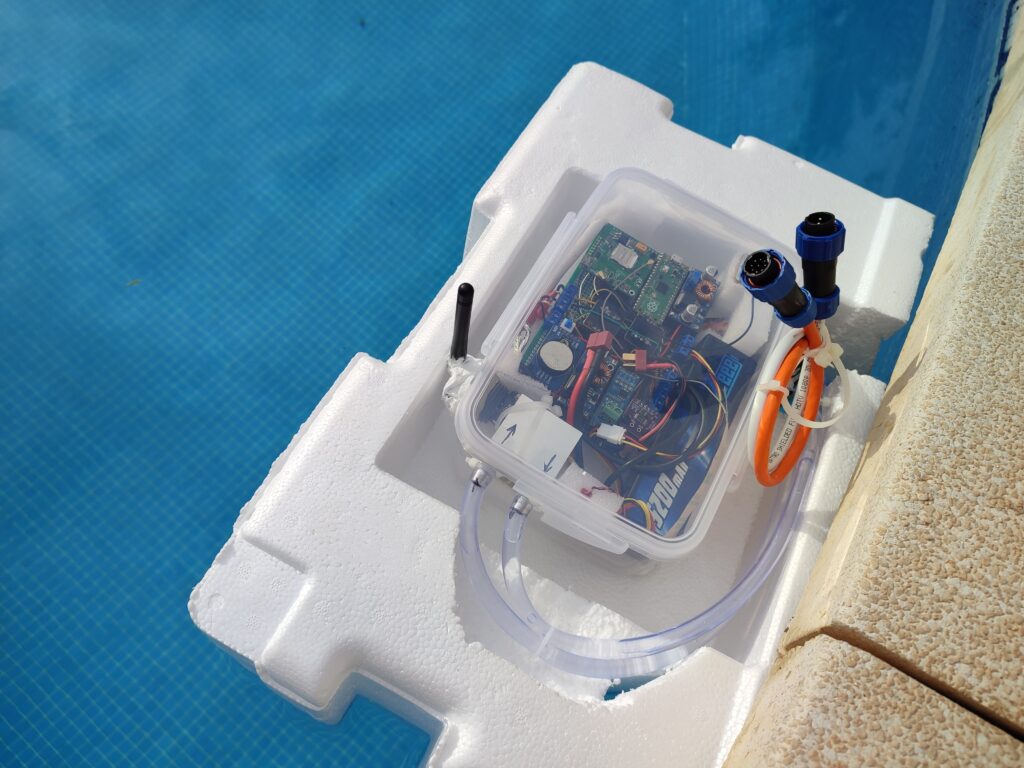
The next step was to pack the Buoy. During the building, I found out that the video transmitter was getting very hot sometimes, making it stop working correctly. To avoid this problem, I decide to cool it with water:
Video transmitter connected to the coolerCooler ready to be pluggedAlioli Buoy
Here is an example of the cooling system working:
Alioli Buoy Video Cooler
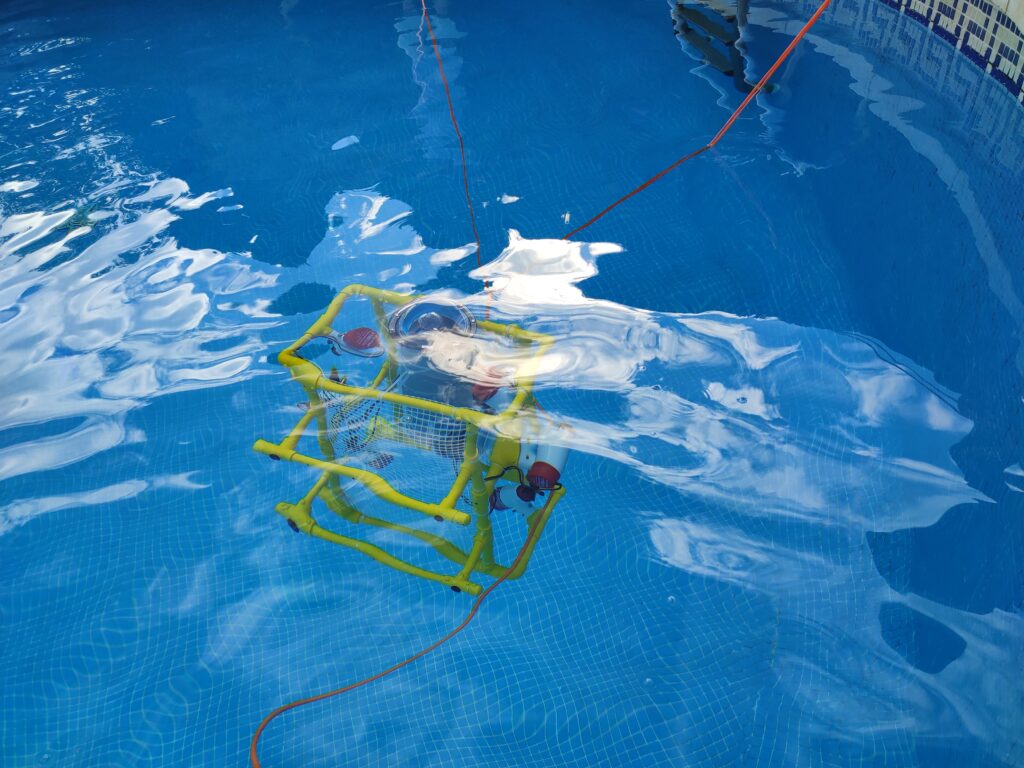
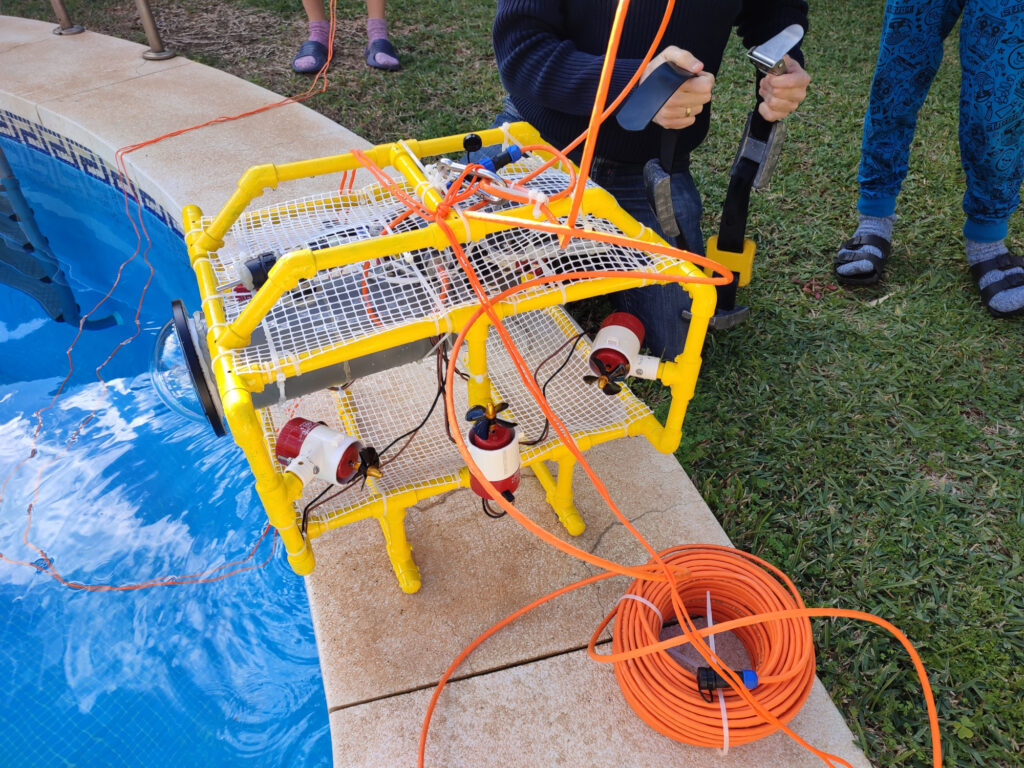
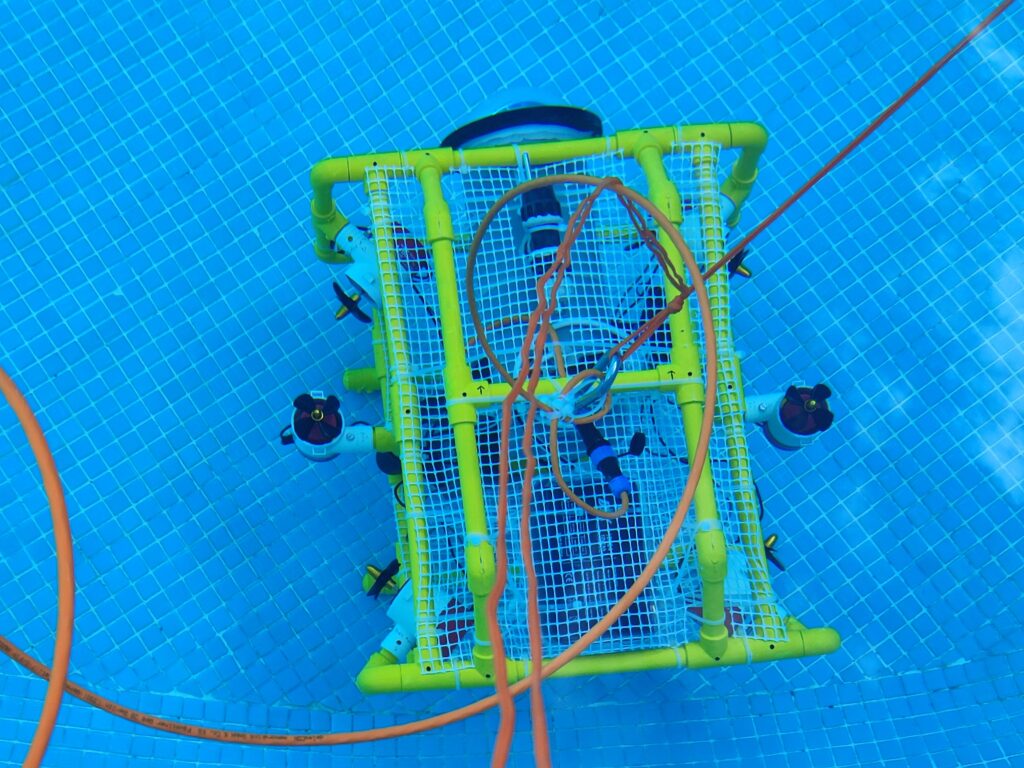
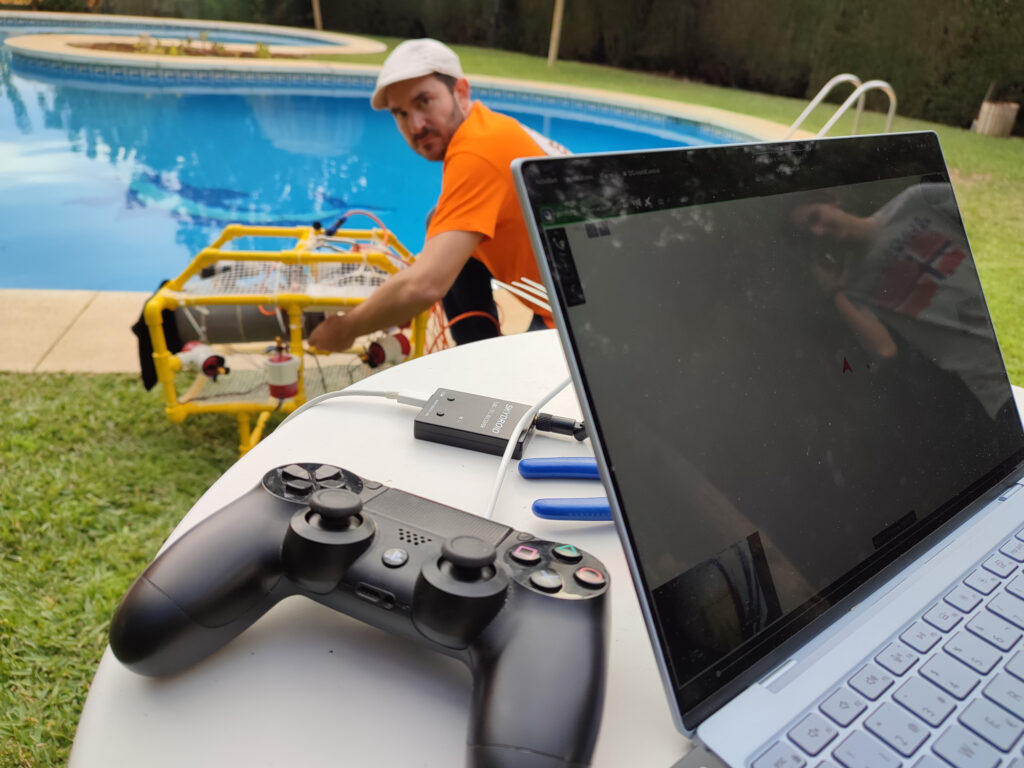
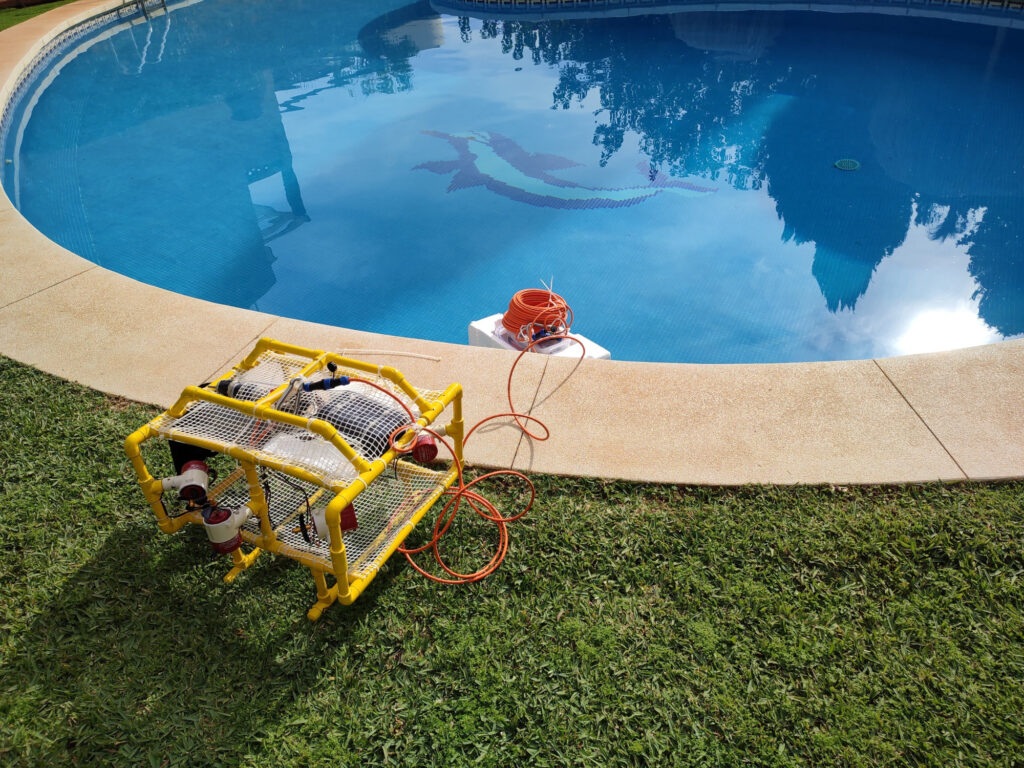
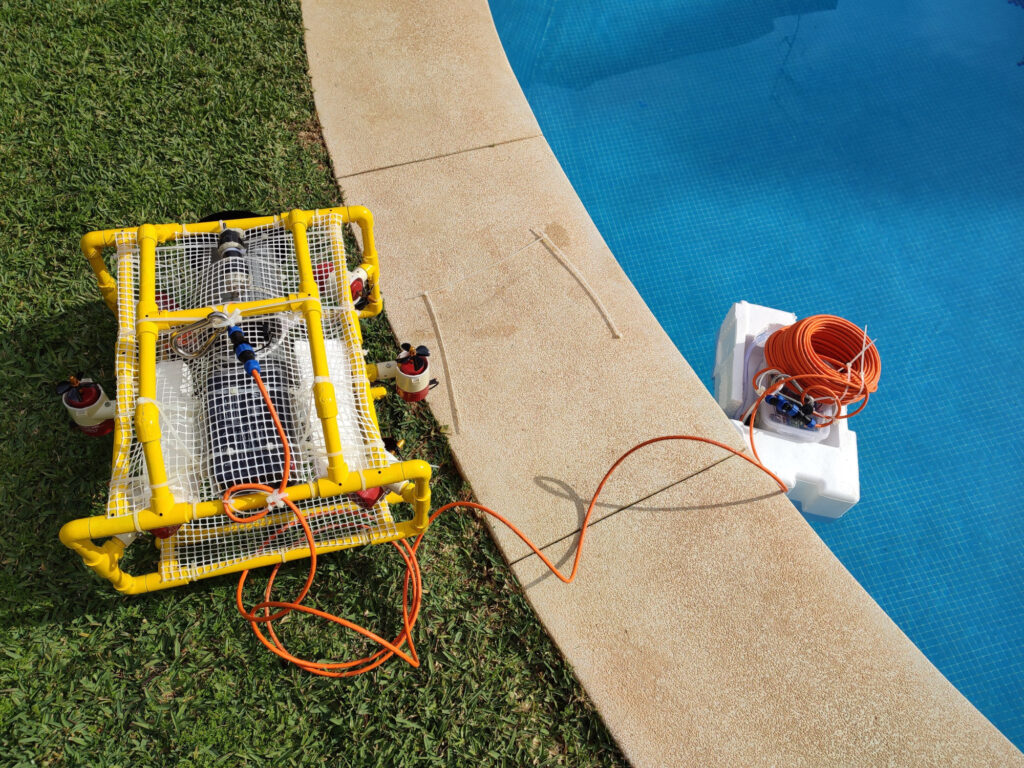
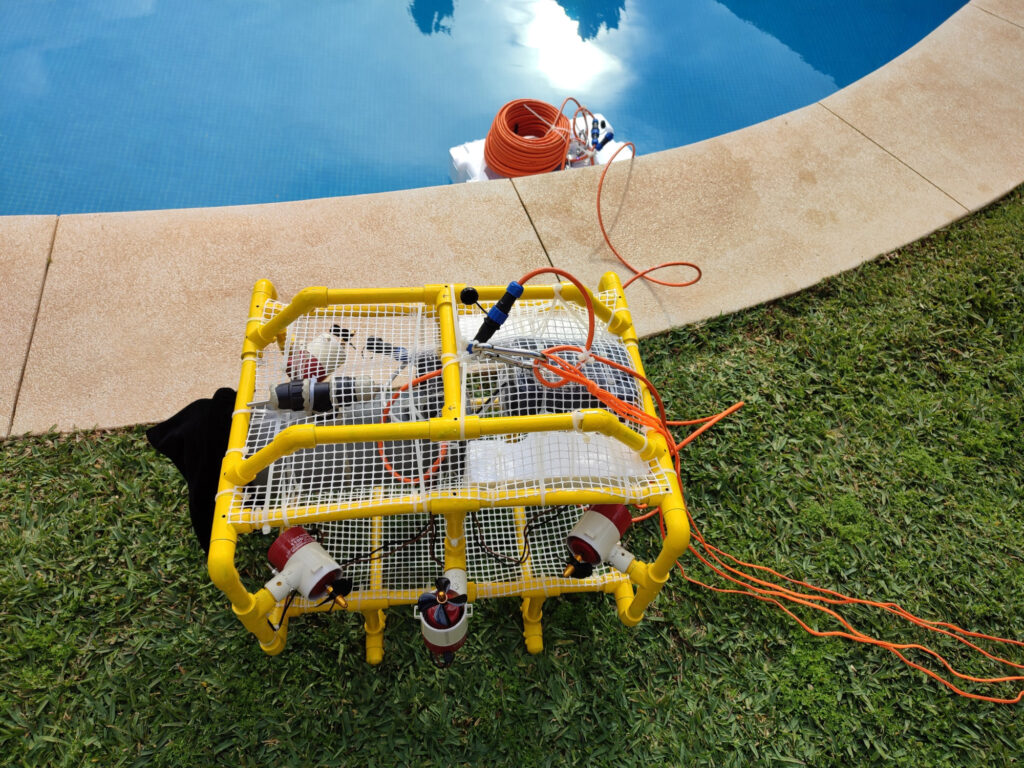
Dec 2022 – Tests
December has been the month for improvements in Buoyancy and weight balance.
– Test 1 –
The first test was done on two baths without circuits inside but with a package of rice of 1 kg (the actual weight of the boards and battery together). During the first bath, the ROV head looked up because of Buoyancy. It was the first time. I decided to leave it that way because the primary purpose was to check if there were water leaks, of course during this bath, I went for my Scuba Diving belt (7 kgs) to try a second bath with a heavier load to keep the ROV horizontal for a little bit longer. I must say that both tests went fine, and no water leaks were found.
First bathWater leak test (5 minutes)After the first bathI added weight (7 kg)Second bath water leak test (10 minutes)
– Test 2 –
I was planning this to be the final test, but something else happened, and I had to abort after all. During this test, I plugged everything (circuits), set the Buoy, powered it on, and put it in water. I already added extra Buoyancy to make the system more balanced.
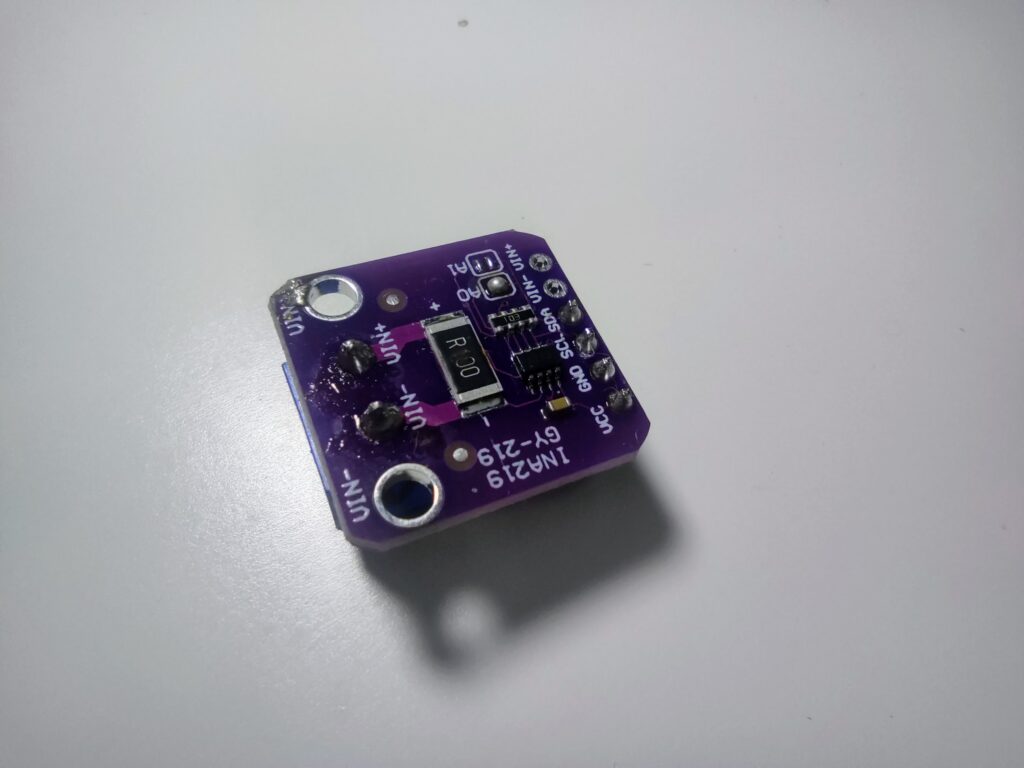
Everything worked like a charm, but during the first test of the engines, they didn’t move anymore. After checking it out, I realized that the circuit to check the voltage and amperage of the engine’s battery got burned, its maximum current supported was 3.2A, and each engine may consume until a top of 3A, during turns the system would require 12A (4 engines working). So I bypassed this and got ready for a final test without feedback about power consumption and voltage left for engines.
Alioli Rov Submarine Drone – Test 2 – The power sensor got burned.The burned Power module
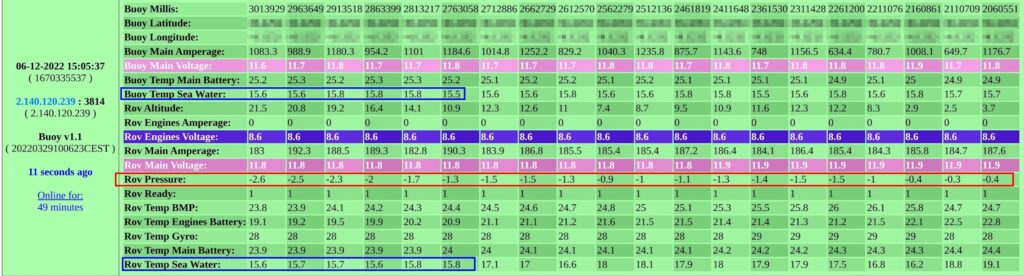
Thanks that the system being connected to my external server, I got this very useful feedback:
Control Panel for Alioli Rov Submarine Drone
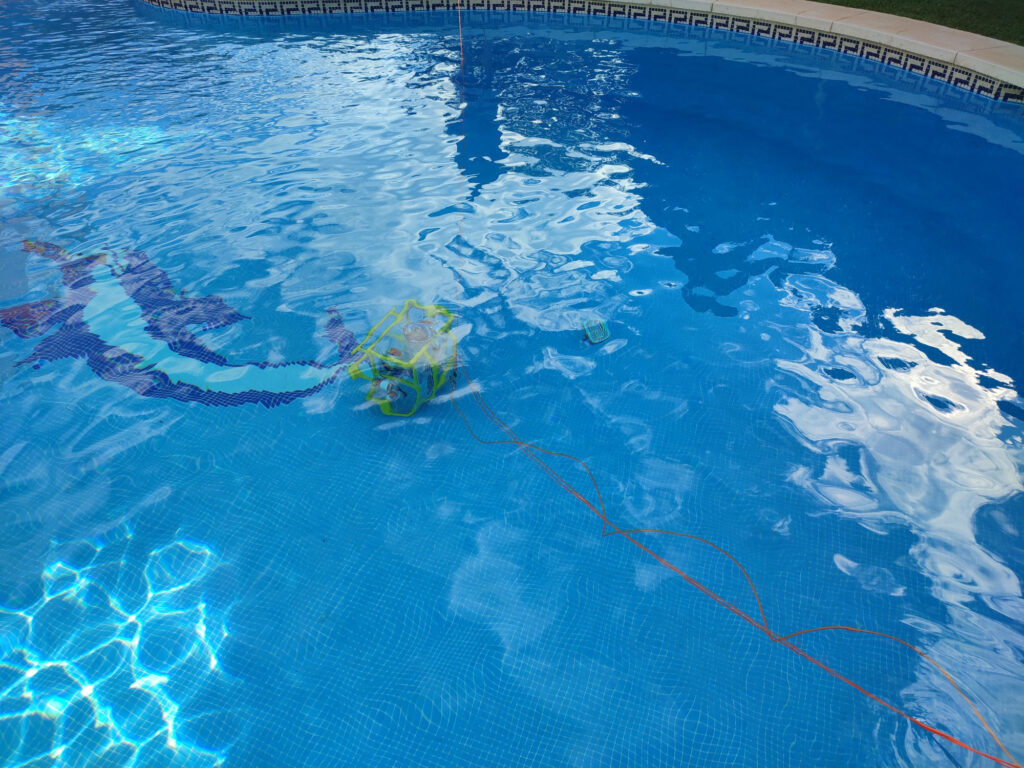
– Test 3 –
I added a new battery to feed the engines (propellers) and avoid new electricity problems. The battery had a weight I planned, but I didn’t calculate the balance correctly. In this test, we see the ROV heading up too much because of the weight of the battery. Also, the propellers are too small and don’t produce enough impulsion, so it moves slowly and looks up. All the rest of the systems perform as expected. The next video show this 3rd test.
Alioli ROV Submarine Drone – Test 3
– Final test –
I installed new propellers (double size) and repositioned the external battery. The final result is:
Comments
JoseRa
Hola ,un gran trabajo JuanMa ! ,veo muchas cosas coincidentes con lo que yo estoy haciendo actualmente en mi proyecto de ROV ,voy poco a poco ,estoy jubilado y ahora espero terminar algo funcional en breve.Te cuento que tambien hice algun prototipo anterior con arduino Mega y que actualmente lo tengo con ESP32 y estoy bastante contento,valore en su dia,cuando salio, el uso de Raspberry Pico como tu pero me frene por si me quedaba sin soporte via YouTube,me gustaria enviarte algunas fotos y cambiar impresiones.
Uso motores sin escobillas y me funcionan muy bien,no uso boya flotante ,la señal va directa hasta la unidad base en tierra o en embarcacion.Actualmente intento sustituir mi camara IP por una GoPro pero me esta dando muchos problemas.Bueno aqui lo dejo,espero tener algun tipo de respuesta tuya y tal vez una direccion donde enviar fotitos ( tengo poquitas).Estoy en Canet de Berenguer asi es que si quieres hasta podriamos intentar quedar un dia en Real,No se que nombre ponerle a mi ROV ¿que te parece “Cremaet” ? Jajaja
Gracias. Durante el desarrollo he aprendido muchísimo y es la parte que más valoro del proyecto. Hay mucho por hacer aún, en cualquier caso es un gran laboratorio para aprender de protocolos eléctricos y conocer perfectamente un microcontrolador. El nombre de tu ROV es algo bastante personal, el que has elegido me gusta. Estoy pendiente de publicar una charla que di (en Inglés) en Junio en OpenSouthCode (Málaga) y se explican cosillas de mi experiencia construyendo el ROV. Ya te he contactado por email para que puedas enviarme fotos y establecer contacto.
During the last weeks, I’ve received interesting news about Cloud computing. Most show that many users are not ready to upload their personal documents online. Are you? What is a Cloud? Cloud Computing is the use of computing resources (hardware and software) that are delivered as a service over a network (typically the Internet). Let’s […]
Debugging and profiling are essential components of software development. They allow you to identify and correct errors and optimise code performance. In this guide, we will discover and learn techniques for debugging and profiling Python programs. What is the difference between debugging and profiling? Debugging is locating and correcting errors or bugs in a program’s […]


Hola ,un gran trabajo JuanMa ! ,veo muchas cosas coincidentes con lo que yo estoy haciendo actualmente en mi proyecto de ROV ,voy poco a poco ,estoy jubilado y ahora espero terminar algo funcional en breve.Te cuento que tambien hice algun prototipo anterior con arduino Mega y que actualmente lo tengo con ESP32 y estoy bastante contento,valore en su dia,cuando salio, el uso de Raspberry Pico como tu pero me frene por si me quedaba sin soporte via YouTube,me gustaria enviarte algunas fotos y cambiar impresiones.
Uso motores sin escobillas y me funcionan muy bien,no uso boya flotante ,la señal va directa hasta la unidad base en tierra o en embarcacion.Actualmente intento sustituir mi camara IP por una GoPro pero me esta dando muchos problemas.Bueno aqui lo dejo,espero tener algun tipo de respuesta tuya y tal vez una direccion donde enviar fotitos ( tengo poquitas).Estoy en Canet de Berenguer asi es que si quieres hasta podriamos intentar quedar un dia en Real,No se que nombre ponerle a mi ROV ¿que te parece “Cremaet” ? Jajaja
Gracias. Durante el desarrollo he aprendido muchísimo y es la parte que más valoro del proyecto. Hay mucho por hacer aún, en cualquier caso es un gran laboratorio para aprender de protocolos eléctricos y conocer perfectamente un microcontrolador. El nombre de tu ROV es algo bastante personal, el que has elegido me gusta. Estoy pendiente de publicar una charla que di (en Inglés) en Junio en OpenSouthCode (Málaga) y se explican cosillas de mi experiencia construyendo el ROV. Ya te he contactado por email para que puedas enviarme fotos y establecer contacto.