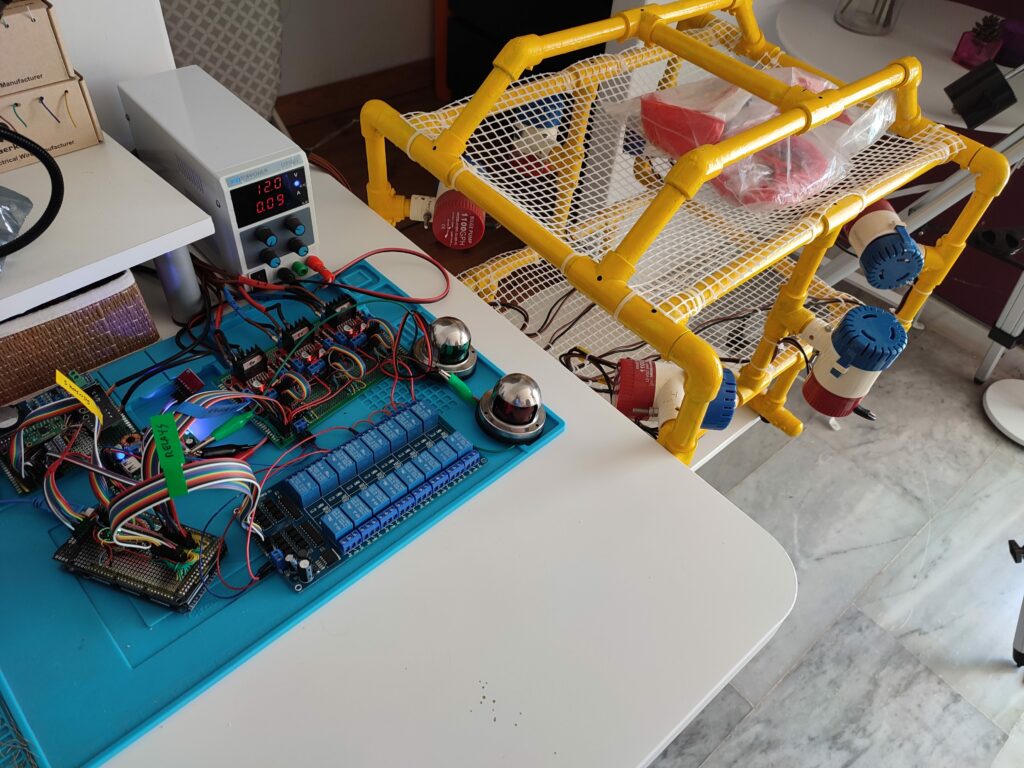
In my last post, “Alioli ROV Boards“, I described most of the hardware I use to build Alioli ROV and how I plan to use it. In this post, I show how the UAV submarine hardware and electronics interconnect with each other and the boards I have built for that purpose: the engines, driver, board, and motherboard.
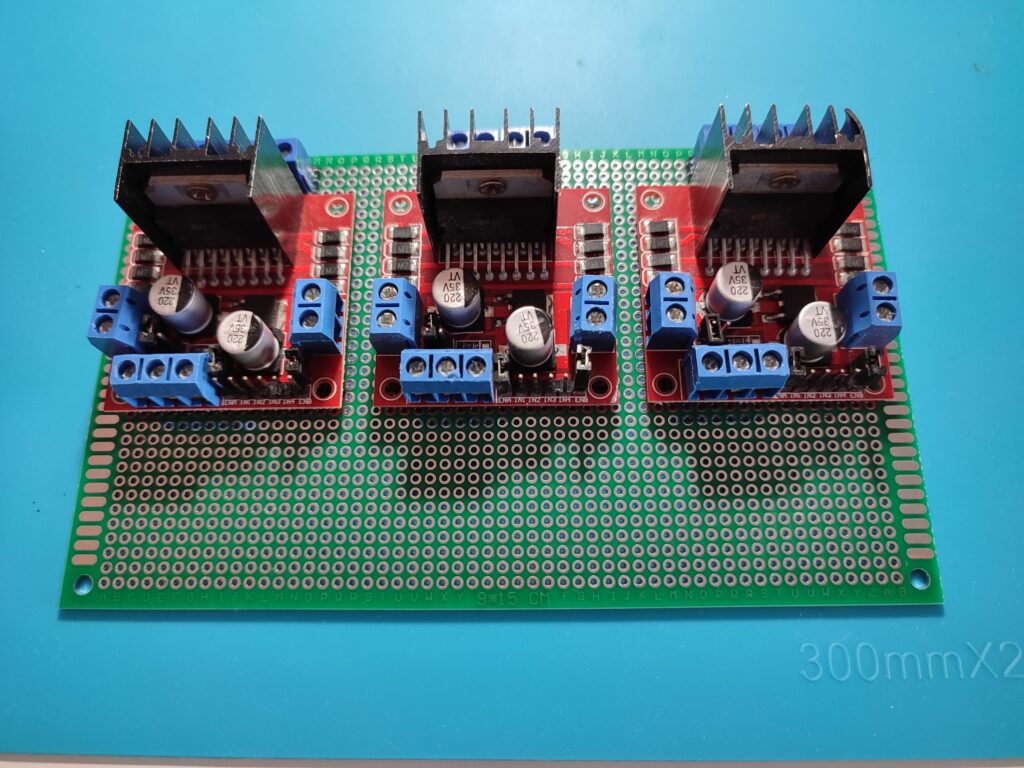
I used an odd version of the engine board earlier, so I decided to redesign it again using my recently acquired knowledge and experience. Here is the schema for the new board:
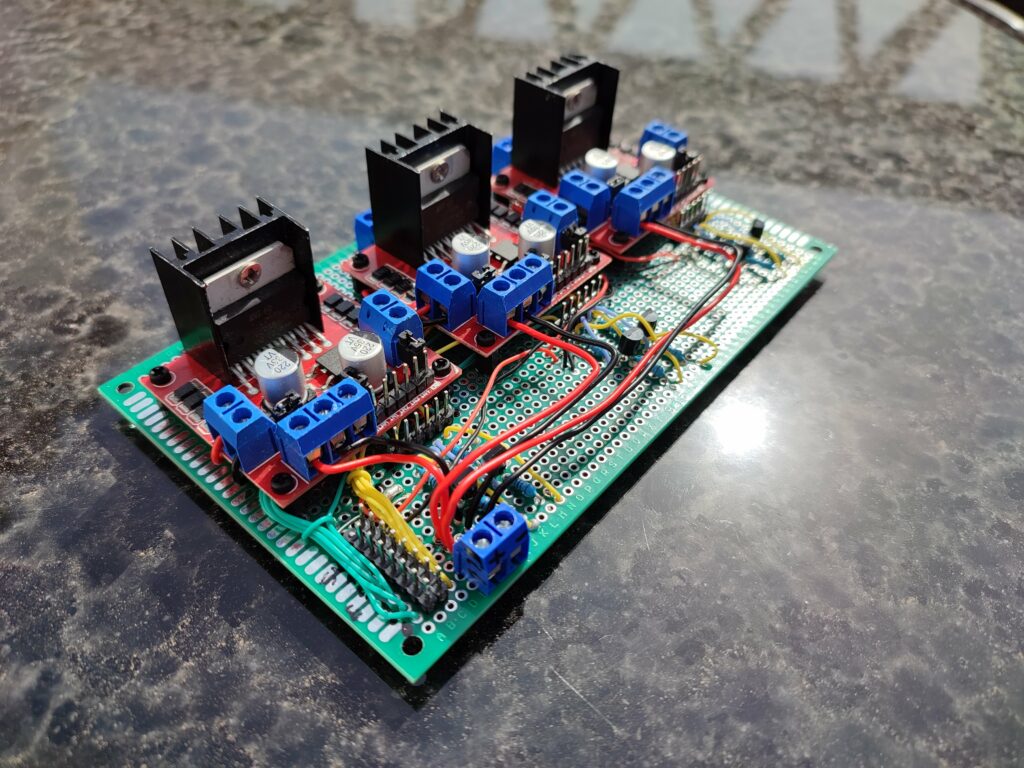
Alioli ROV Engines Board v1
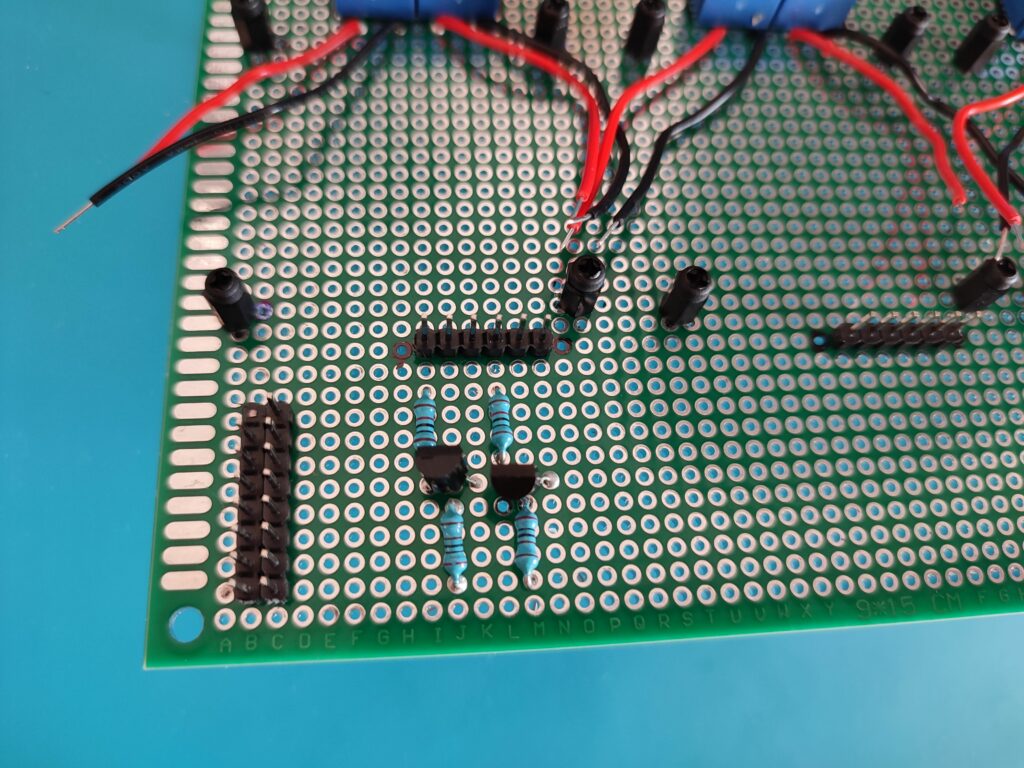
The building process wasn’t easy because I decided to add logic to get an inverted signal for Ox signals (pink), inverting the signal given from the Ix signals (yellow) in the L298N Dual H Bridge controller. I also decided to explore the transistors (2 different kinds) included in my Arduino starter kit. Finally, I got to the conclusion that I had in my hand 2 NPN Transistors (models PN2222A and S8050). The good news was that the same logic applied equally to both.
After reading theory, asking friends from Telecommunications (you must know that I am a computer engineer and I didn’t have much idea about electronics when I started with the submarine), and making some tests on the protoboard, I got to these conclusions:
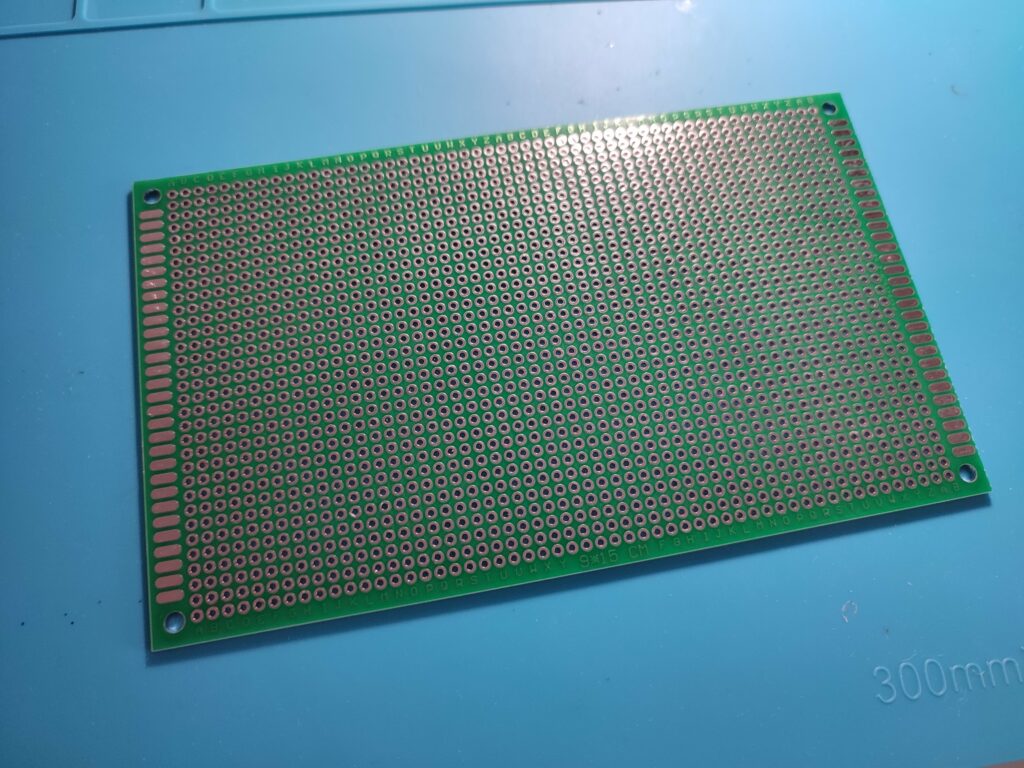
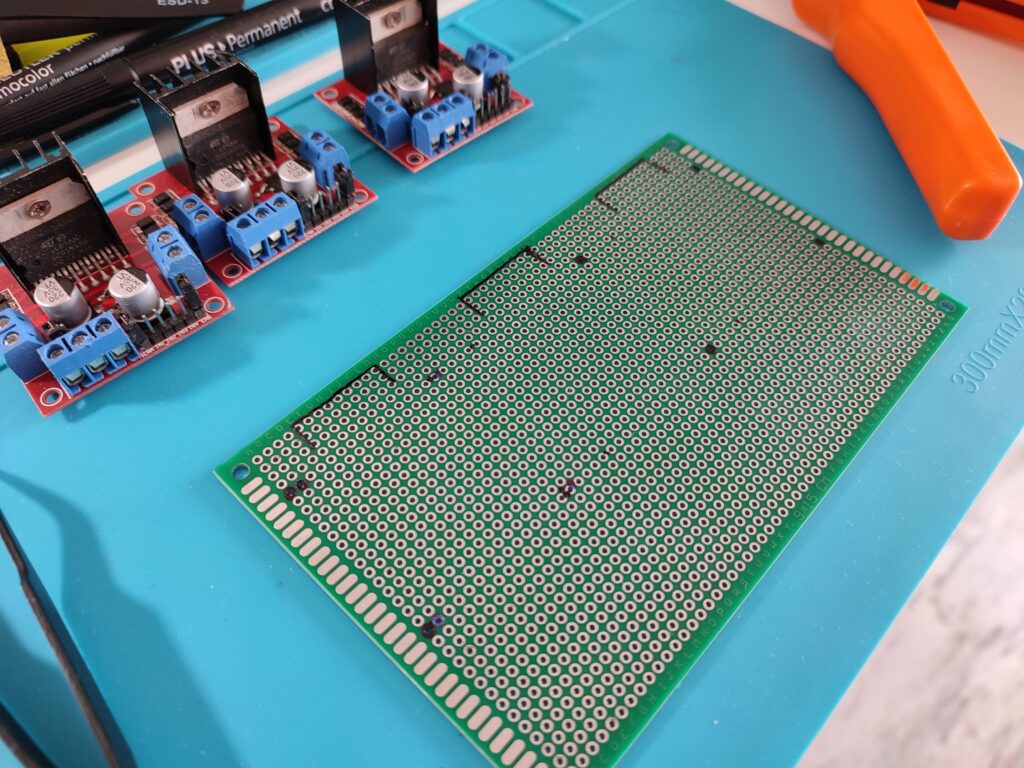
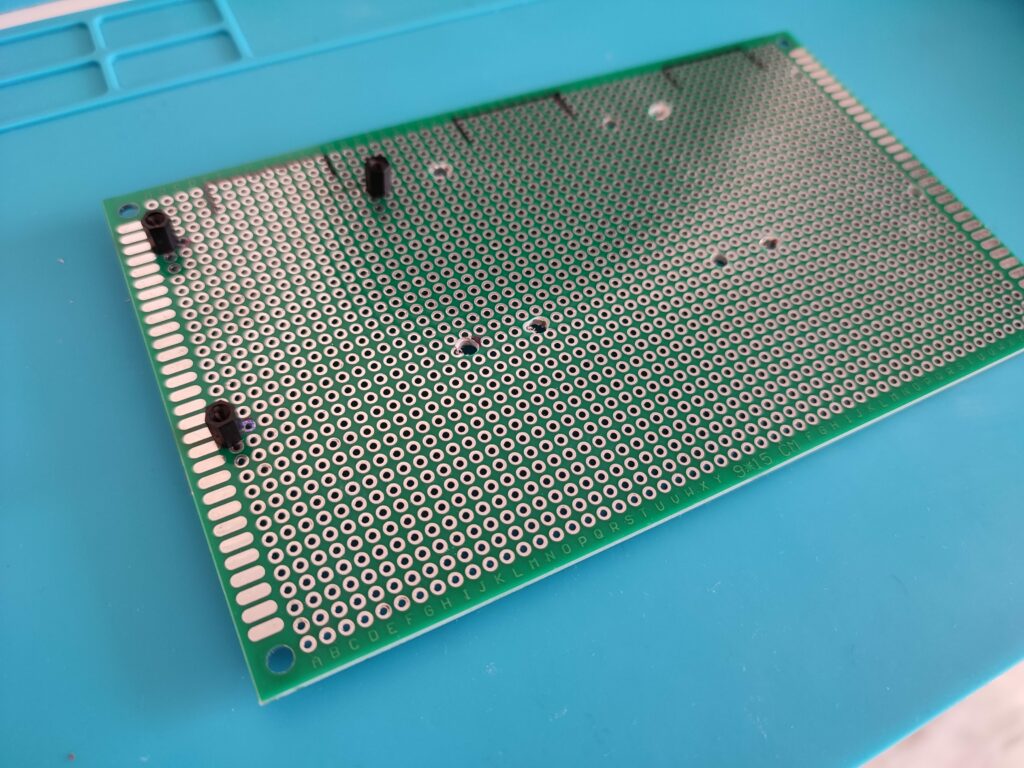
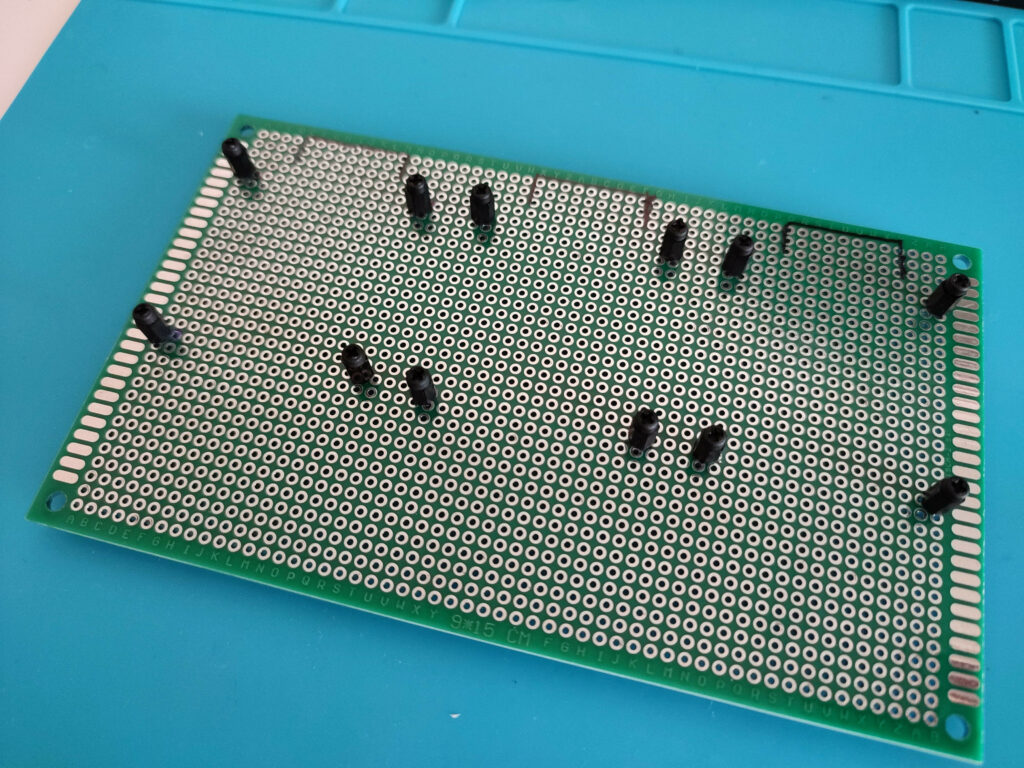
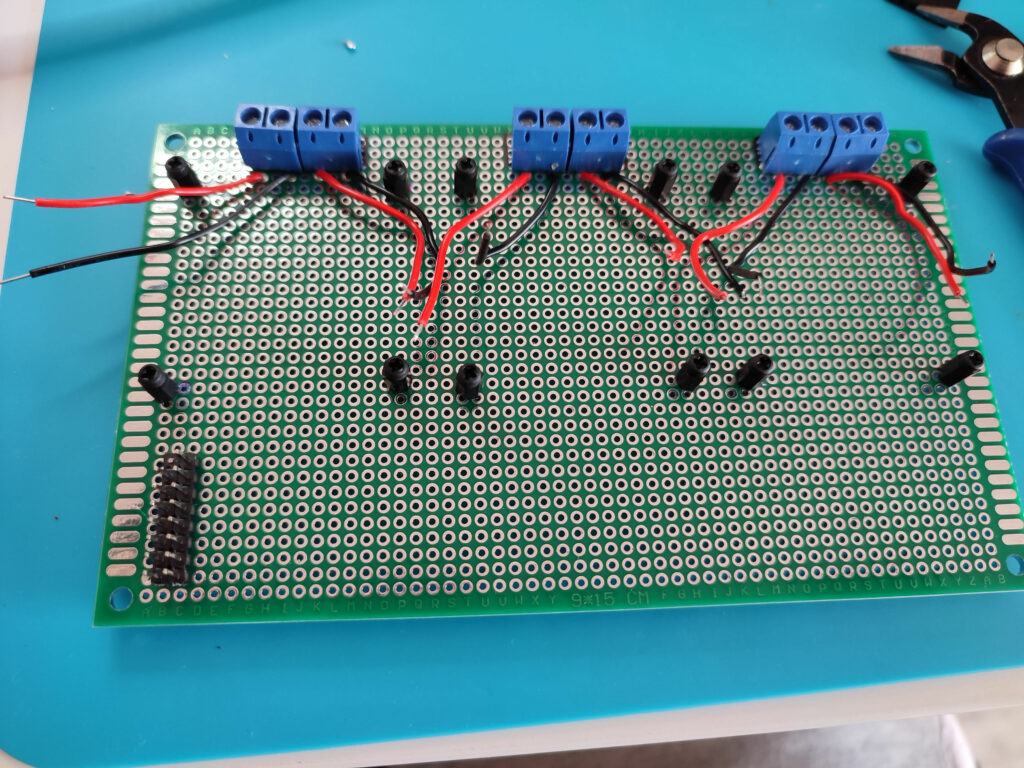
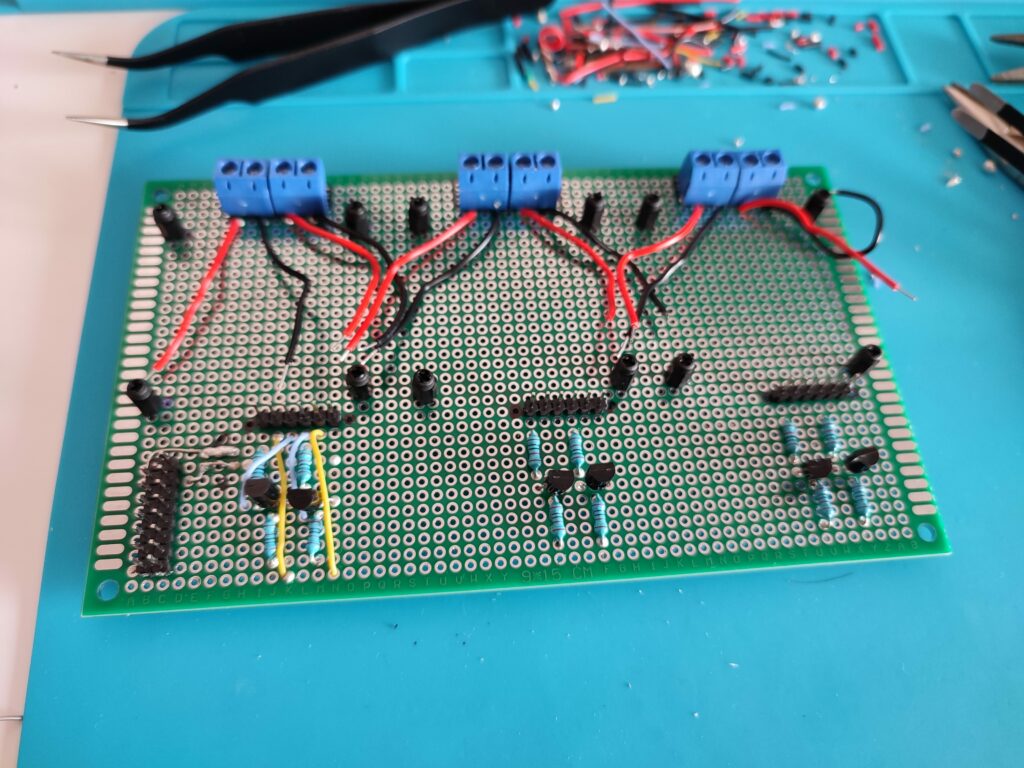
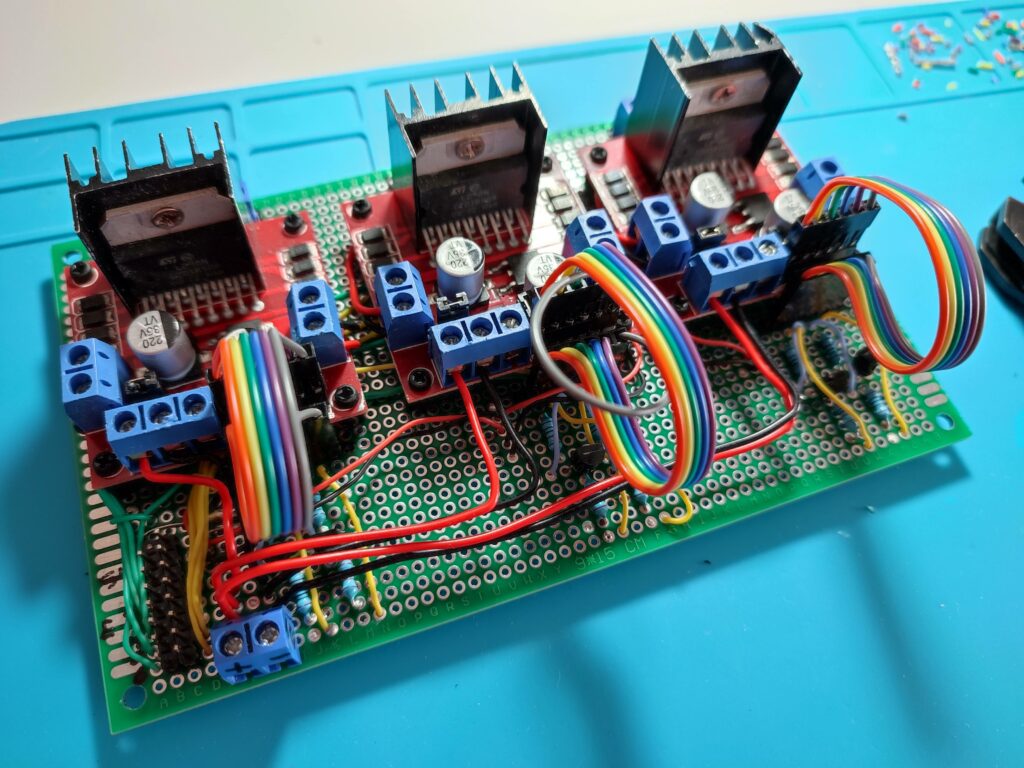
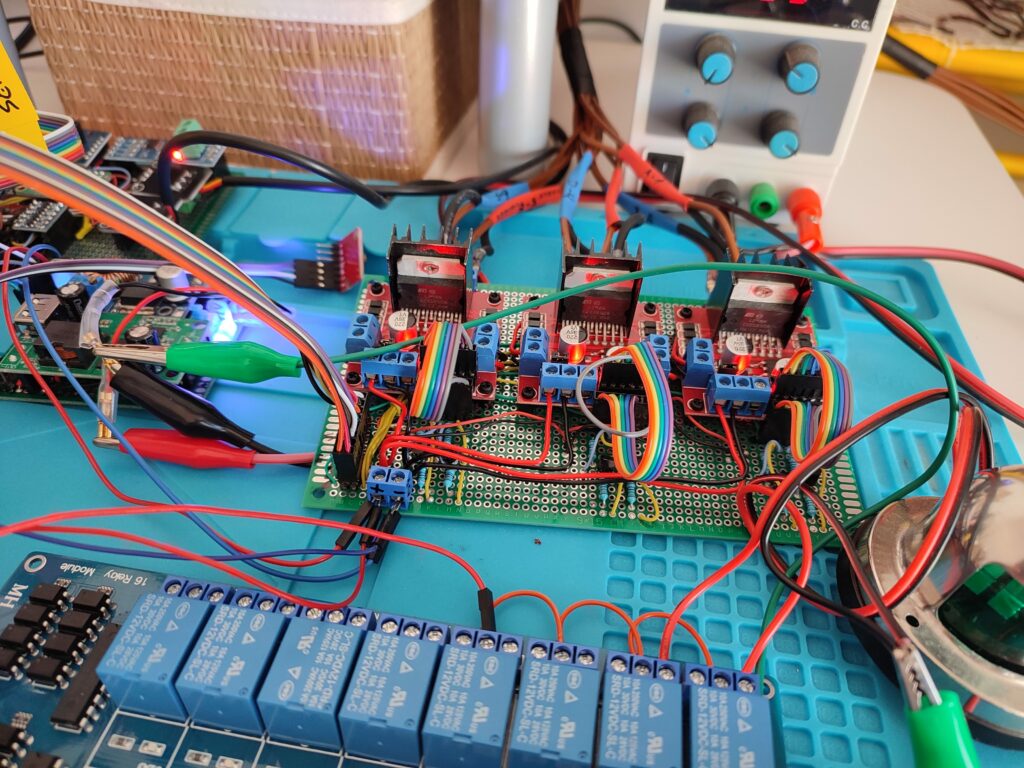
The next step was to build the board (first, I had to look for a bigger one since I couldn’t match the 3 L298 inside the boards I already had). I implemented the schema shown before. Here you have the building process:
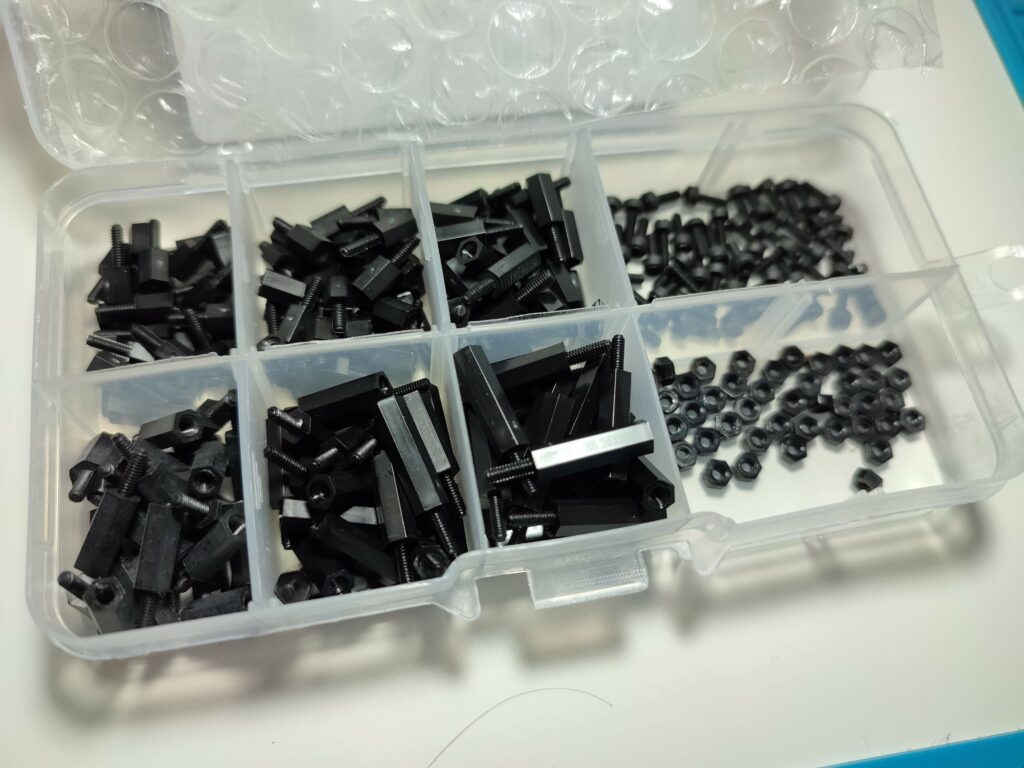
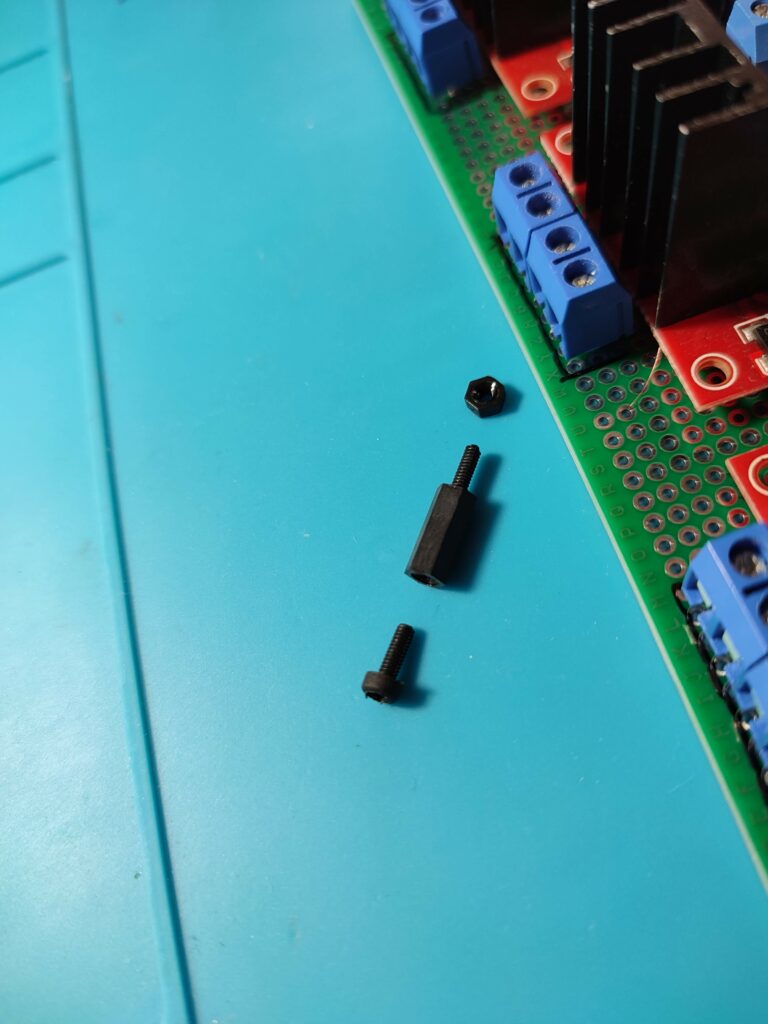
Baseboard 9cm x 15cmCheck spacing for 3 x L298NMark where they will be placedChoose spacers for L298NThe chosen spacerDrill holes in the boardInstall all spacersSolder external engines connectorsSolder first inverter’s componentsFinish the inverter and solder all the restWire the board for all connectorsInstall L298N Dual H BridgeFinished board with connected buses to L298N Dual H Bridge
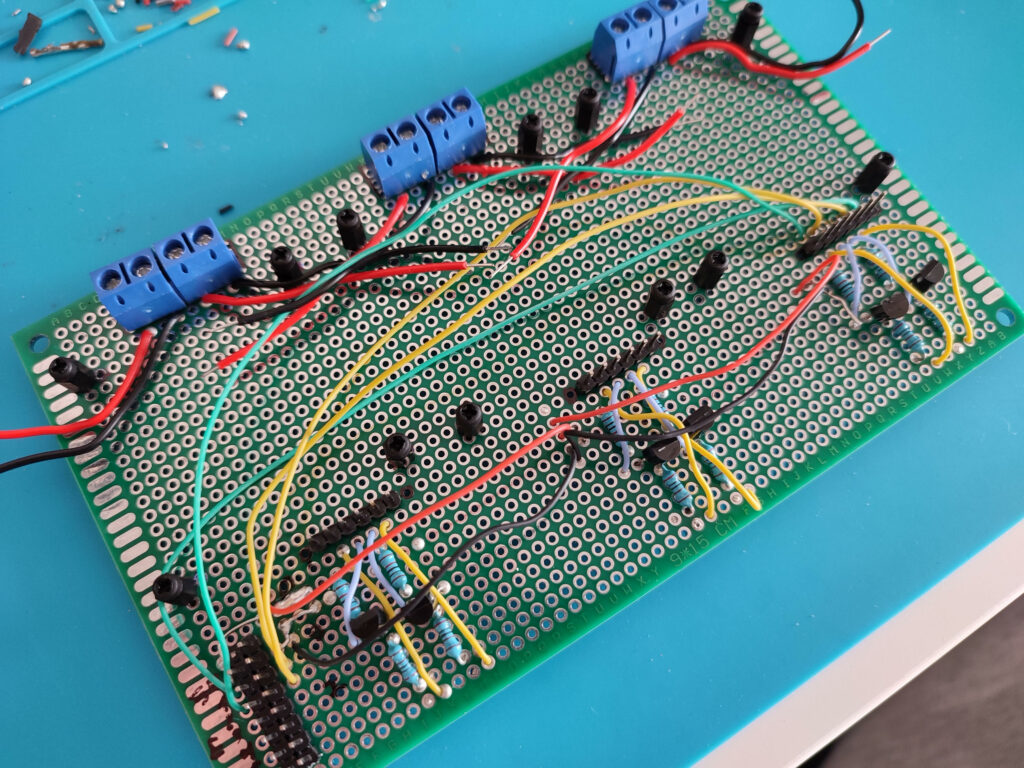
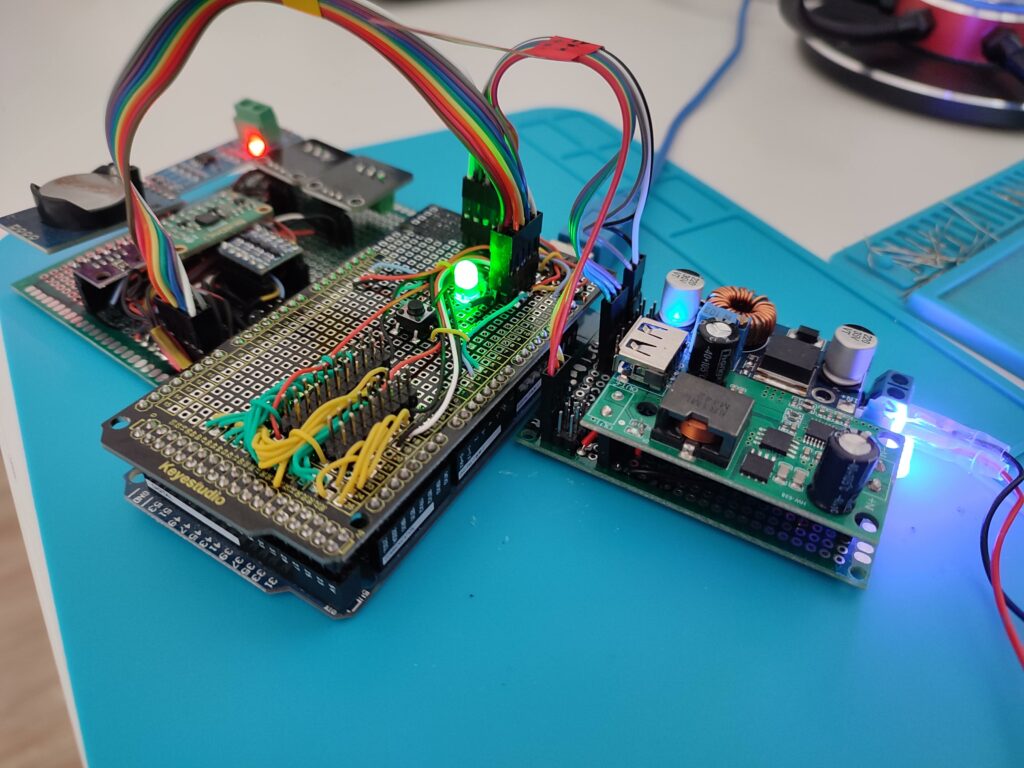
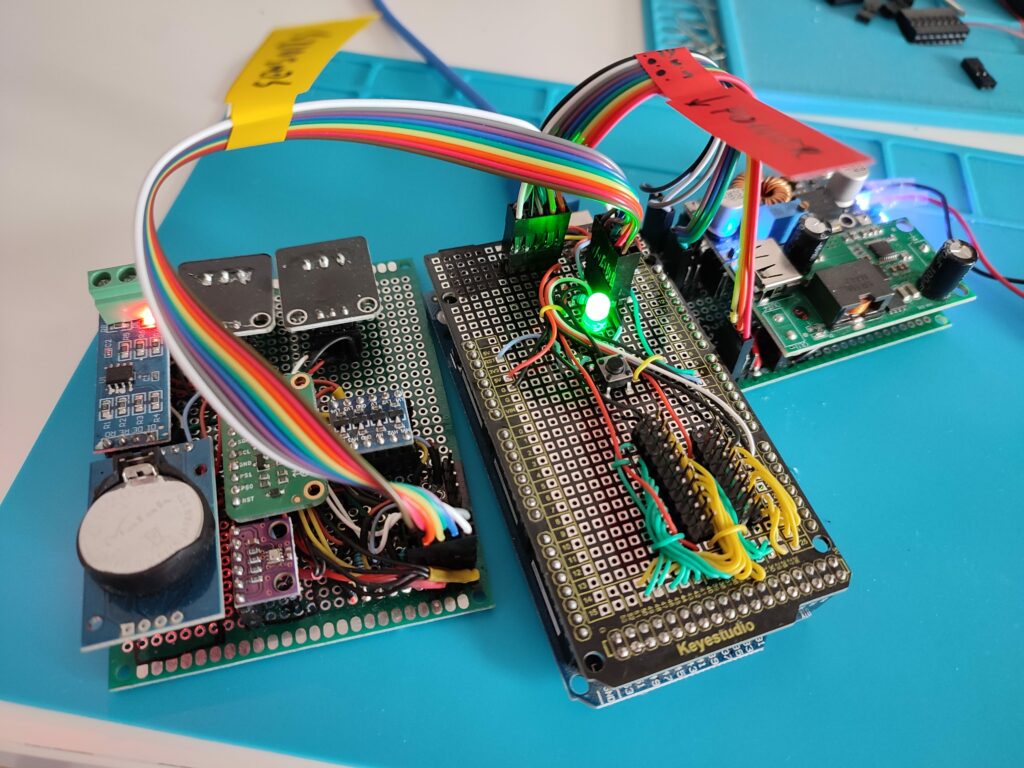
Motherboard
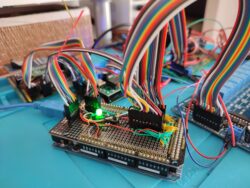
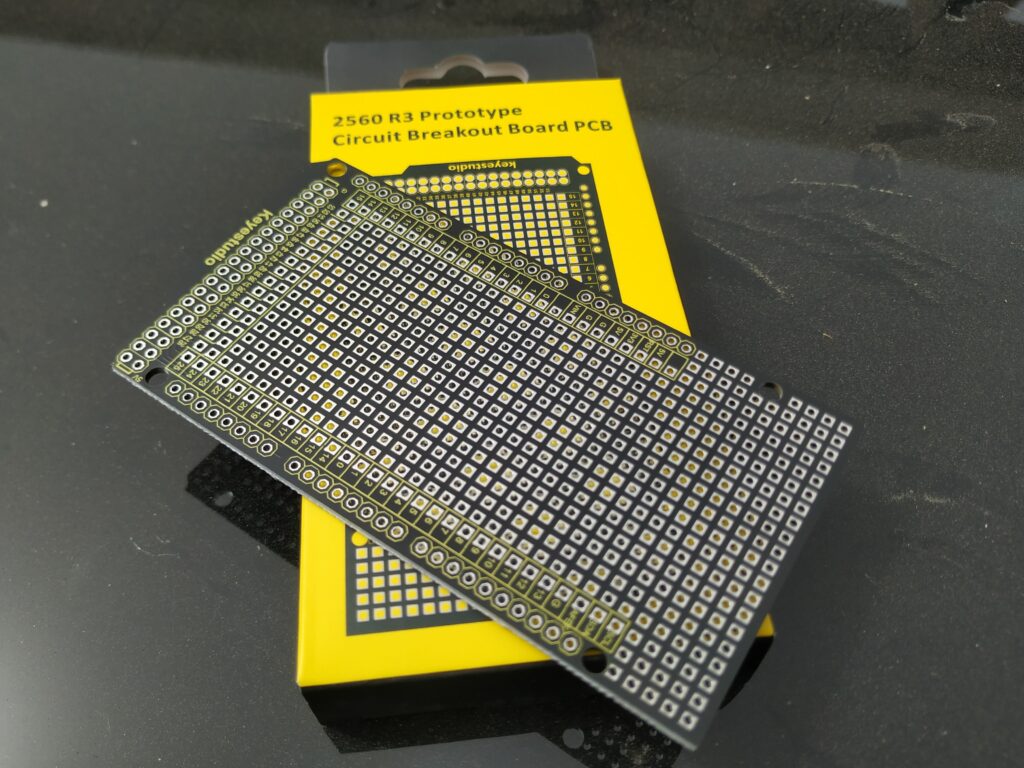
The motherboard is where all the buses will interconnect with Arduino. For this purpose, I bought a Breakout board for Arduino Mega 2560 Rev3 where I could solder pins to connect buses and wire everything as I expect:
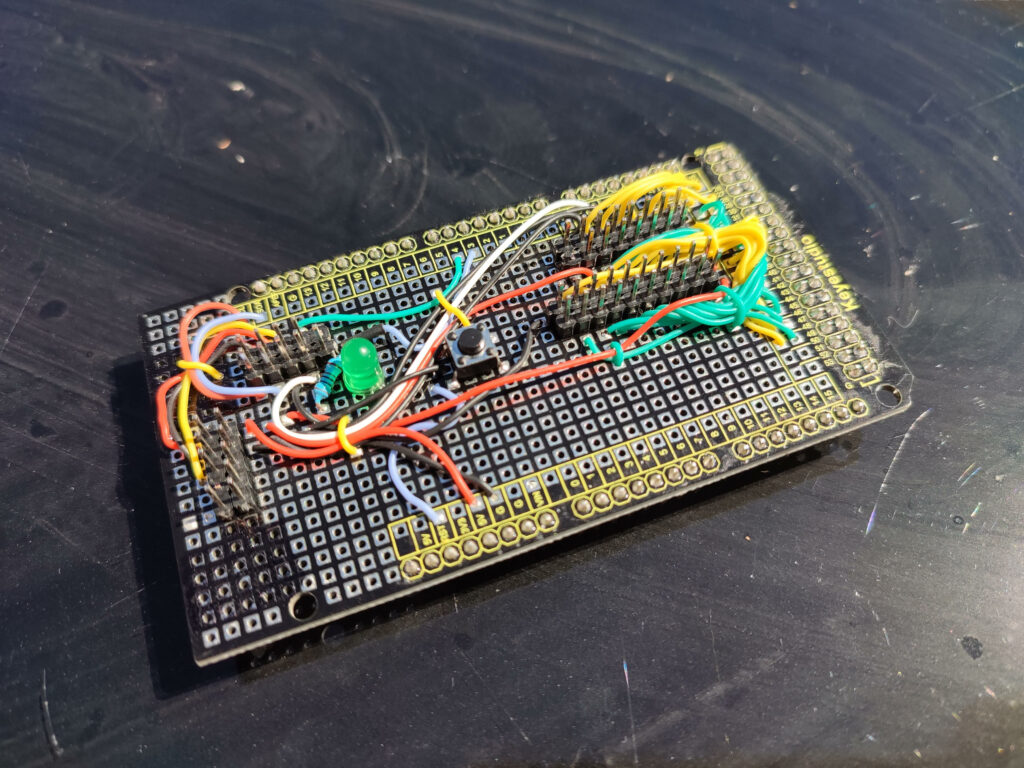
Then I started soldering on it:
Juanmi Taboada Soldering on Arduino Mega 2560 Rev3 Breakout Board
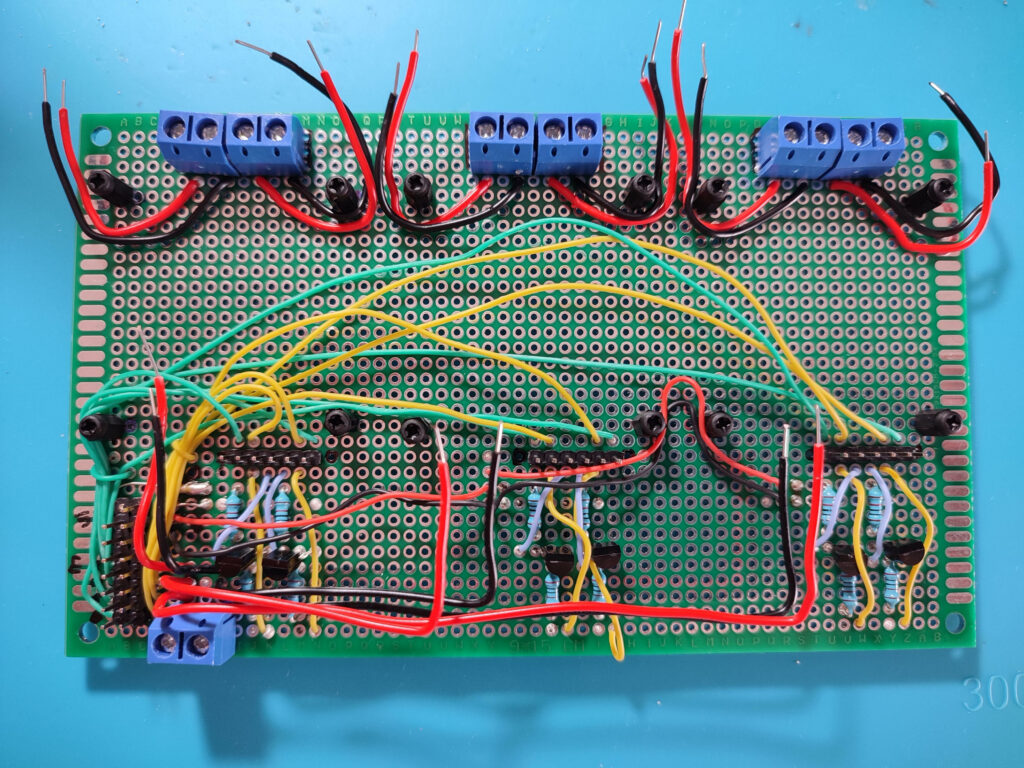
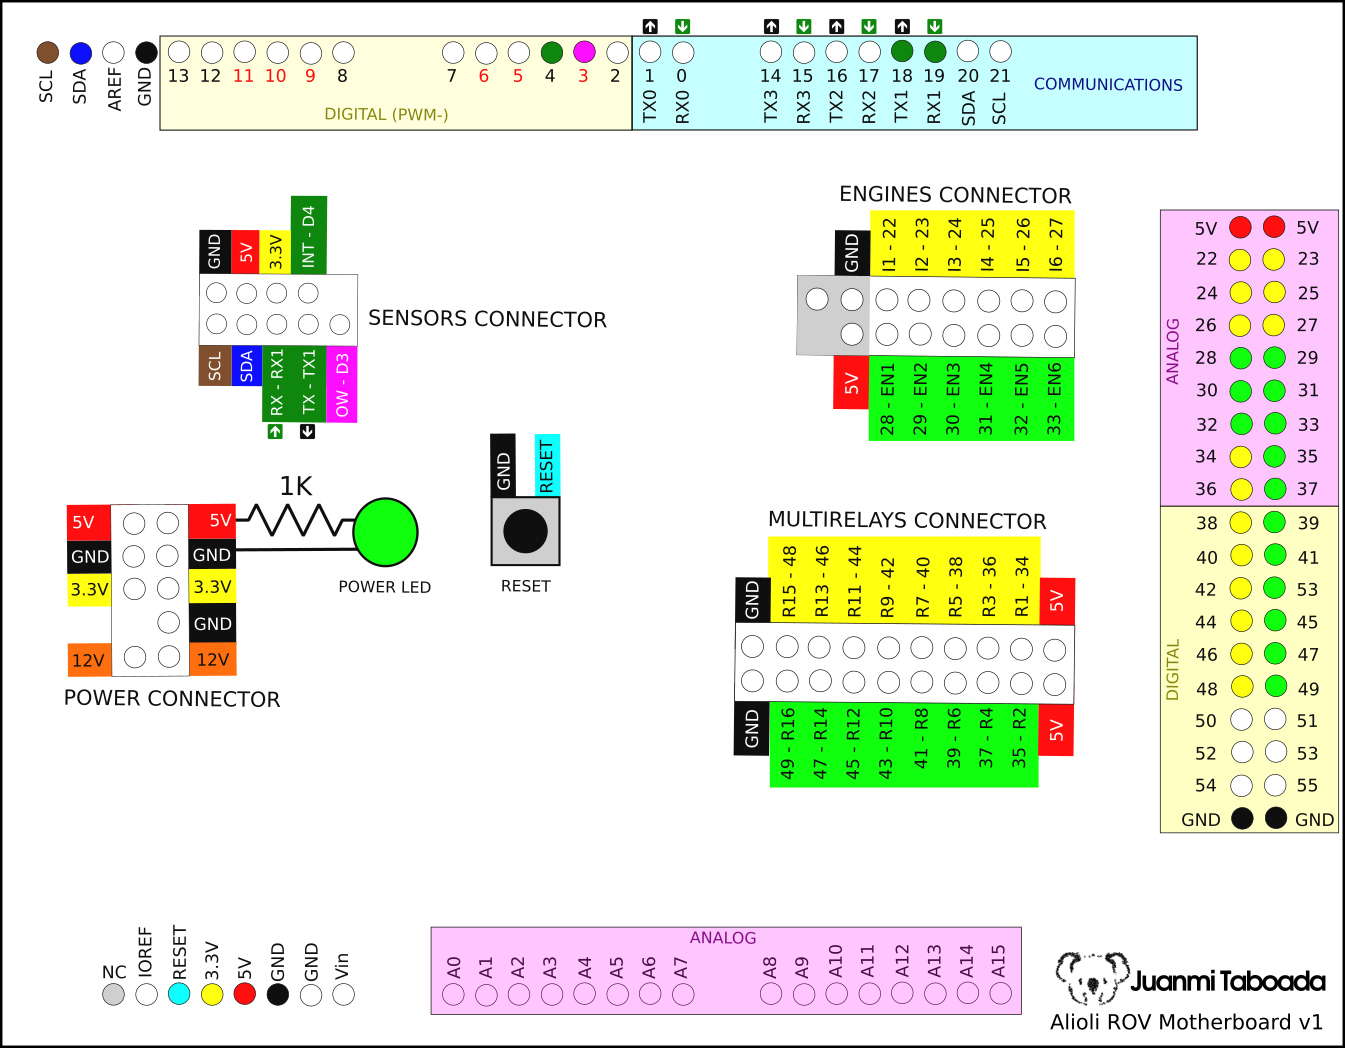
Following the next schema:
And I got this as a result:
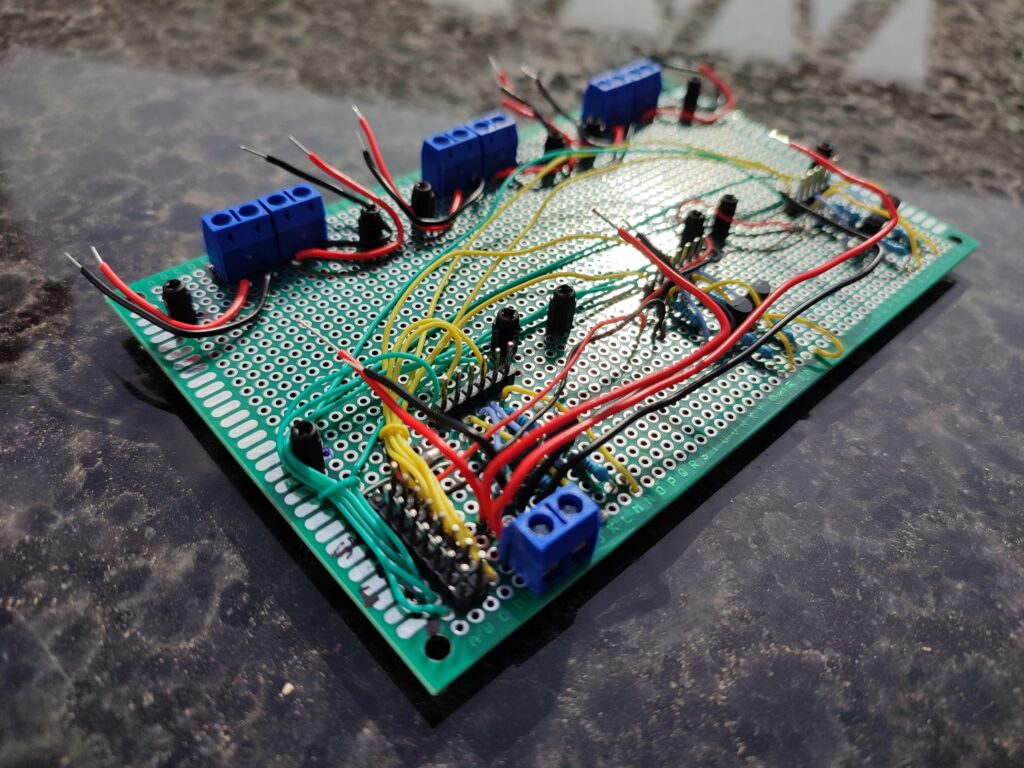
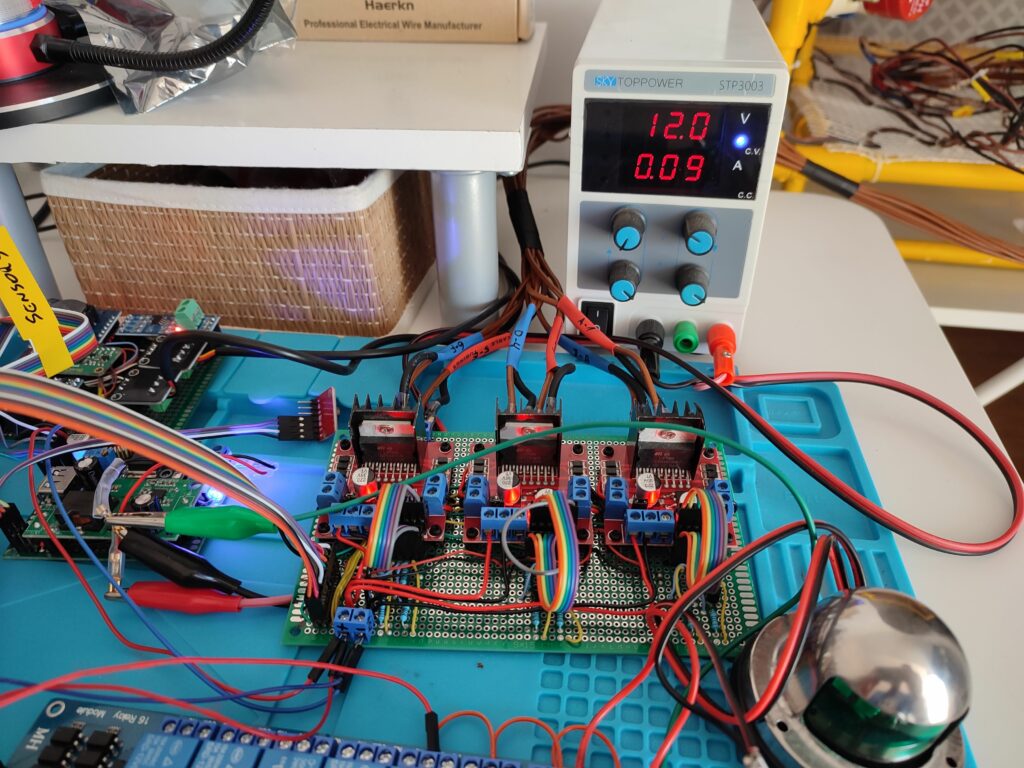
Finally the test
Then I connected everything, and it was working as I expected:
Sensors and MotherboardSensors and Motherboard
The next video shows everything working as expected. There will be a warning at the beginning saying that MPU6050 is not connected (yes, it is right, I changed it for BNO055 from Bosh). The video also shows the test for engines (usually, I have disabled this test), but I enabled it for the video to show that the driver board for the engines is working perfectly. During the test, each engine will rotate forward and backwards. After the engines, Alioli will say hello, doing a dance flashing red and green lights in a specific way.
Everything working with the original version of the software
Muy buen trabajo JuanMi, lo sigo desde que empezaste con estas publicaciones.
Soy un aficionado al Arduino y al submarinismo, pero con muy pocos conocimientos de las dos actividades.
También estoy haciendo un ROV con Arduino, pero no lo tengo tan avanzado como tú. He pasado mucho tiempo atascado con el programa, ahora parece que veo la luz al final del túnel.
Empece siguiendo los pasos de https://www.techmonkeybusiness.com/category/tech-projects.html
pero mi proyecto ha cambiado bastante, lo tengo subido a Github, por si te interesa https://github.com/asesorplaza1/Programas-ROV-en-evolucion
Muchas gracias, yo también soy buceador (este verano me hice el curso avanzado el cual te recomiendo…en especial el buceo nocturno). Yo soy informático de base y no he tenido contacto con la electrónica más allá de lo que he aprendido poco a poco por mi cuenta. Lo que hago es resultado de leer mucho y experimentar, no todo sale a la primera.
He estado ojeando tu proyecto y me han surgido algunas dudas. El sensor de proximidad E18D80NK que has elegido, ¿funciona bajo el agua? ¿hasta que distancia?. ¿Los leds? ¿qué consumo tienen y cuantos lúmenes generan?.
Yo estoy trabajando con un láser de alta potencia y usando software para hacer fotogrametría con el fin de poder mapear estructuras. Cuando tenga resultados concluyentes los publicaré aquí.
I have experimented very much with photogrammetry and got exciting results. This article talks about this experience. These experiments were done together with Andalú Sea and my friend Juan Soler. During underwater operations, we always record videos of the whole process just in case of problems and for documentation purposes. We checked a sewage outfall […]
Llevo buscando unos días fuentes para mi ordenador para enseñar a mis hijos a leer y escribir….finalmente he conseguido montar una colección bastante buena y he decidido compartirlo con vosotros ya que yo las he conseguido de forma gratuita y además he detectado que existe gente que las vende por más de 60€, lo que […]


Muy buen trabajo JuanMi, lo sigo desde que empezaste con estas publicaciones.
Soy un aficionado al Arduino y al submarinismo, pero con muy pocos conocimientos de las dos actividades.
También estoy haciendo un ROV con Arduino, pero no lo tengo tan avanzado como tú. He pasado mucho tiempo atascado con el programa, ahora parece que veo la luz al final del túnel.
Empece siguiendo los pasos de https://www.techmonkeybusiness.com/category/tech-projects.html
pero mi proyecto ha cambiado bastante, lo tengo subido a Github, por si te interesa https://github.com/asesorplaza1/Programas-ROV-en-evolucion
Un saludo
Muchas gracias, yo también soy buceador (este verano me hice el curso avanzado el cual te recomiendo…en especial el buceo nocturno). Yo soy informático de base y no he tenido contacto con la electrónica más allá de lo que he aprendido poco a poco por mi cuenta. Lo que hago es resultado de leer mucho y experimentar, no todo sale a la primera.
He estado ojeando tu proyecto y me han surgido algunas dudas. El sensor de proximidad E18D80NK que has elegido, ¿funciona bajo el agua? ¿hasta que distancia?. ¿Los leds? ¿qué consumo tienen y cuantos lúmenes generan?.
Te he mandado un correo mas extenso.
El sensor infrarrojos mide a 80 cm
Los focos son unos LEXAN que encontré en Leroy Merlin
Los focos son unos LEXAN a 12 voltios, que encontré en Leroy Merlin
Un saludo
Yo estoy trabajando con un láser de alta potencia y usando software para hacer fotogrametría con el fin de poder mapear estructuras. Cuando tenga resultados concluyentes los publicaré aquí.