Programación
Waterlinked GPS inside
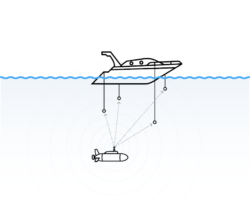
During our operations, very often, we use a Waterlinked Underwater GPS. This helps us to keep track in 3D of our movements and link video recording’s timing and telemetry to...
Filter by Category
Filter by Author

During our operations, very often, we use a Waterlinked Underwater GPS. This helps us to keep track in 3D of our movements and link video recording’s timing and telemetry to...

I have experimented very much with photogrammetry and got exciting results. This article talks about this experience. These experiments were done together with Andalú Sea and my...
In my last post, “Alioli ROV Boards“, I described most of the hardware I use to build Alioli ROV and how I plan to use it. In this post, I show how the UAV submarine...

In my last post, “Get your hardware for Arduino Underwater ROV”, I described most of the hardware I use to build Alioli ROV and how I plan to use it. In this post, I...

In my last post, “Finishing the frame for an Underwater ROV”, I gave all details about the design I used to build the frame for Alioli Underwater ROV. In this post, I...

In my last post, “How I designed the frame for my Underwater ROV“, I gave all details about the design I used for the frame for Alioli Underwater ROV. In this post, I...
In my last post, “Underwater Alioli ROV“, I shared all the information I got from the Internet to build my Underwater ROV. In this post, I will explain how I made the...
This time I have decided to write this article in English because I have been able to get a lot of information. Thanks to that, most of the information I found to help me with...
🇬🇧 Read it in English, “GenCreate, GenUpdate, GenDetail and GenDelete“ En el último artículo describíamos Codenerix GenList para comenzar a usar los listados de CODENERIX. Ha...

🇬🇧 Read it in English, “GenList“ Anteriormente hablábamos sobre CodenerixModel para entender como se construye un modelo funcional con CODENERIX. Sin embargo, para que...
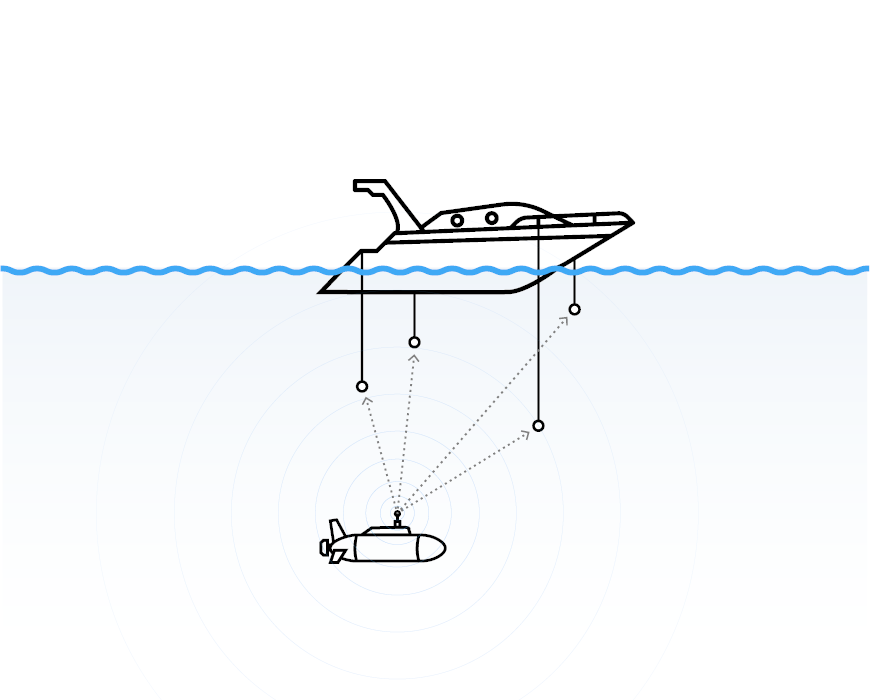
During our operations, very often, we use a Waterlinked Underwater GPS. This helps us to keep track in 3D of our movements and link video recording’s timing and telemetry to specific places. These experiments were done together with Andalú Sea. Some examples of these 3D tracks are:
Thanks to this technology, we can position the ROV when it is under the water, but…
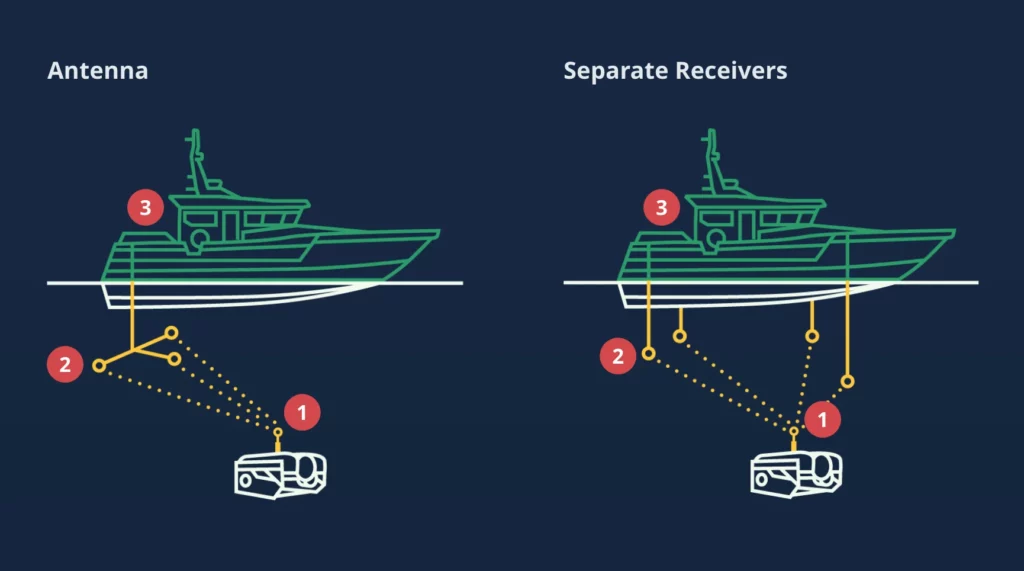
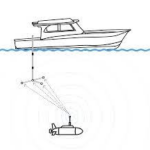
Using the Master Waterlinked GPS System (3), the boat knows the ROV’s position under the water thanks to some pulses that the ROV is sending using a Locator (1) installed. This Locator (1) sends pulses every n-seconds, and those pulses are listened to by the Antenna or Receivers (2), which transmits those pulses to the Master (3).
In general, the Master (3) can compute a lot of information about positioning:
To determine the relationship between Acoustic and Global positioning, the Waterlinked GPS requires pairing the Locator (1) with the Master (3) before getting to the water.
The Locator (1), which has a GPS Chip installed, can synchronize its timing with the available GPS satellites. Once the Locator (1) is synchronized, it sends pulses.
The Master (3) is also synchronized with the available GPS satellites and will start reading those pulses.
When Antenna (2) is set, the system can accurately find out the position of the ROV (distance from the antenna) using synchronized timing. The Master (3) knows when precisely the Locator is sending its pulses. Now it can infer the delay and the distance from each Receiver in the Antenna (2) to the Locator (1).
The rest is just maths.
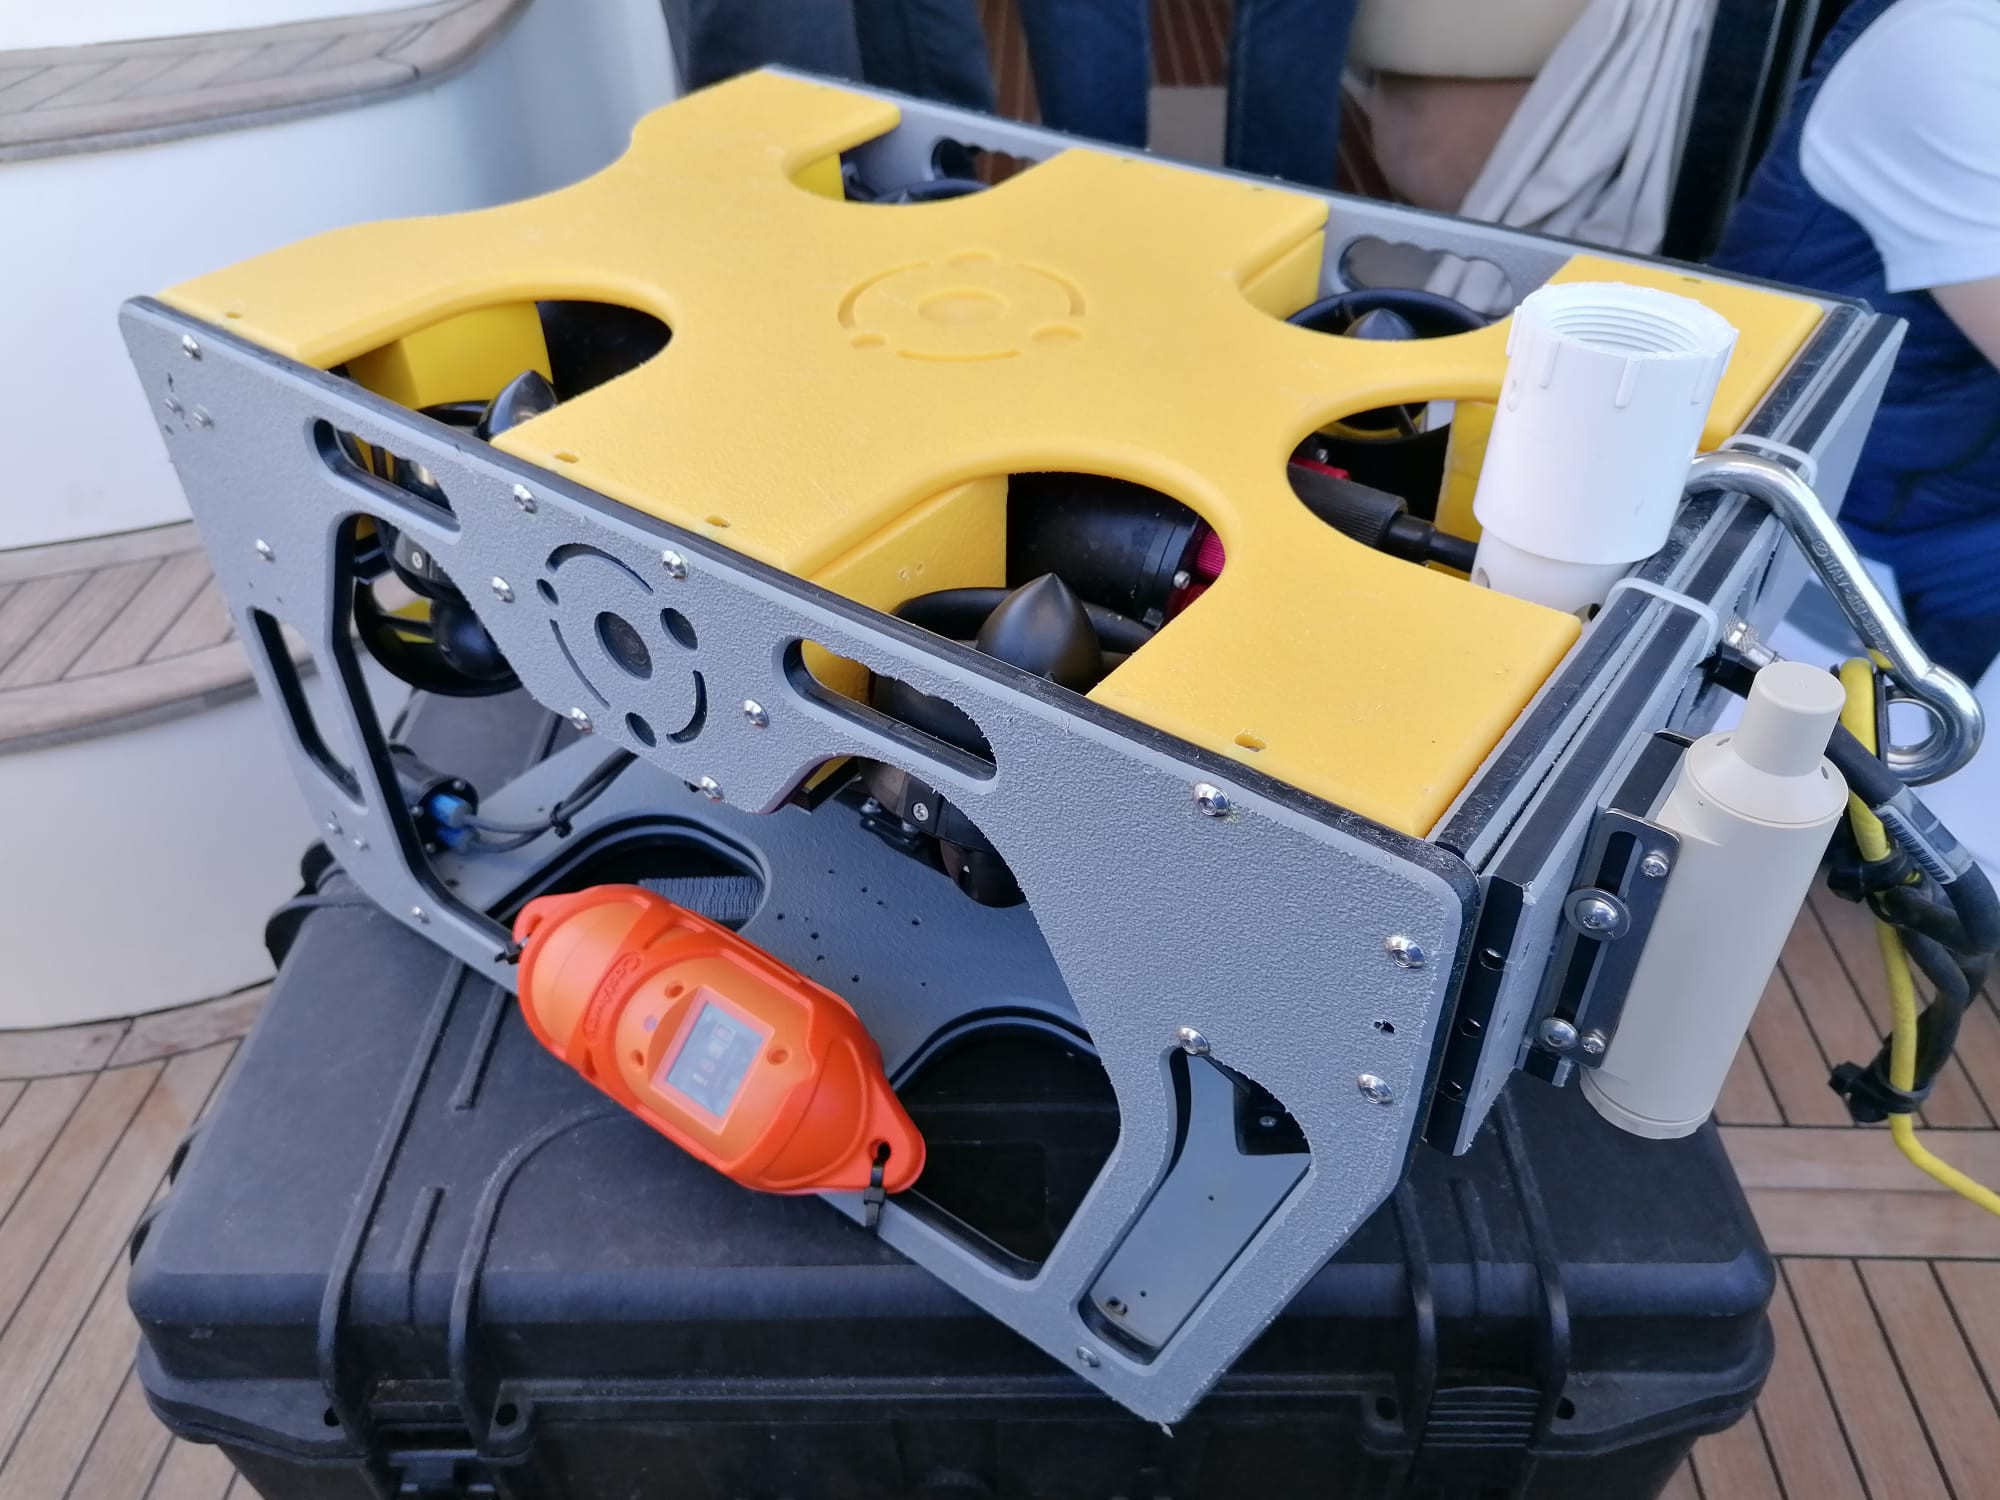
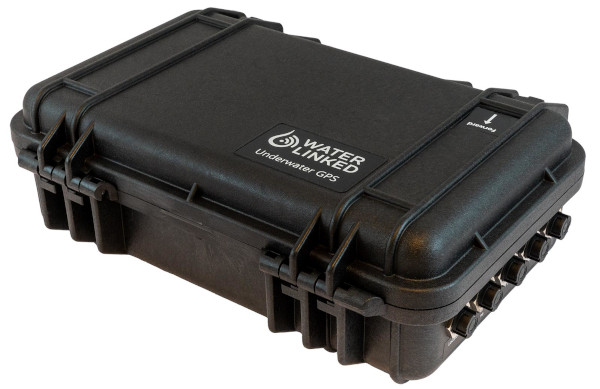
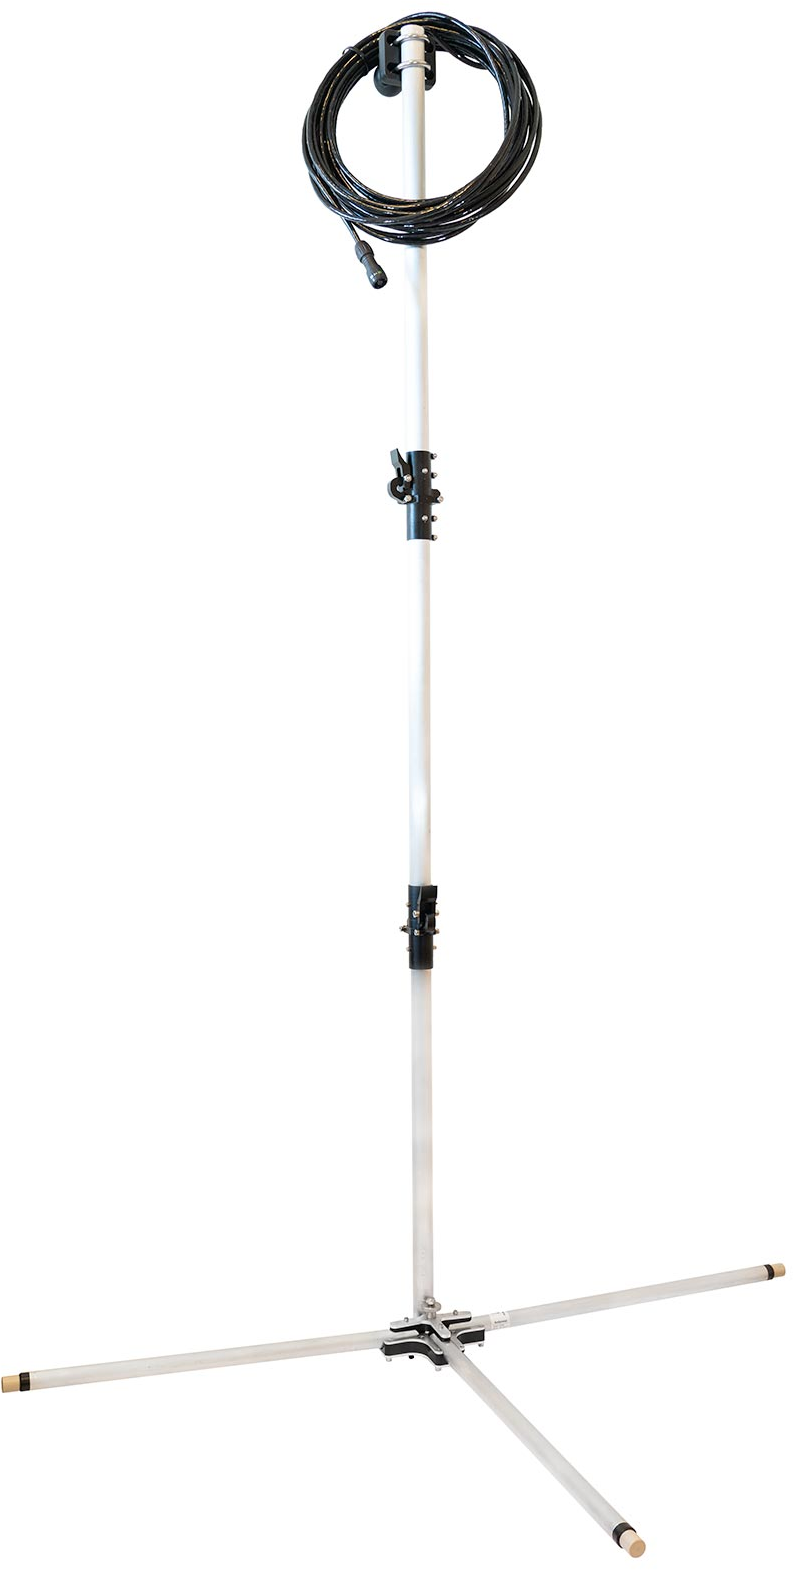
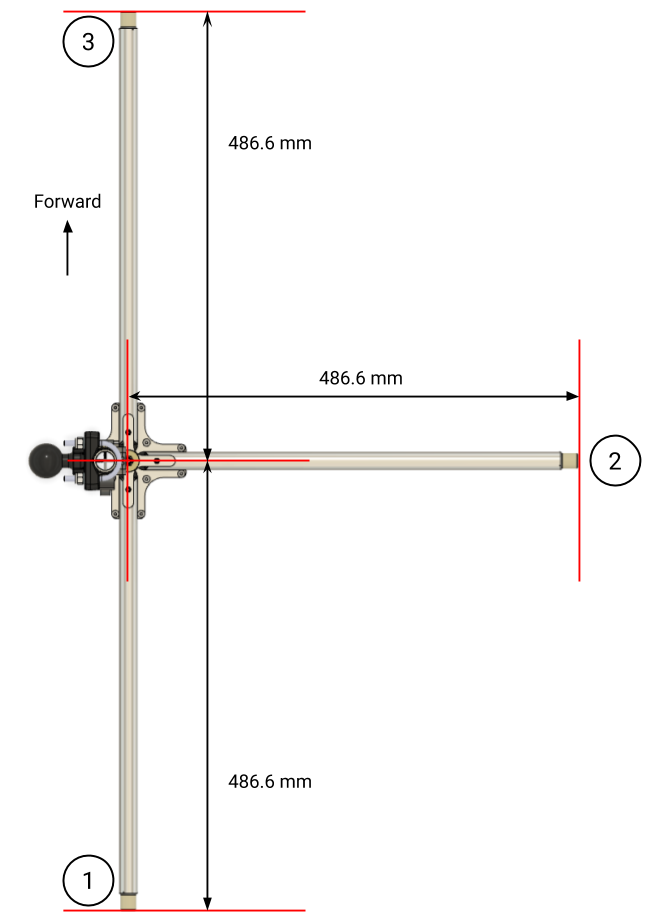
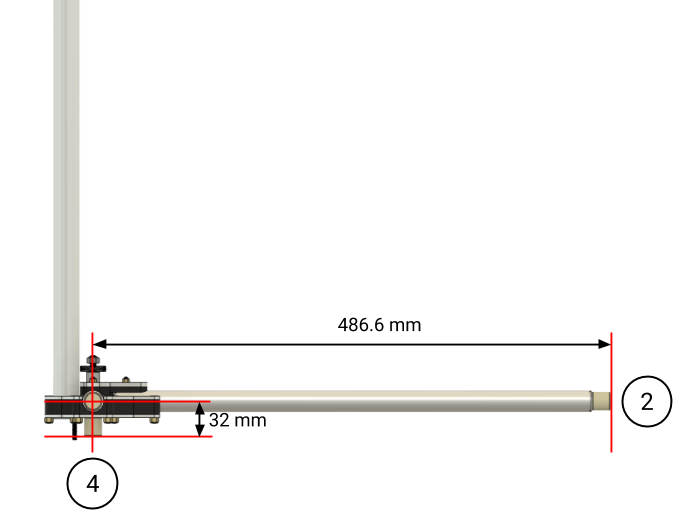
Our Waterlinked GPS is set up with an Antenna (2).
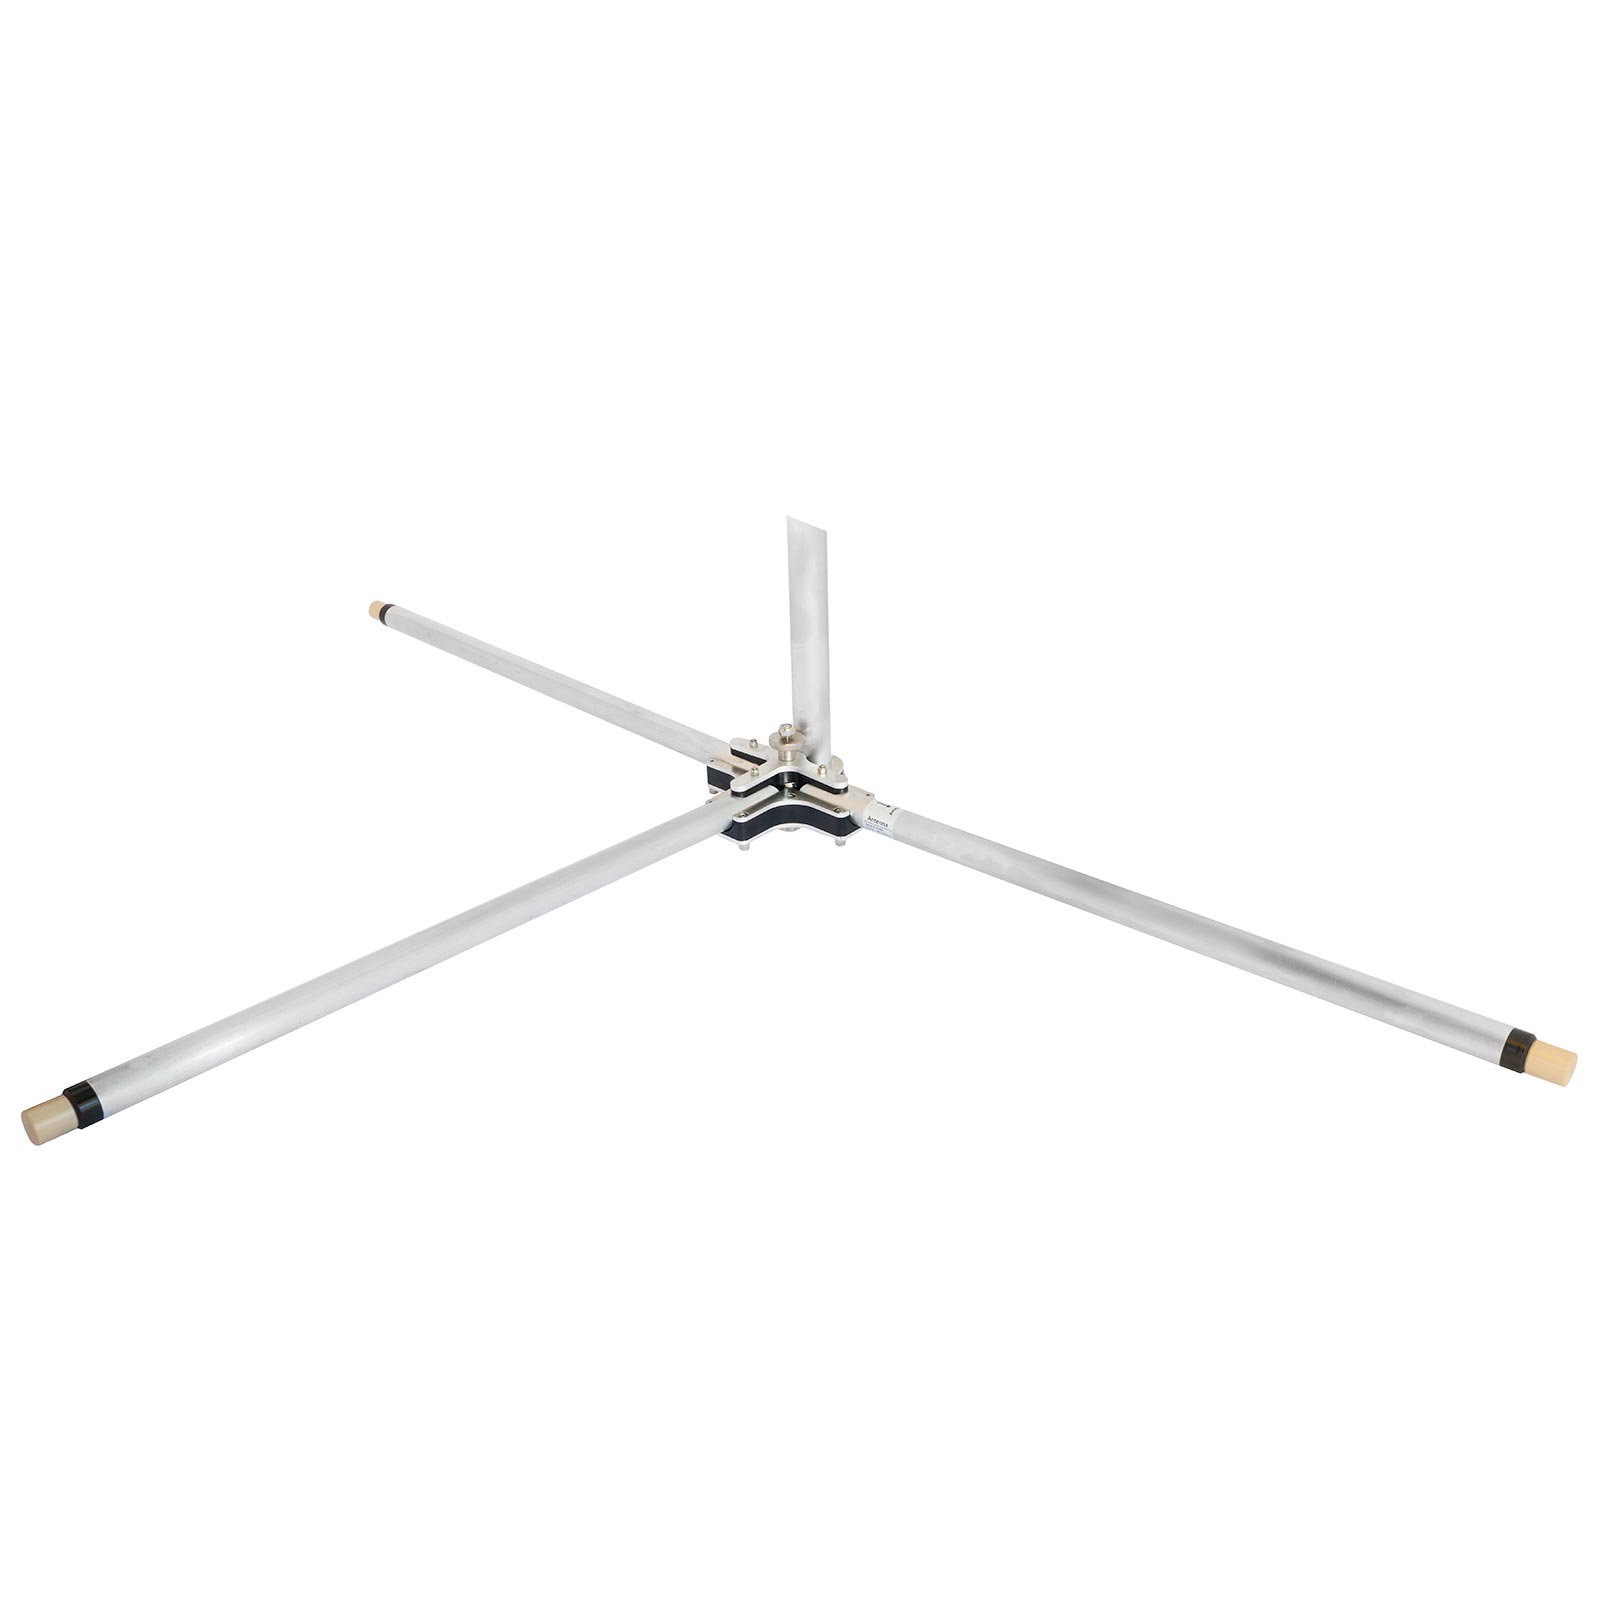
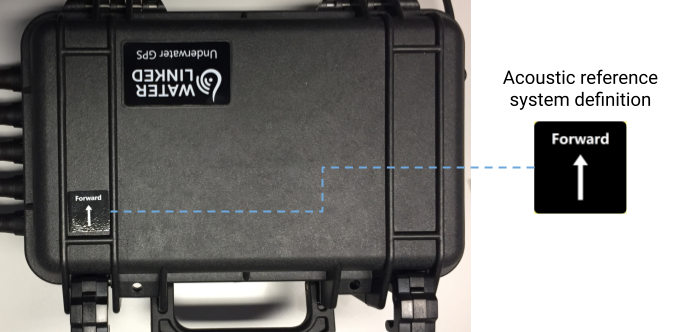
The first thing to do is to attach it properly to the boat, so it will not move. Both the Antenna (2) and the Master (3) have a printed arrow on them, so it is mandatory to point both in the same direction when the Antenna (2) and the Master (3) is attached to the boat.
Close correctly the Locator (1), link it with Master (3), attach it to your ROV, and put it in the water (so it will start sending its position):
Start the pairing process as pointed by the instructions, and once ready, your ROV is prepared for duty.
You can get the full User Manual for Waterlinked GPS here.
I did a few basic programs to read data from a Waterlinked GPS and save it in files. Then others can plot the information on your screen using Matplotlib or convert it to GPX or KML format used by Google Maps.
You can find those visiting Waterlinked GPS on GitHub.
The system is composed by:
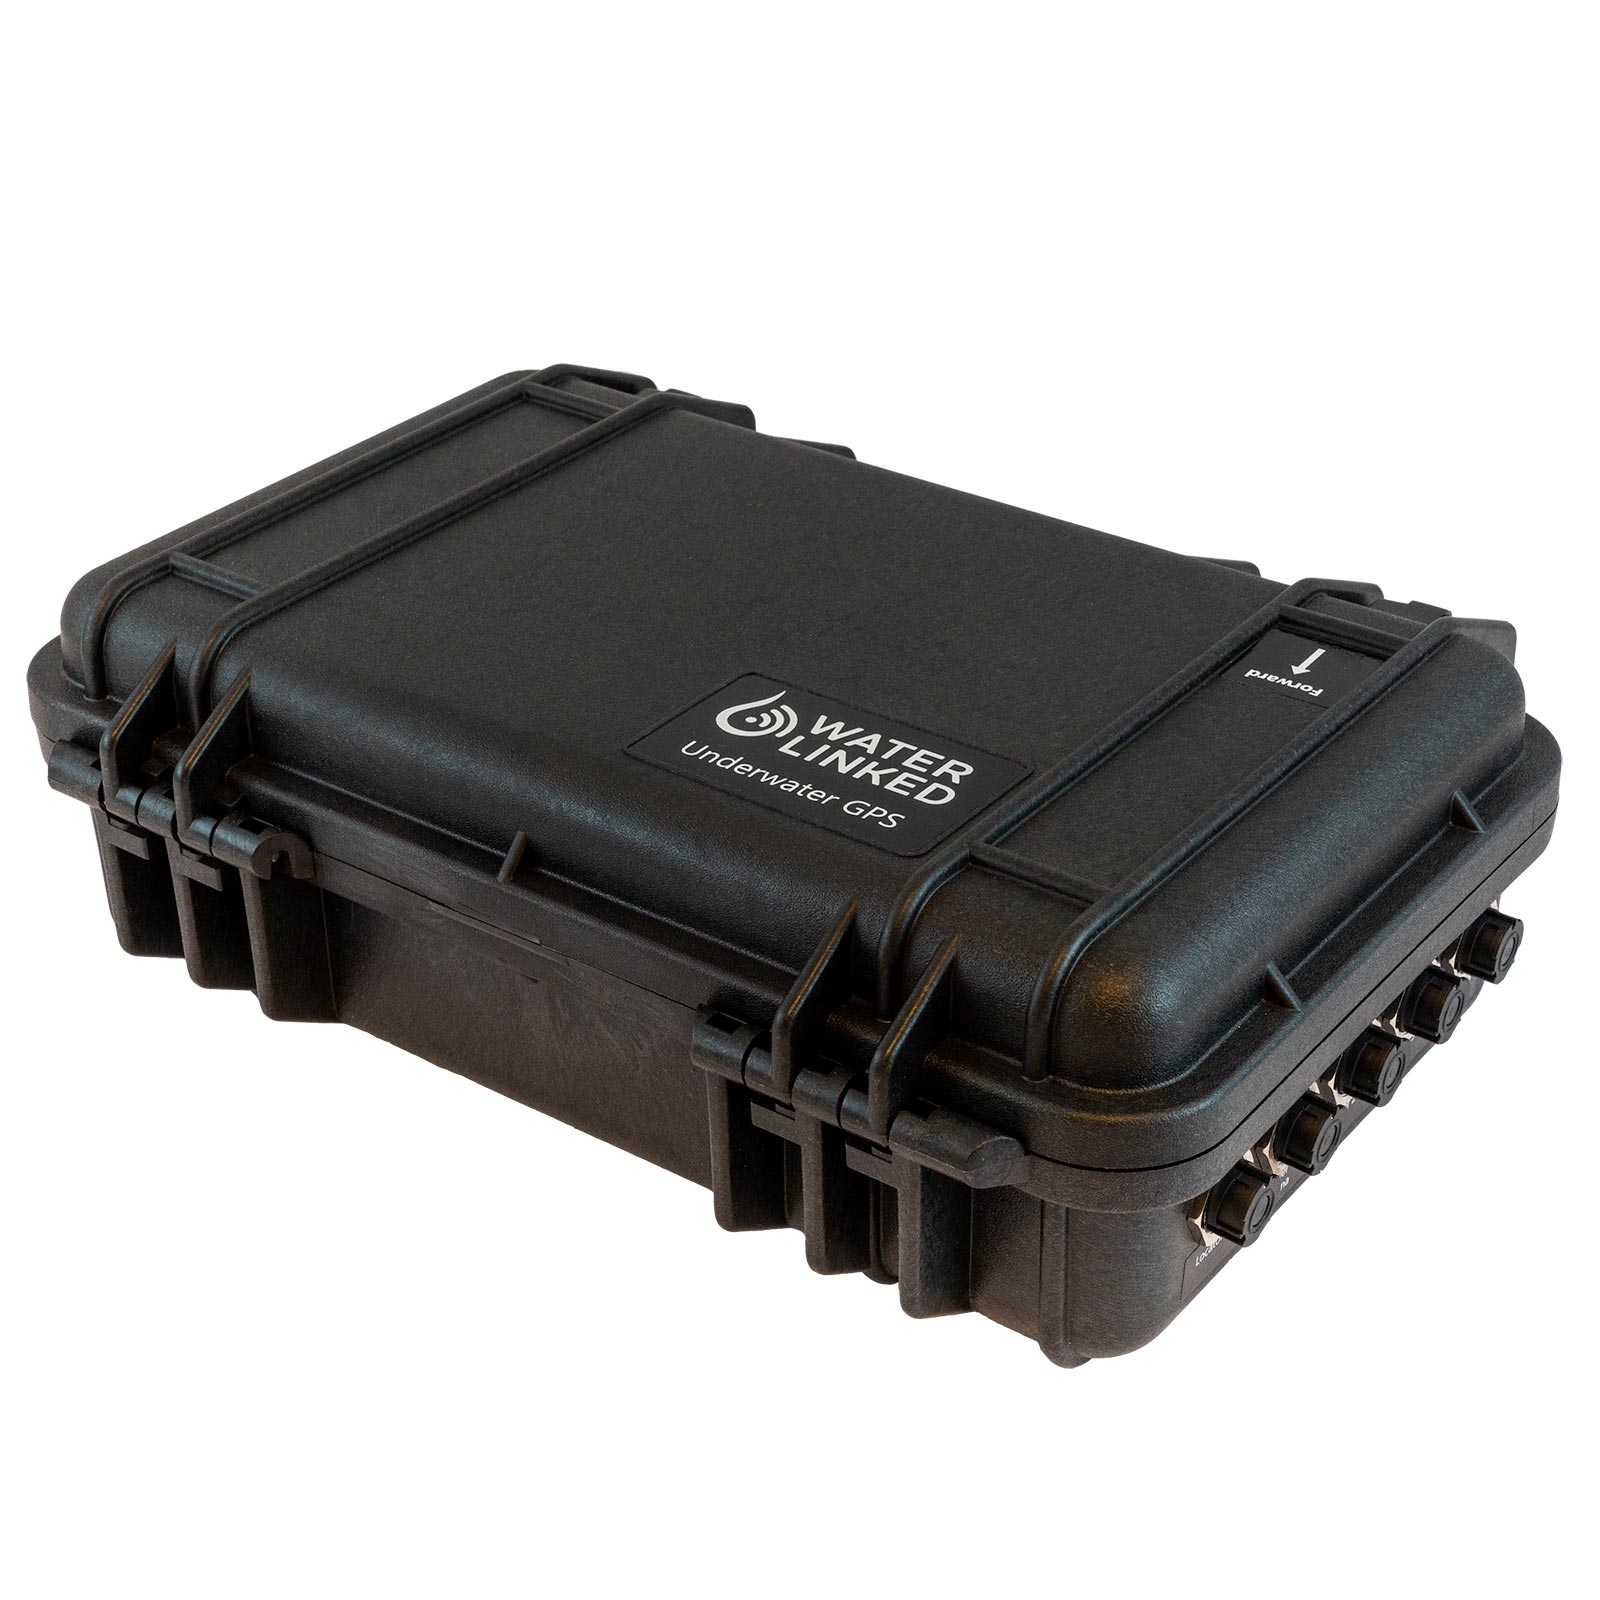
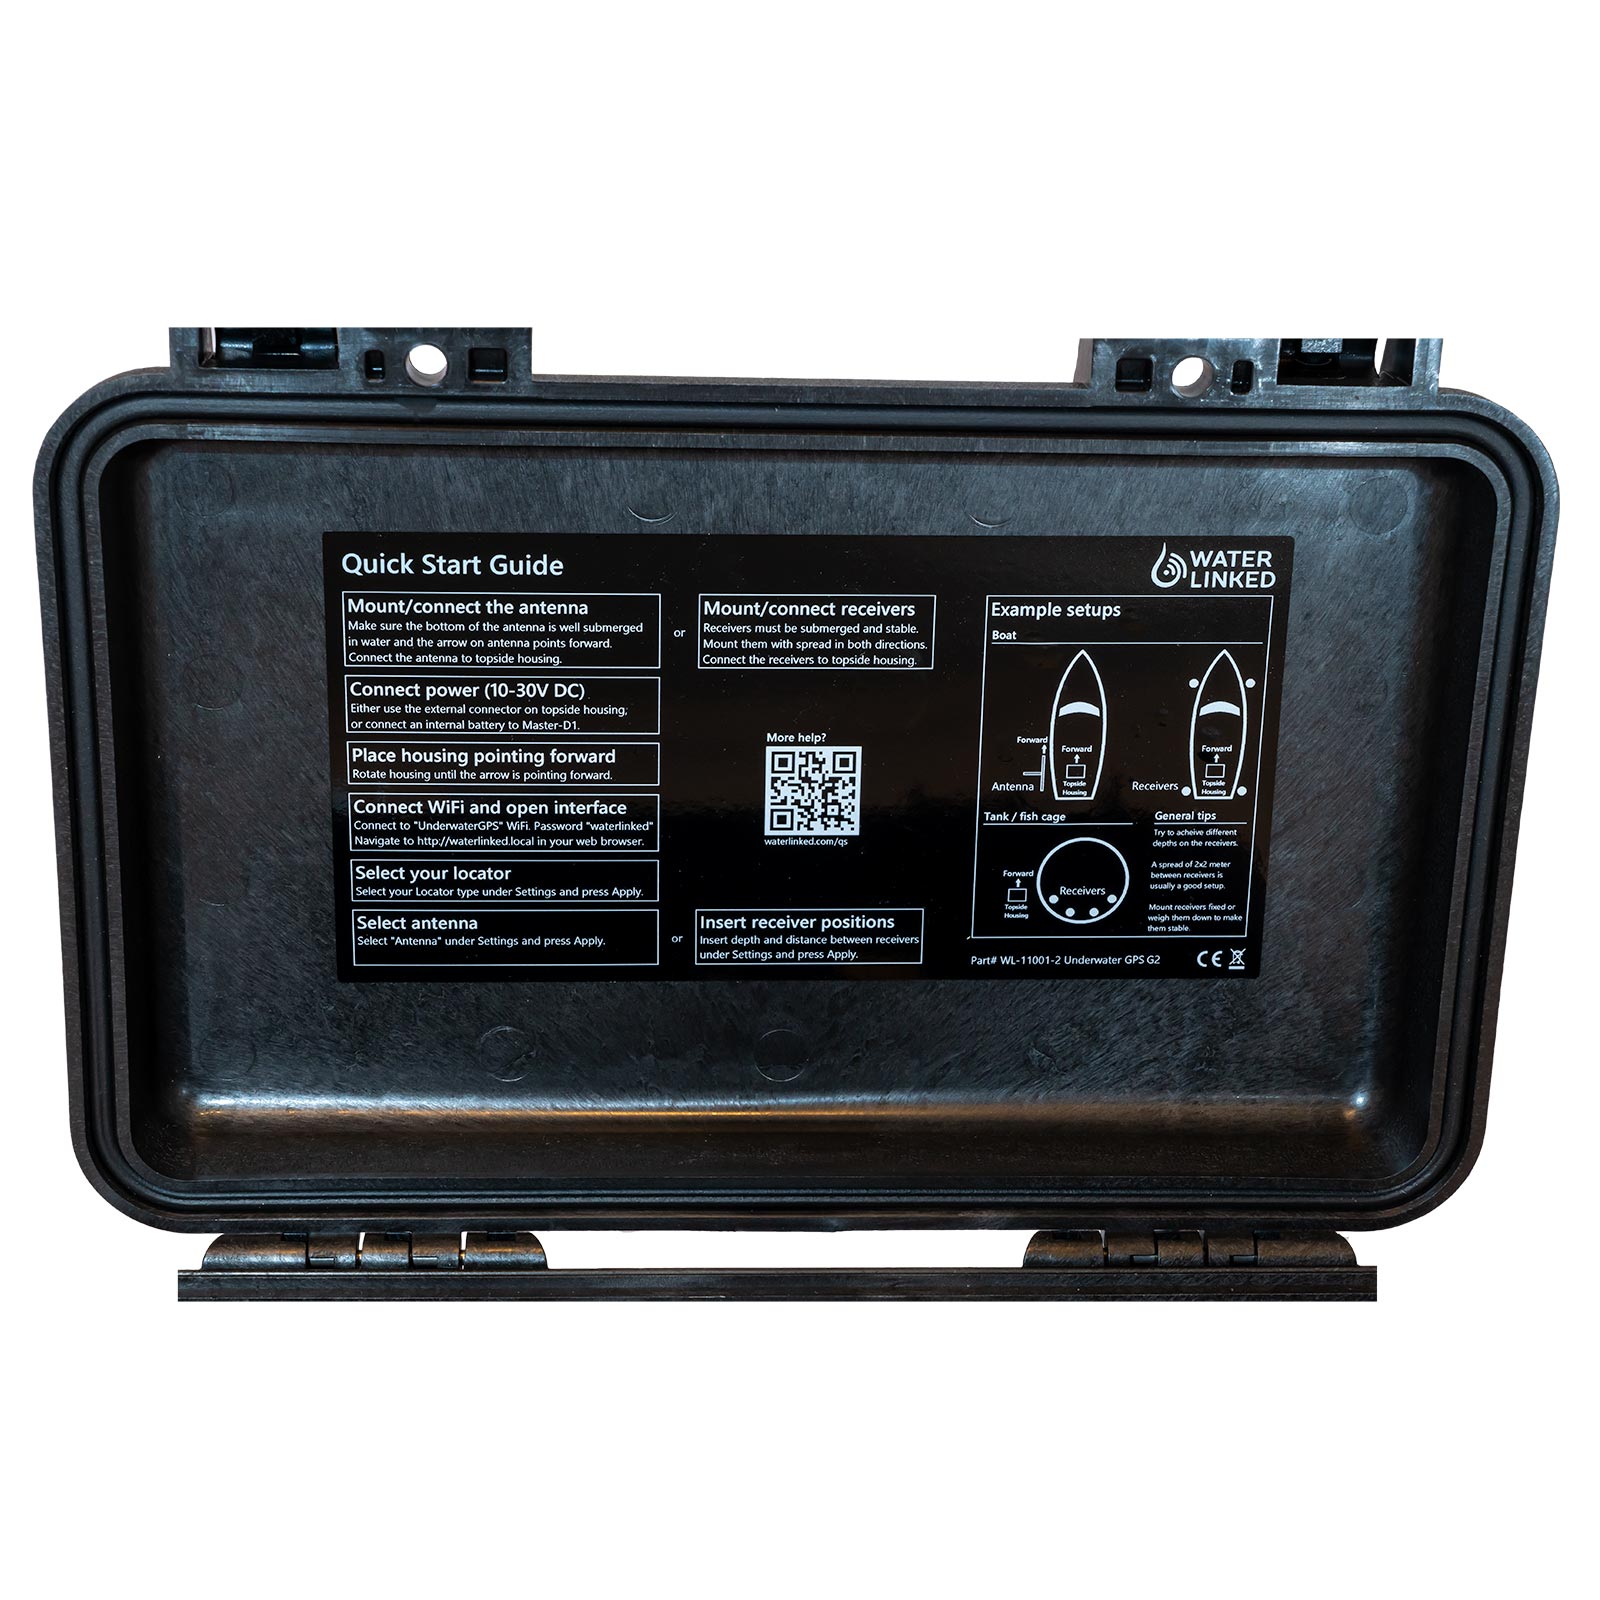
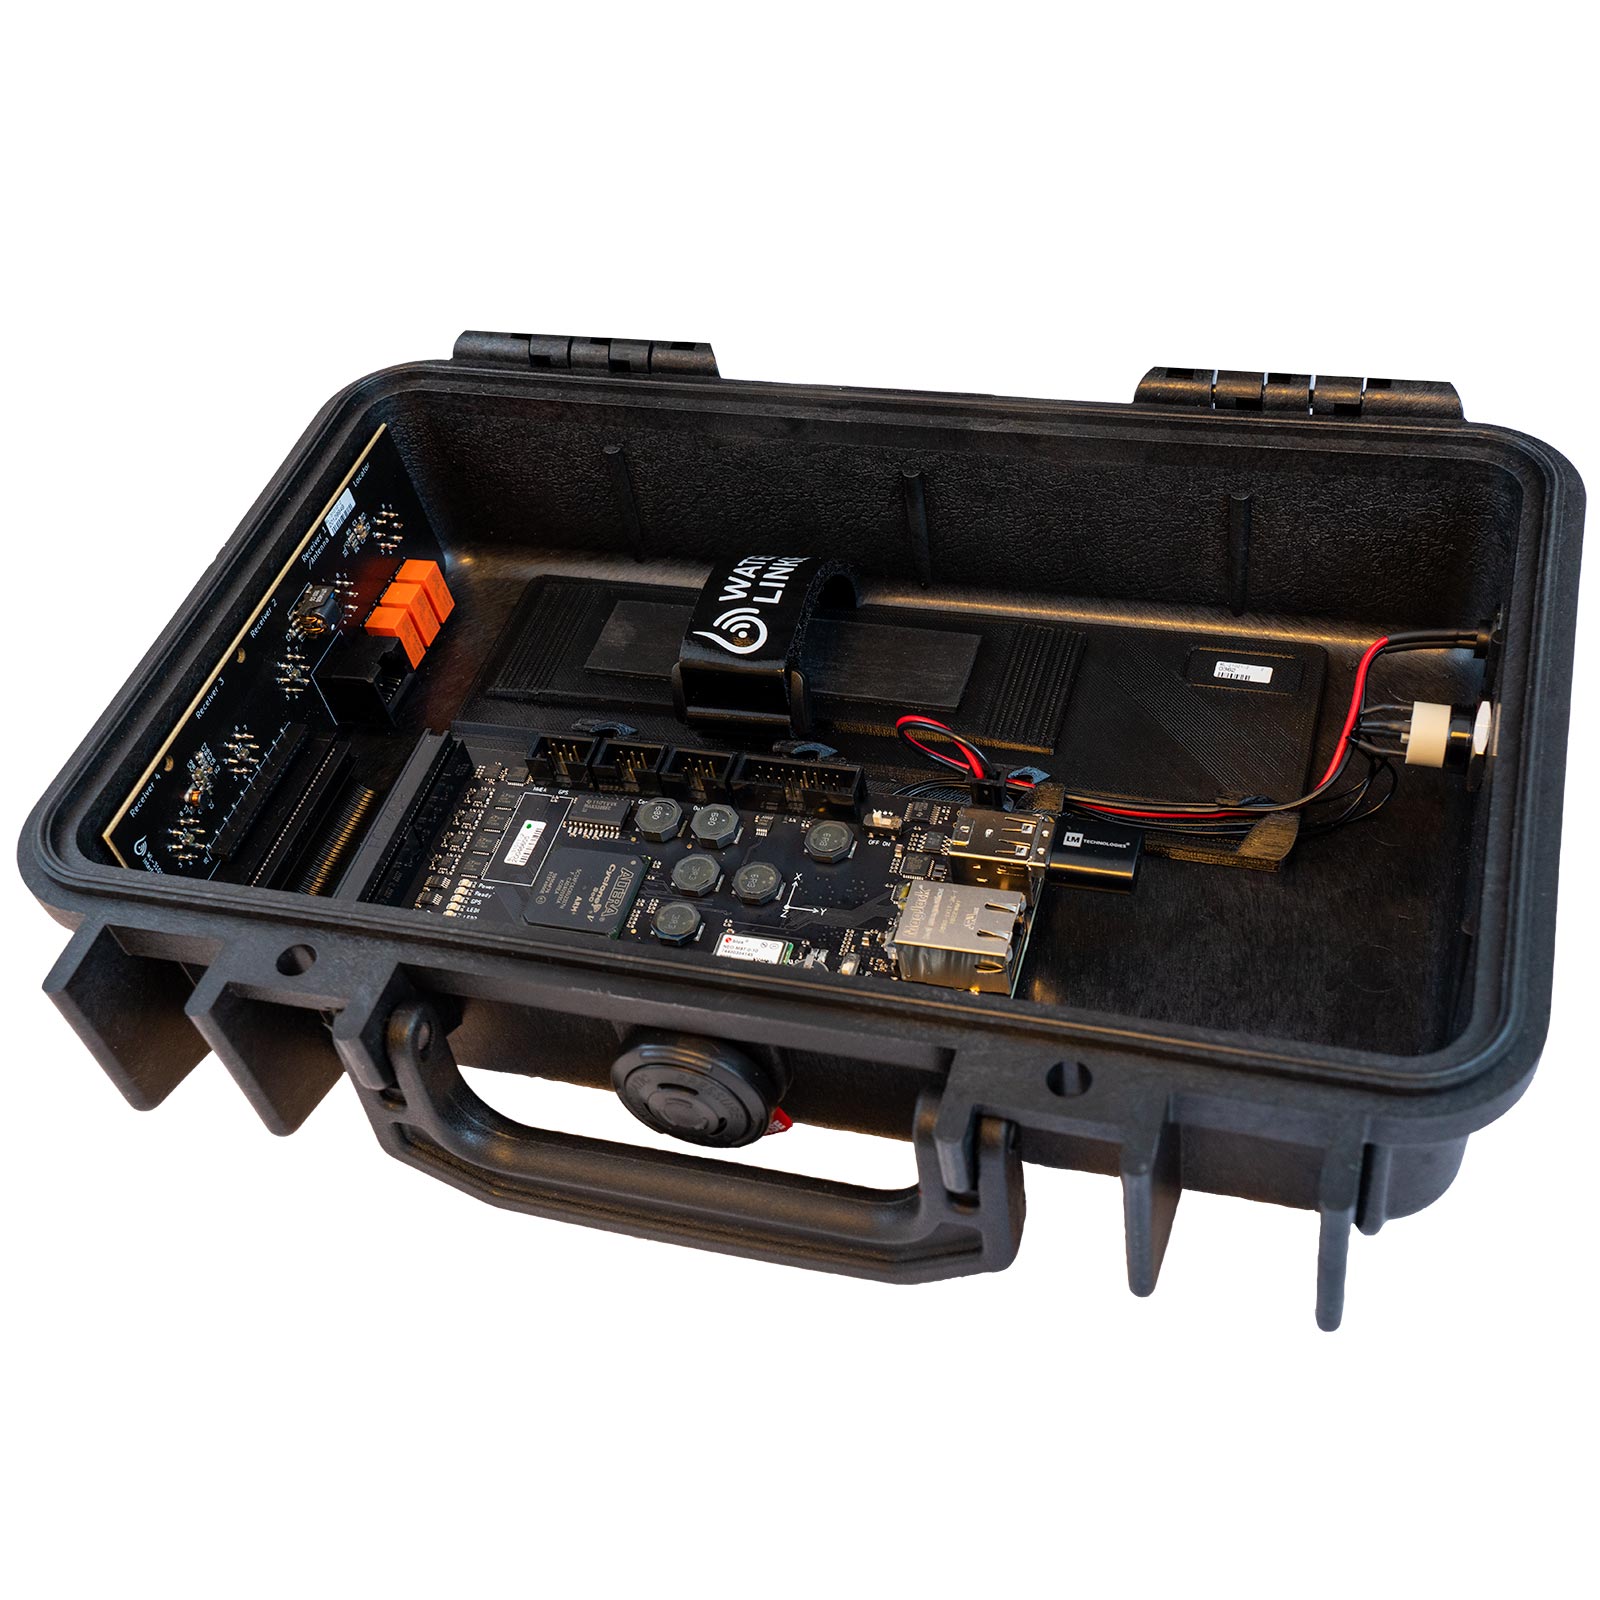
1.- Master (3), a connection box outside the water that will communicate with the computer using a wifi connection (the box works in AP mode with ESSID “UnderwaterGPS” and Password “waterlinked”, the connection box will not deliver a DHCP connection so you must set your own one using 192.168.7.x IP address):
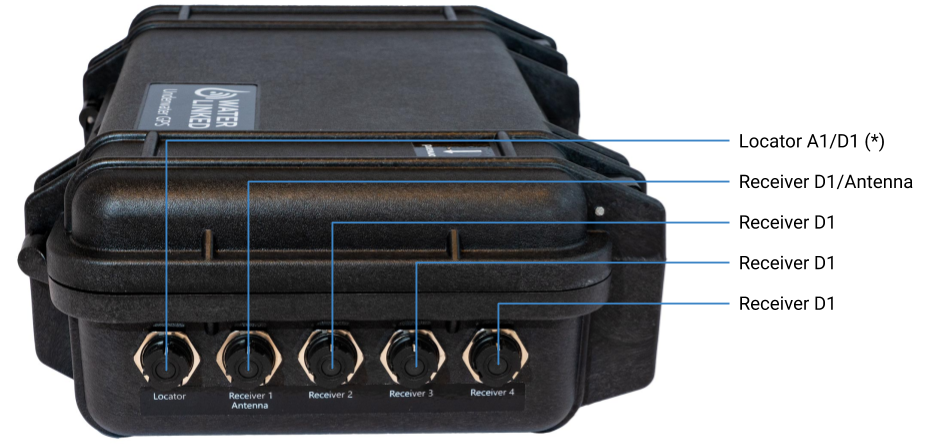
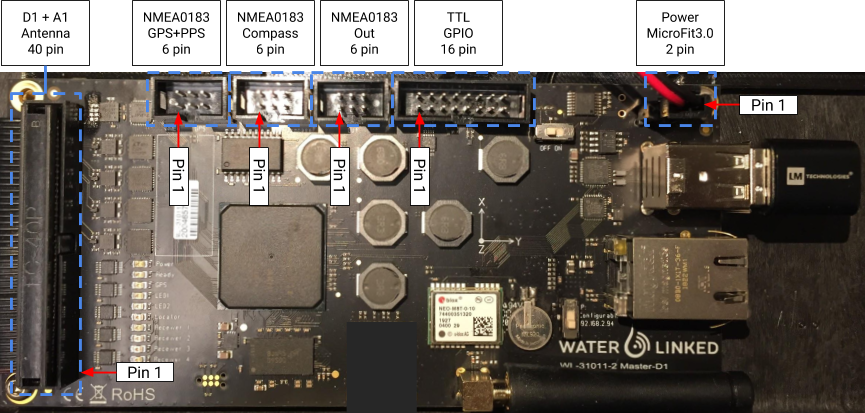
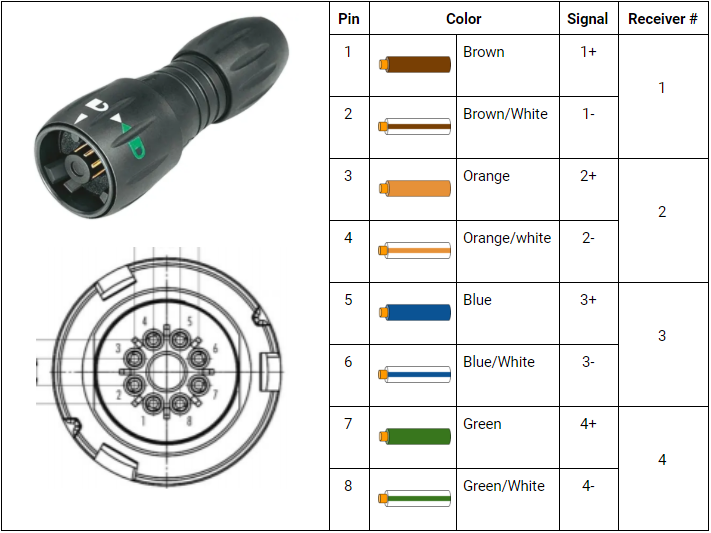
40-pin Molex Interface
| Signal | Pin | Pin | Signal | Function |
|---|---|---|---|---|
| GPIO 2* | 1 | 2 | GPIO 3 | |
| D1 TX+ | 3 | 4 | D1 TX- | Locator-D1 |
| D1 RX+ | 5 | 6 | D1 RX- | | |
| GND | 7 | 8 | 12 V | Power out |
| R1 TX+ | 9 | 10 | R1 TX- | Receiver-D1 |
| R1 RX+ | 11 | 12 | R1 RX- | | |
| GND | 13 | 14 | 12 V | Power out |
| R2 TX+ | 15 | 16 | R2 TX- | Receiver-D1 |
| R2 RX+ | 17 | 18 | R2 RX- | | |
| GND | 19 | 20 | 12 V | Power out |
| R3 TX+ | 21 | 22 | R3 TX- | Receiver-D1 |
| R3 RX+ | 23 | 24 | R3 RX- | | |
| GND | 25 | 26 | 12 V | Power out |
| R4 TX+ | 27 | 28 | R4 TX- | Receiver-D1 |
| R4 RX+ | 29 | 30 | R4 RX- | | |
| ANT RX 1+ | 31 | 32 | ANT RX 1- | Antenna |
| ANT RX 2+ | 33 | 34 | ANT RX 2- | | |
| ANT RX 3+ | 35 | 36 | ANT RX 3- | | |
| ANT RX 4+ | 37 | 38 | ANT RX 4- | | |
| A1 TX+ | 39 | 40 | A1 TX- | Locator-A1 |
| Signal | Pin | Pin | Signal |
|---|---|---|---|
| GND | 1 | 2 | 12 V |
| NMEA GPS TX | 3 | 4 | NMEA GPS RX |
| NMEA GPS PPS | 5 | 6 | GND |
| Signal | Pin | Pin | Signal |
|---|---|---|---|
| GND | 1 | 2 | 12 V |
| NMEAS COMPASS TX | 3 | 4 | NMEA COMPASS RX |
| NC | 5 | 6 | GND |
| Signal | Pin | Pin | Signal |
|---|---|---|---|
| GND | 1 | 2 | 12 V |
| NMEA OUT | 3 | 4 | NC |
| NC | 5 | 6 | GND |
| Signal | Pin | Pin | Signal |
|---|---|---|---|
| GND | 1 | 2 | 12 V |
| DNC | 3 | 4 | DNC |
| DNC | 5 | 6 | DNC |
| DNC | 7 | 8 | DNC |
| GND | 9 | 10 | PPS OUT |
| GND | 11 | 12 | PPS IN |
| GPIO 0 | 13 | 14 | GPIO 1 |
| GND | 15 | 16 | 3.3 V |
| Signal | Pin | Pin | Signal |
|---|---|---|---|
| GND | 1 | 2 | VIN* |
2.- Antenna (2), several sensors that will be held underwater near the water line:
3.- API Access:
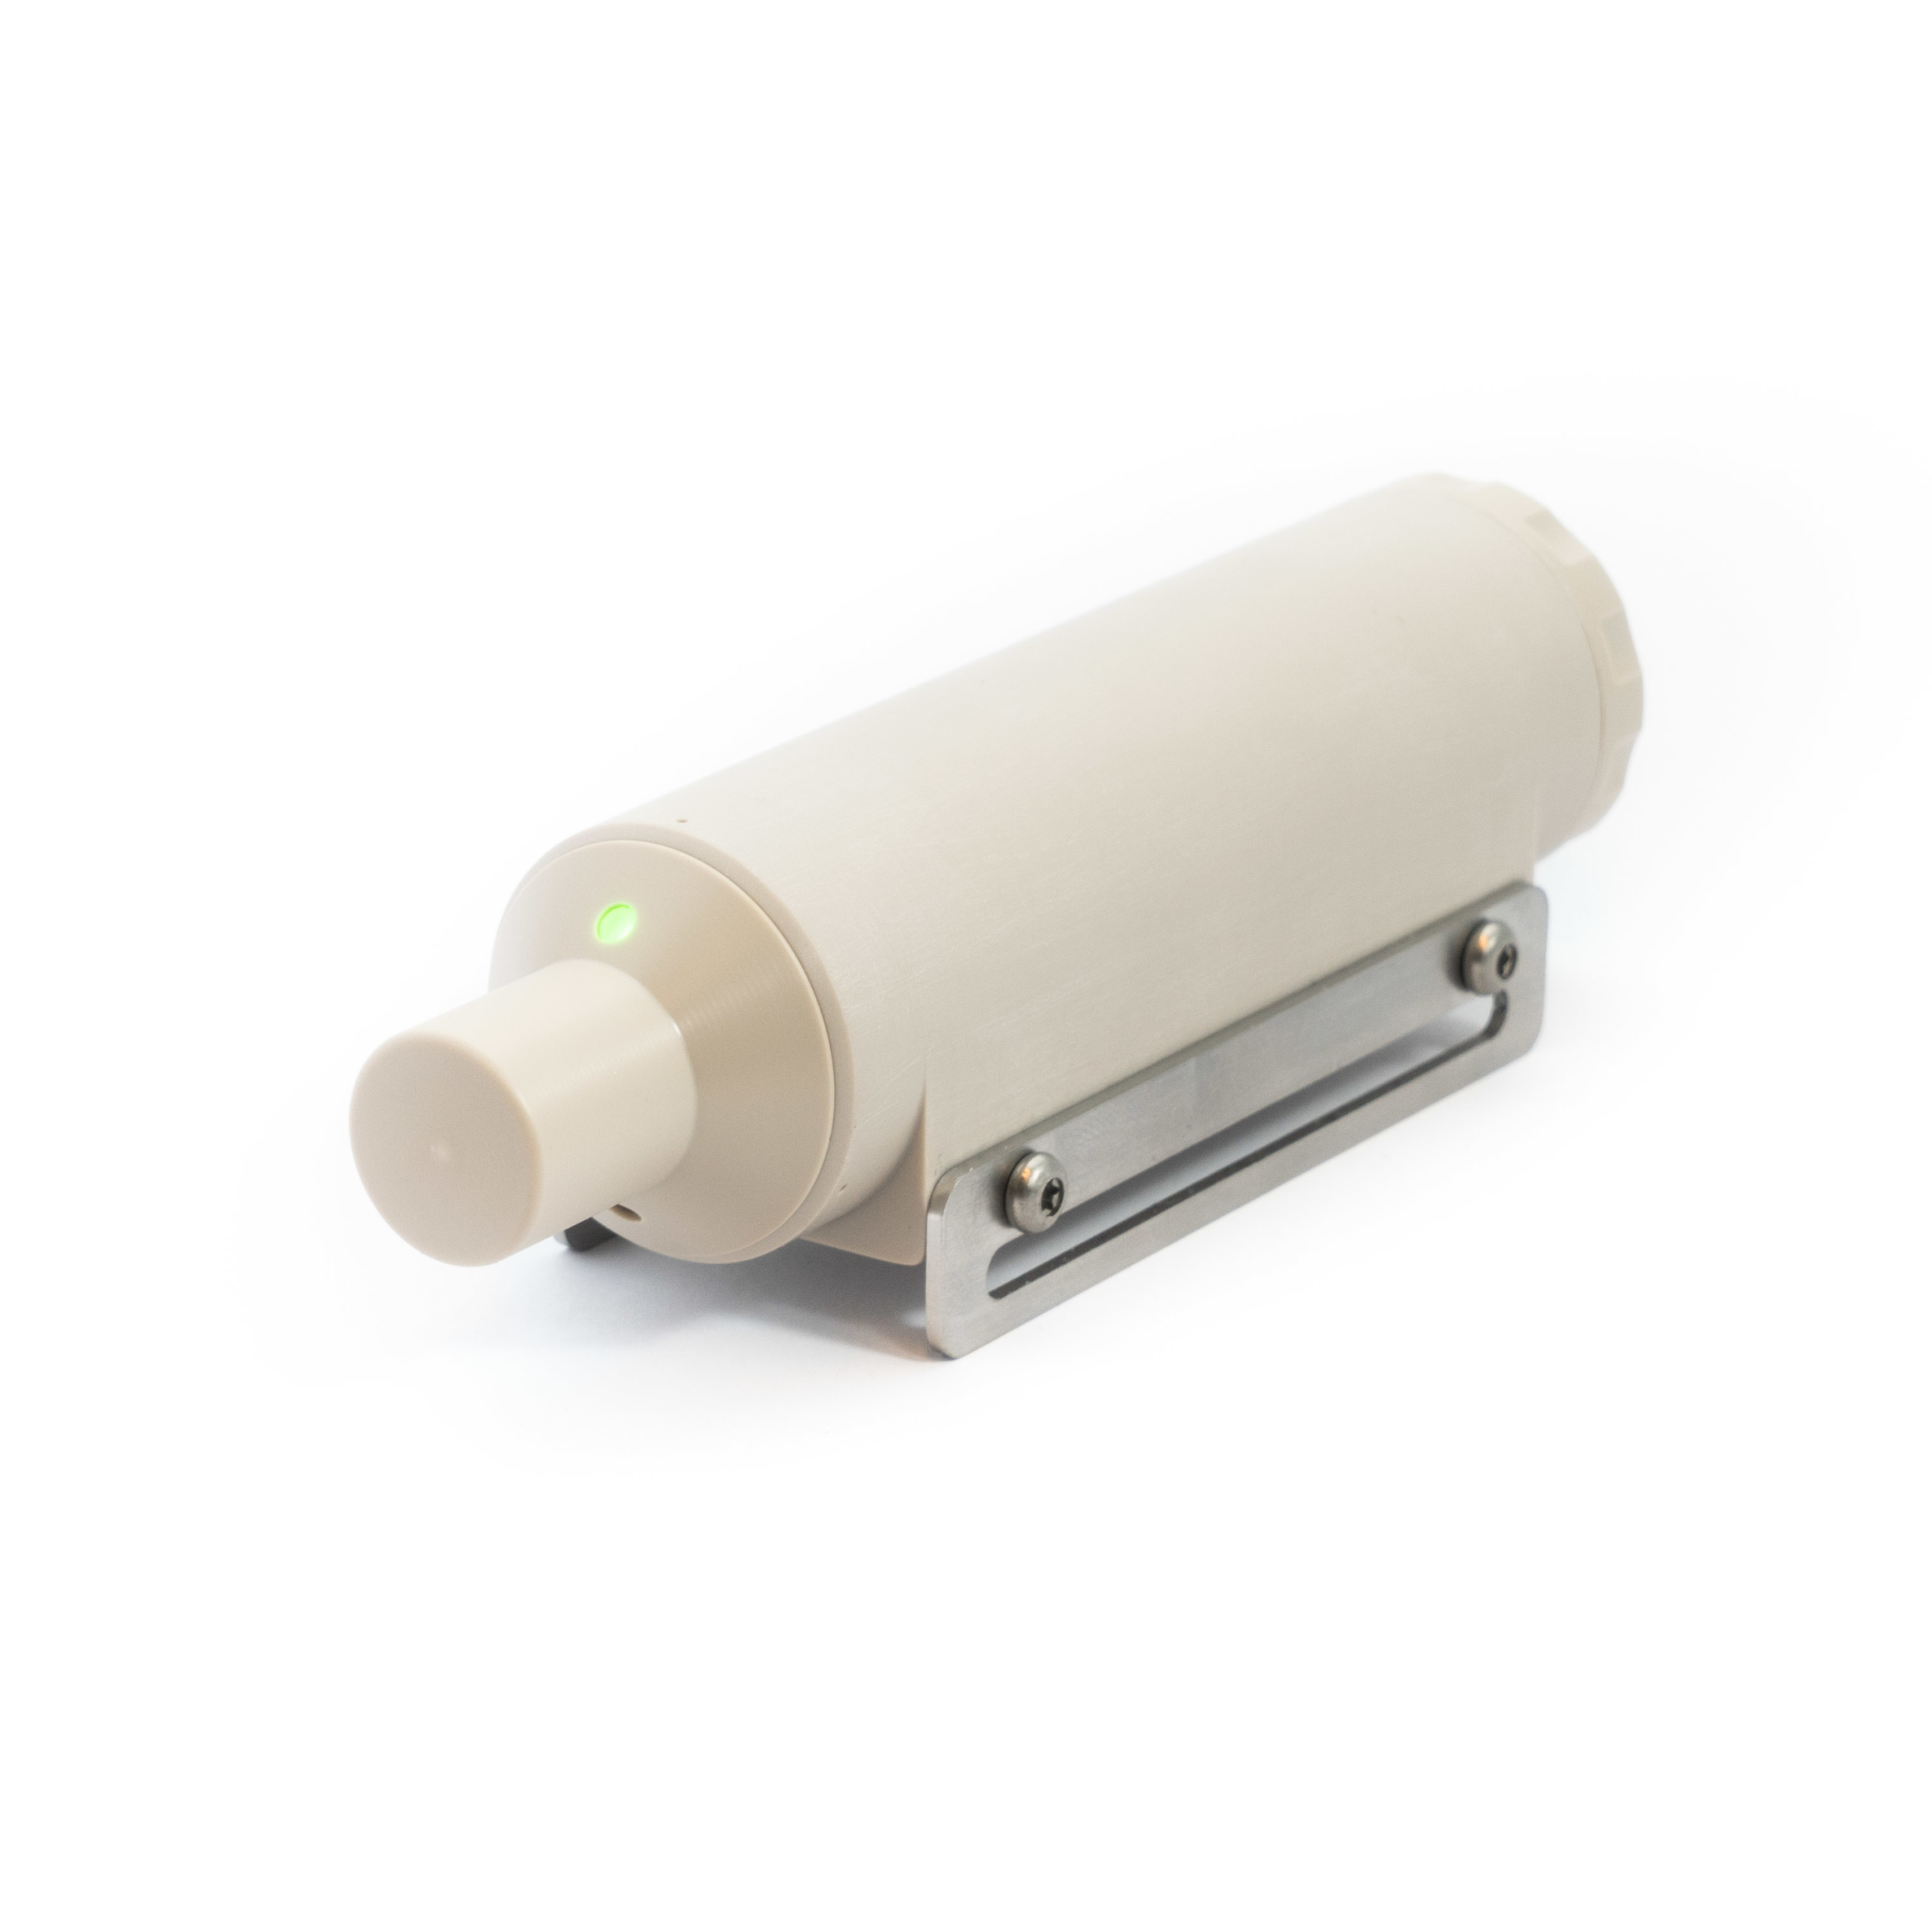
4.- Locator (1): this is one of the most important parts, and we will describe it in detail.
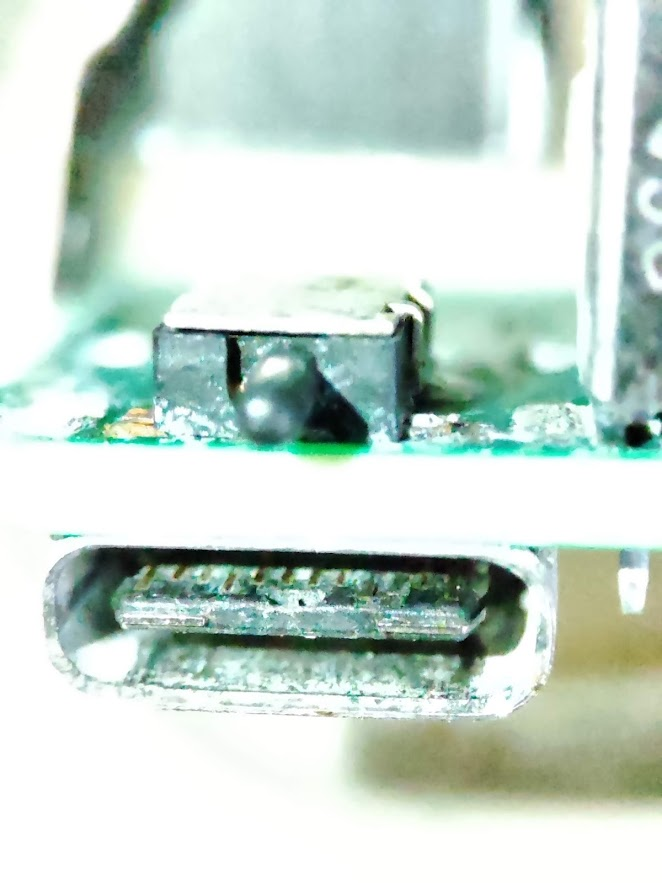
The external USB-C connector and switch ON button will be pushed when the cap is attached and closed. There is also a potentiometer it may be used for channel configuration:
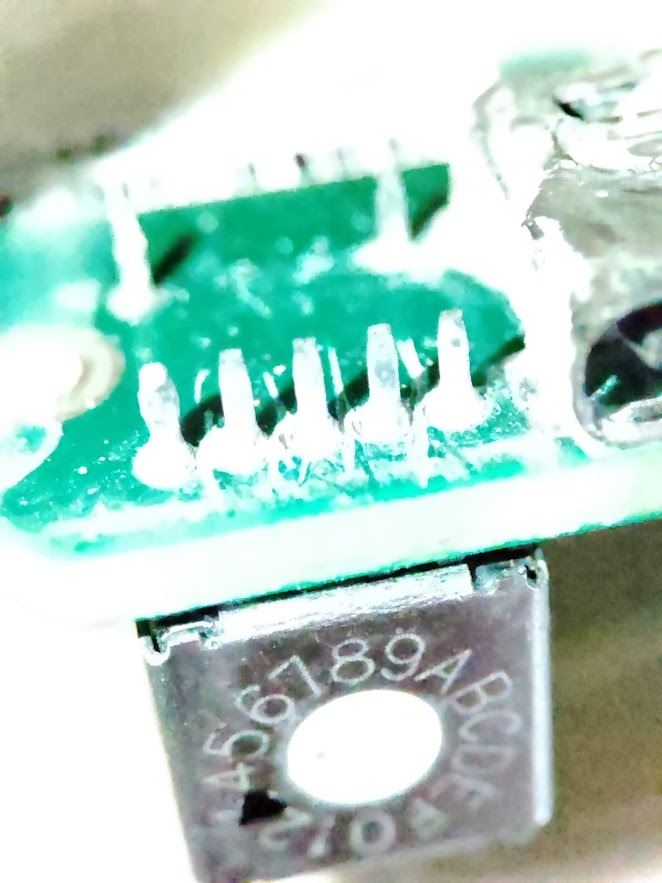
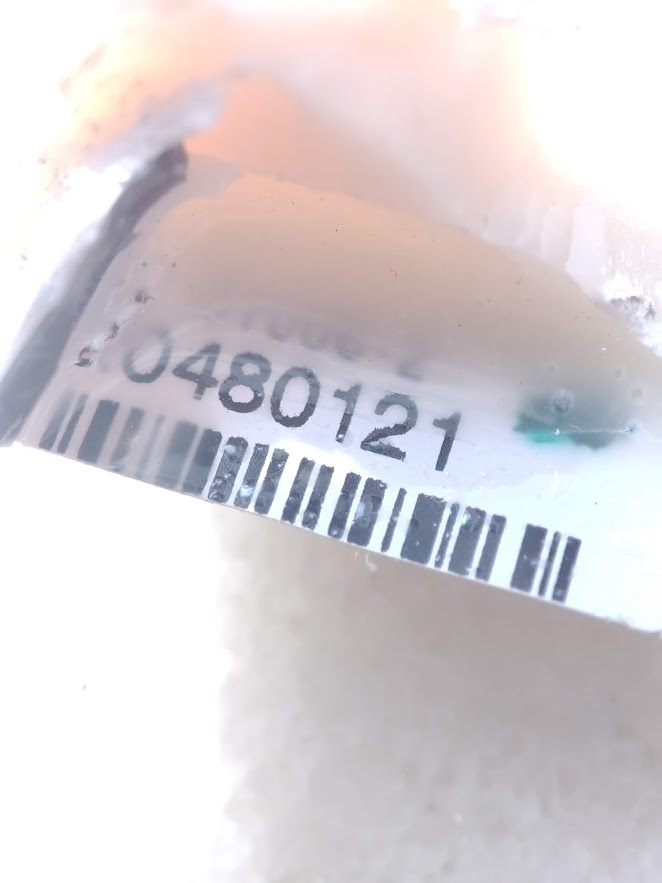
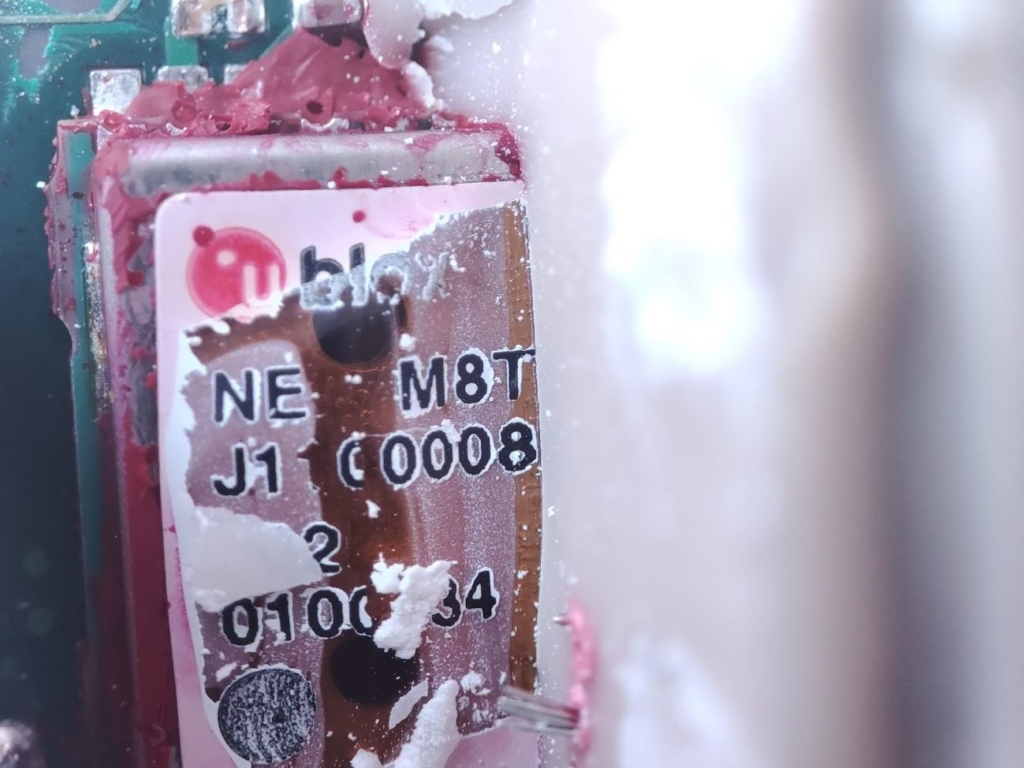
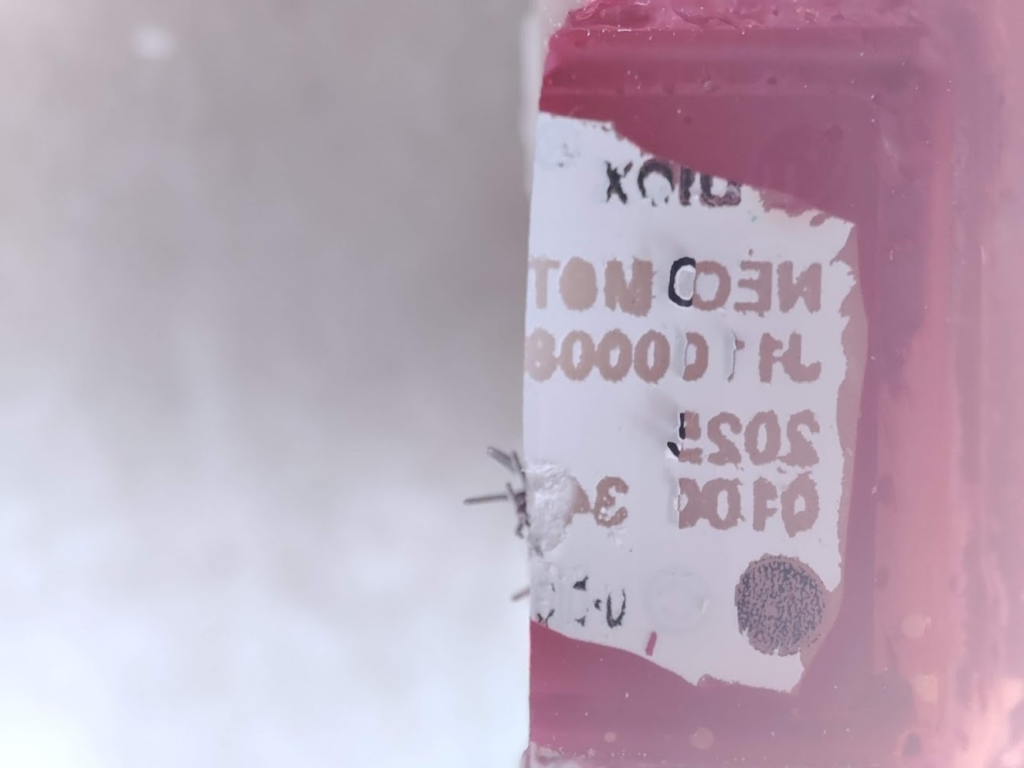
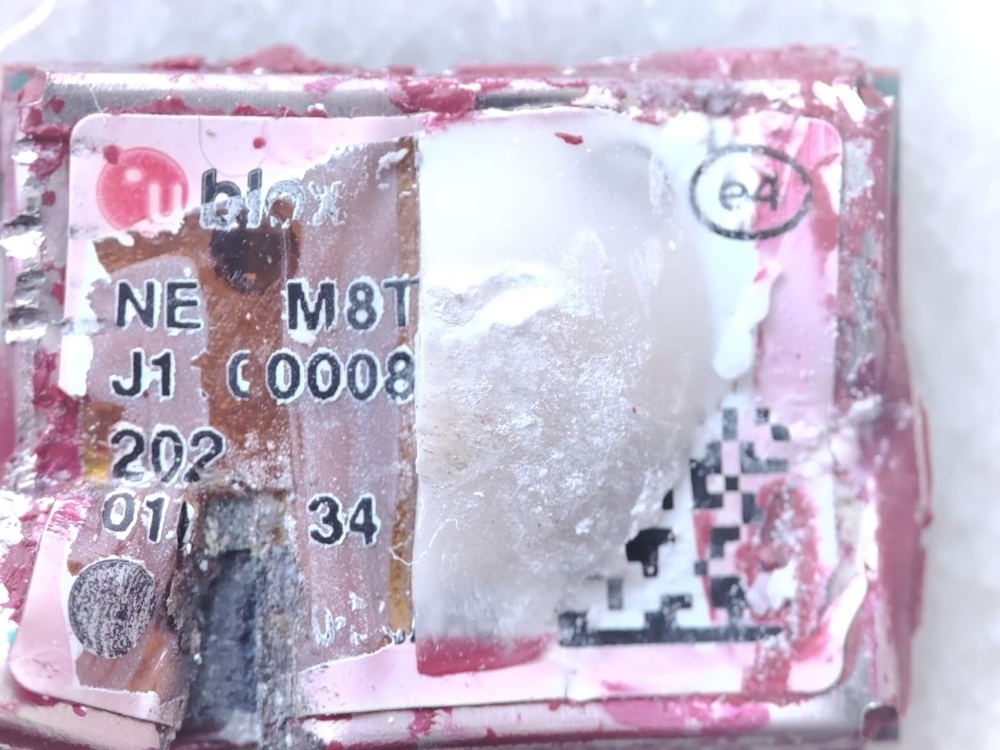
There is a serial number on the motherboard. I believe this is the serial number of the sensor itself when configured by the manufacturer:
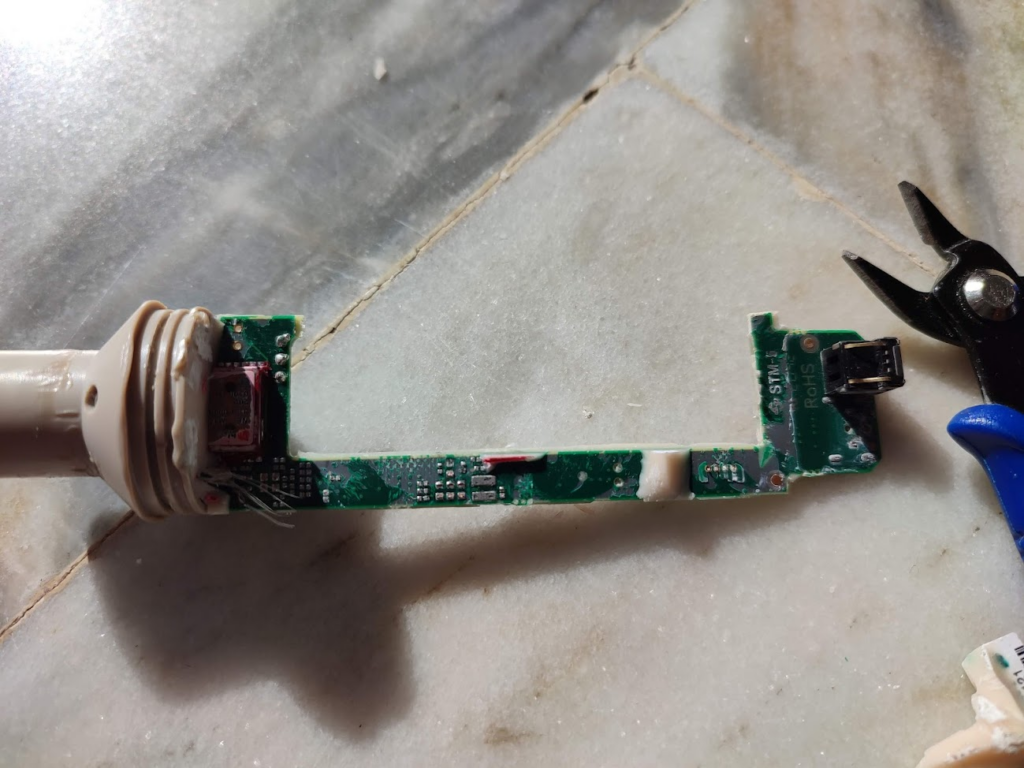
The entire sensor is enclosed in a tube filled with epoxy glue. After removing the cover (tube), we can see the battery:
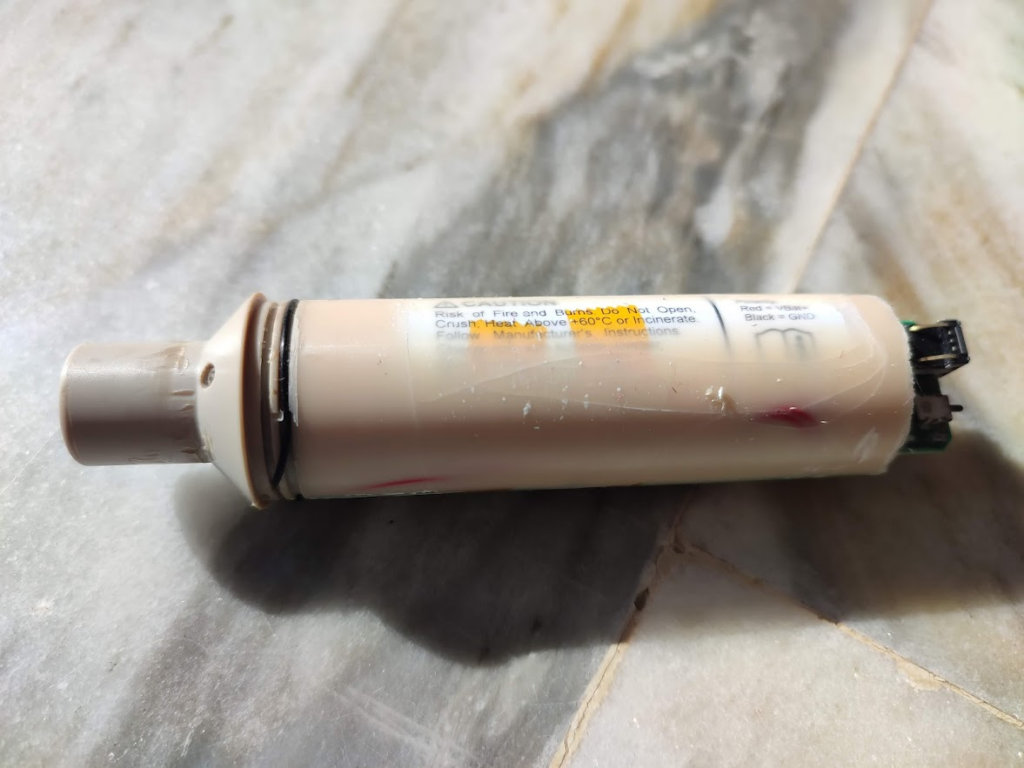
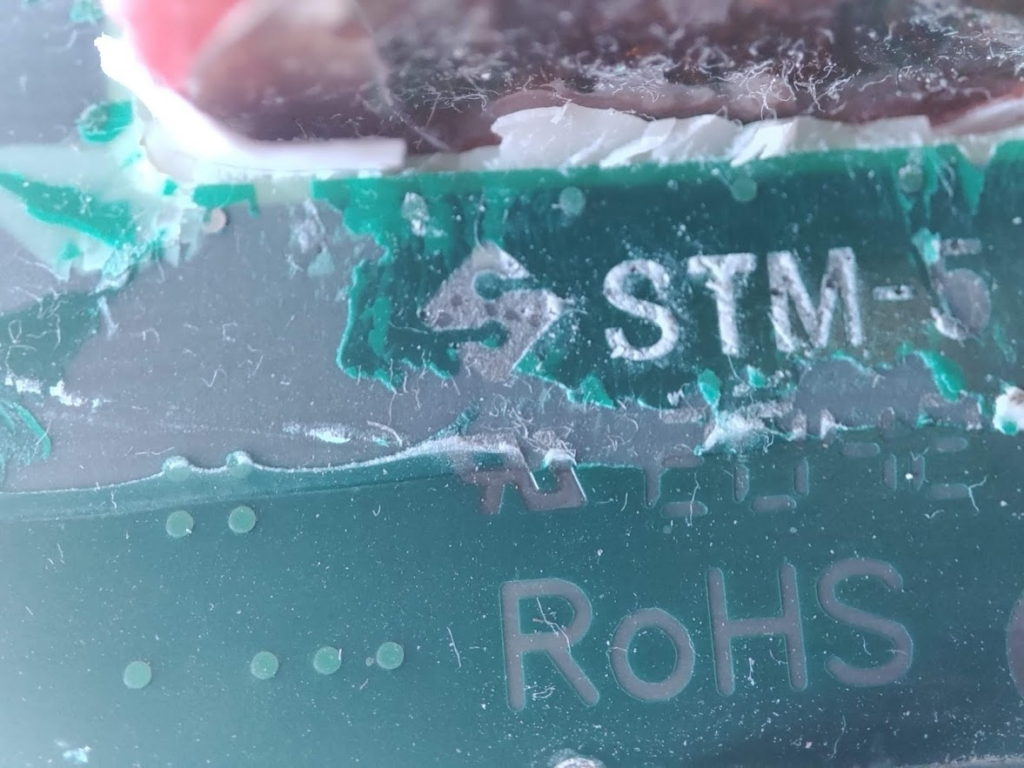
The model number and RoHS certification:
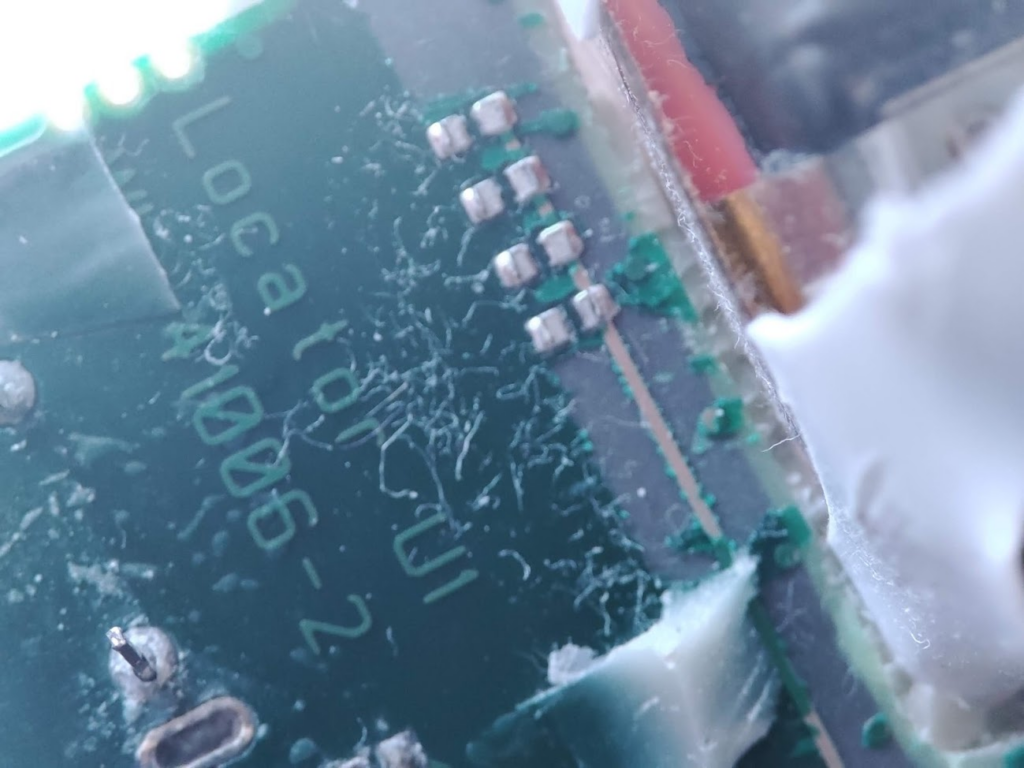
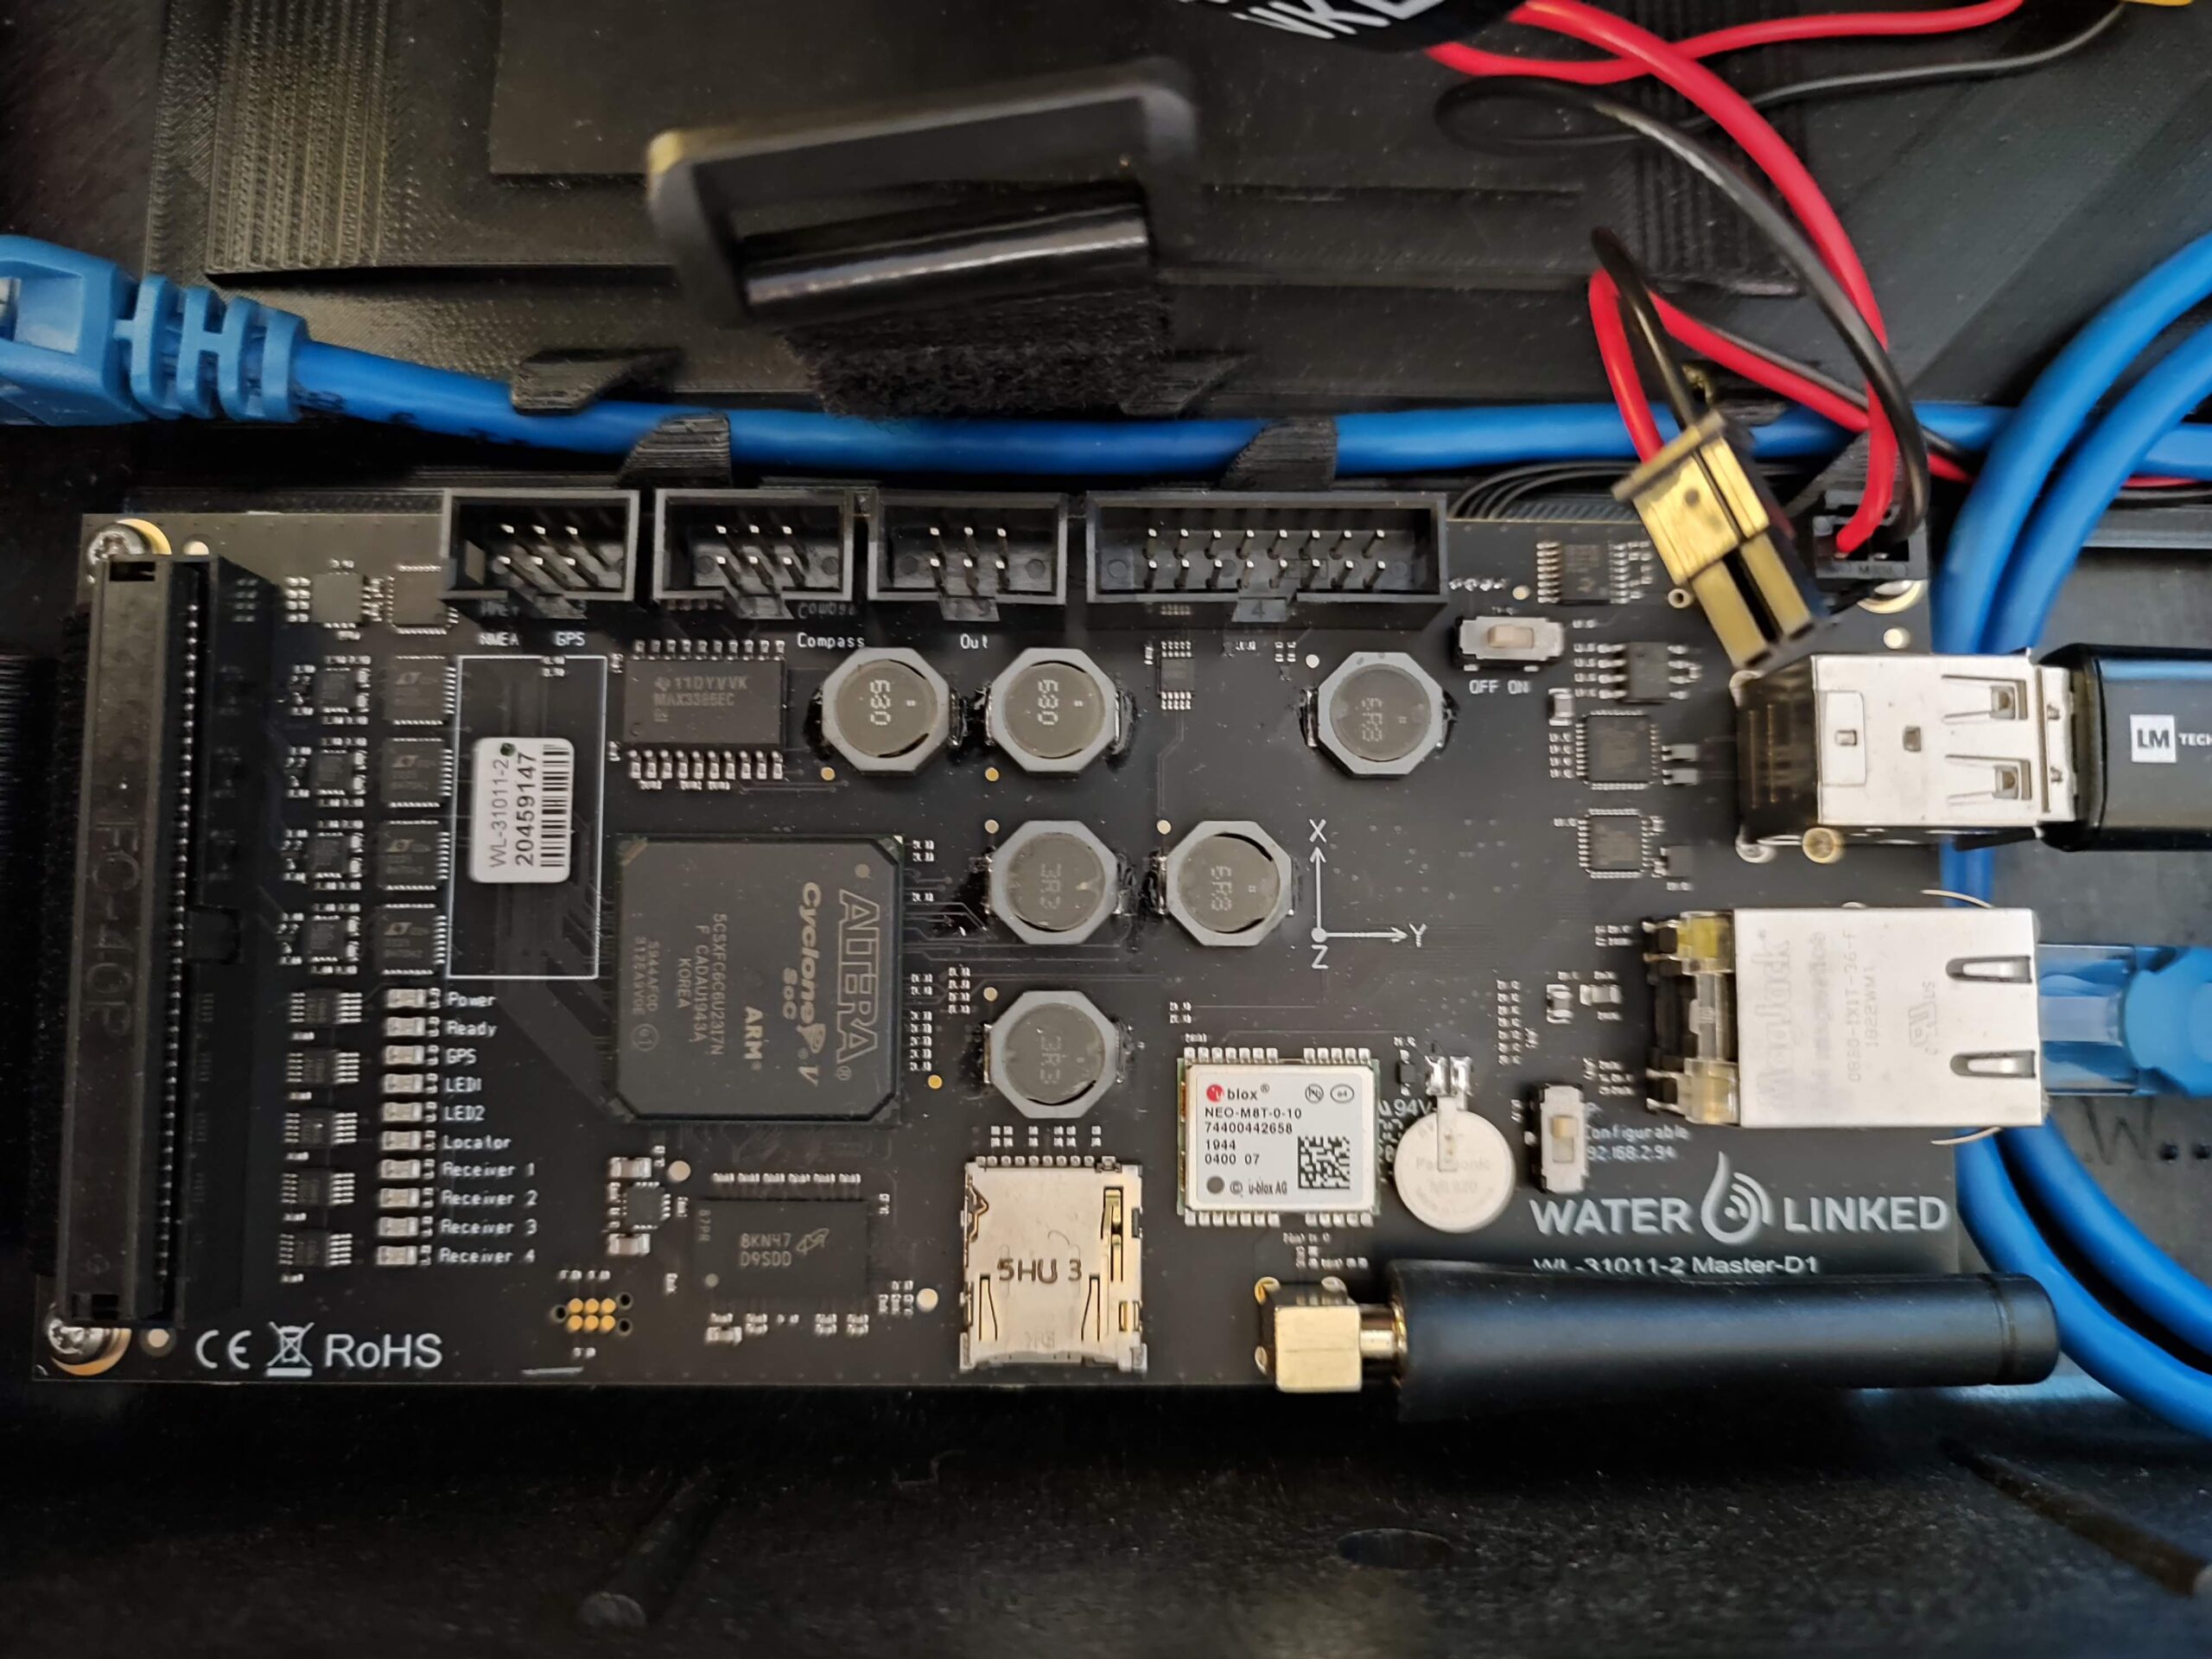
Mainboard:
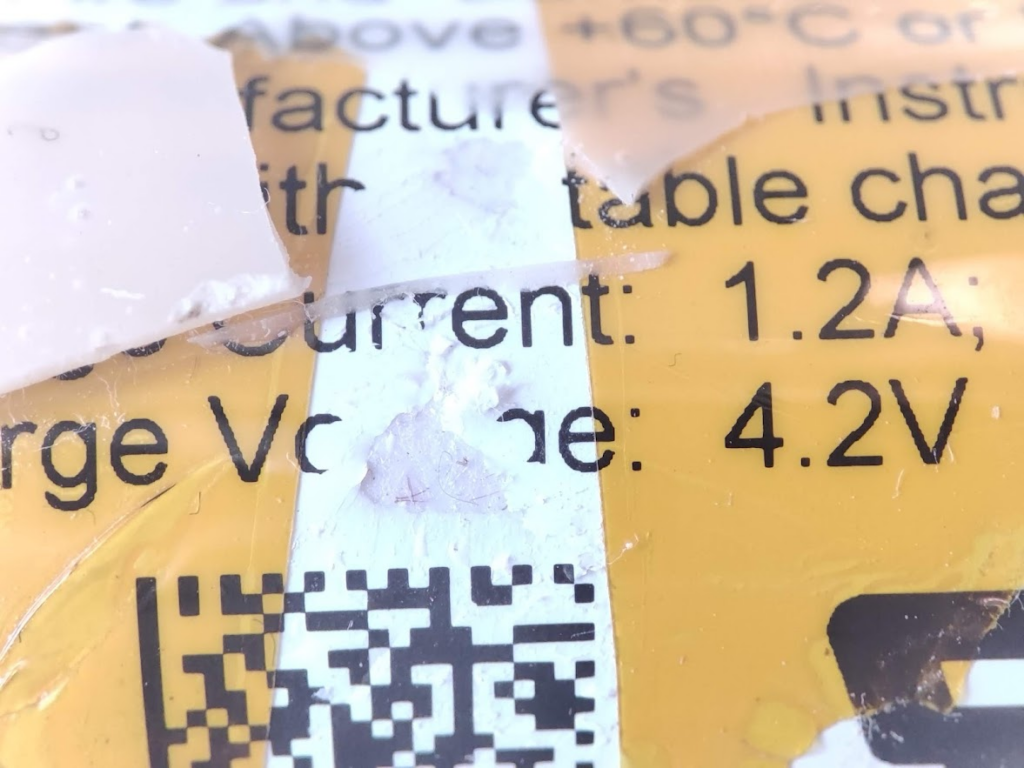
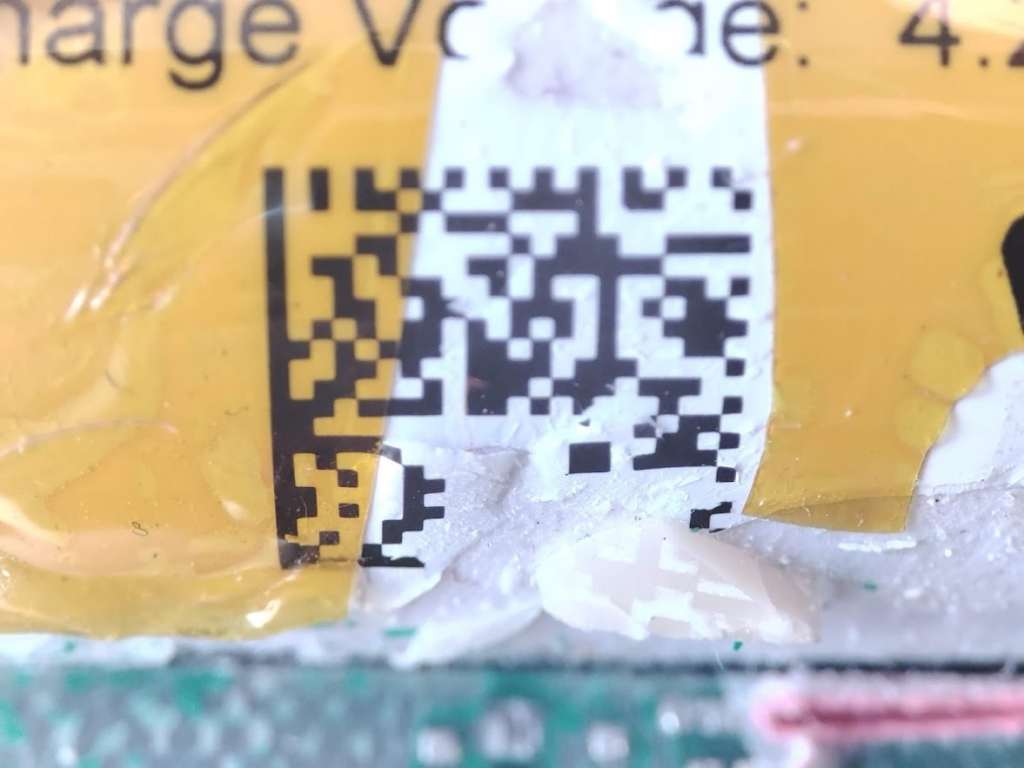
Battery Fey PA-UL-LNB19-R001:

Which can provide until 1.2A at 4.2V:
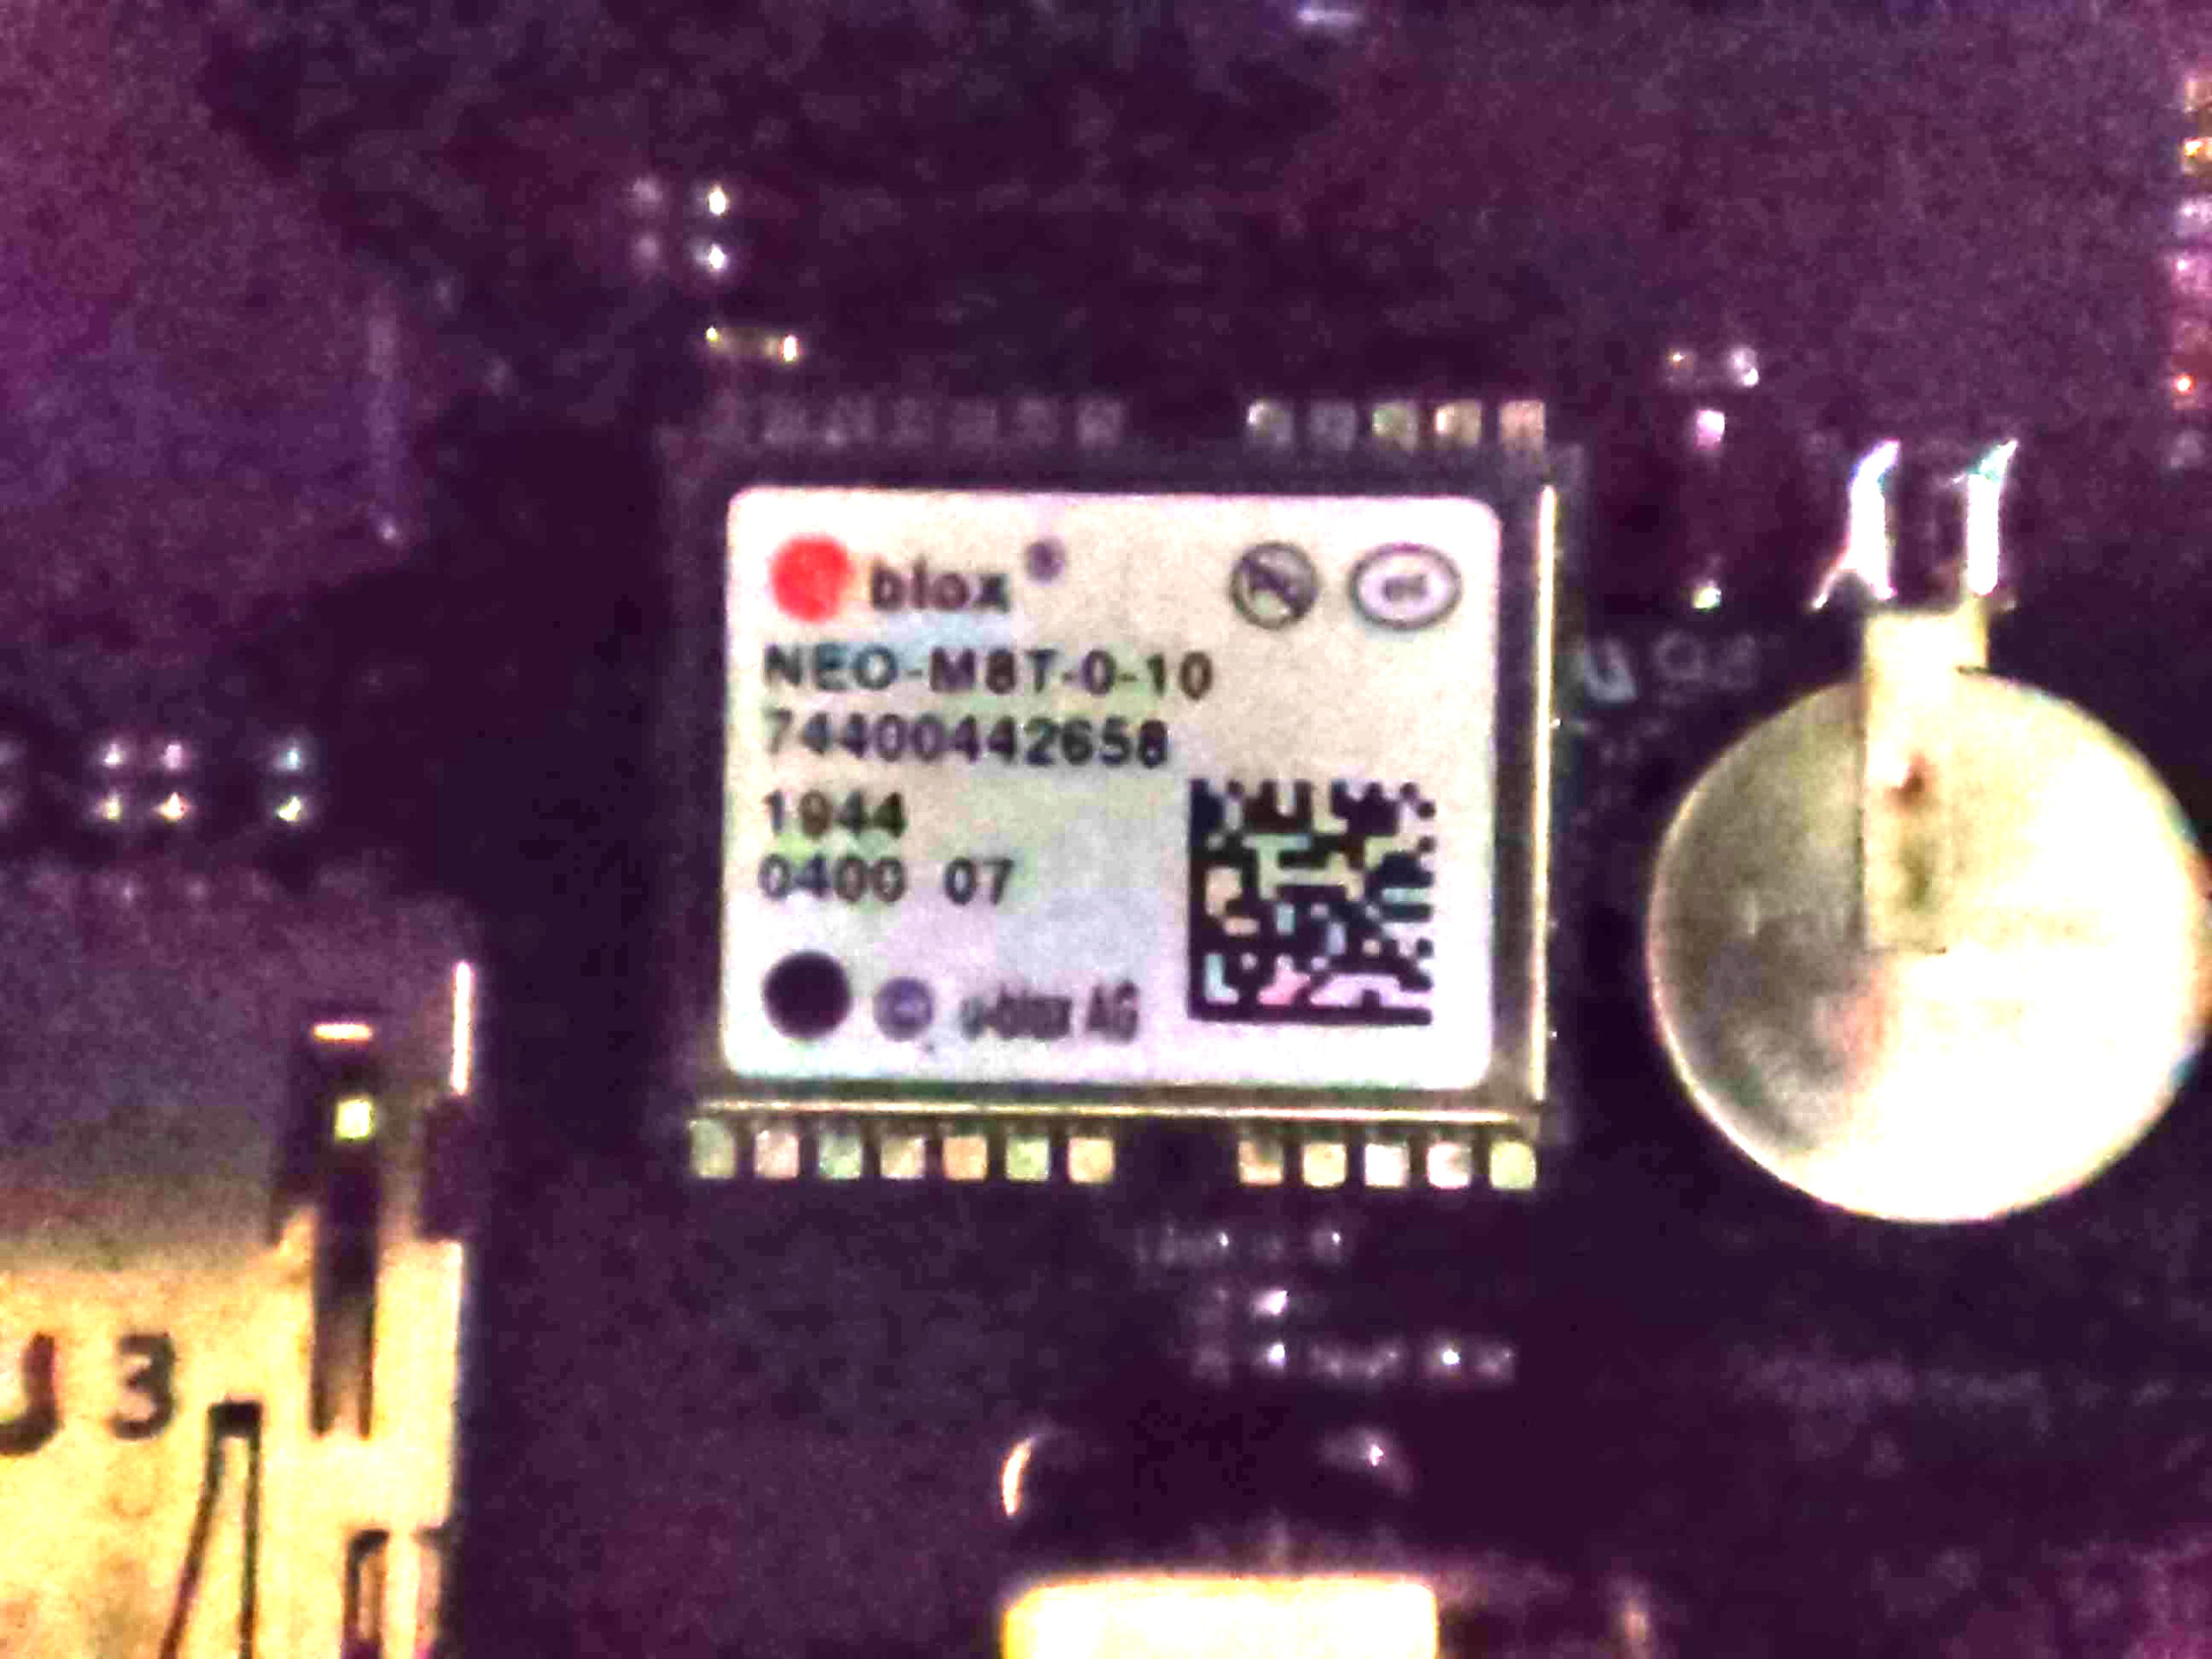
The main chip is a uBlox NEO M8T:
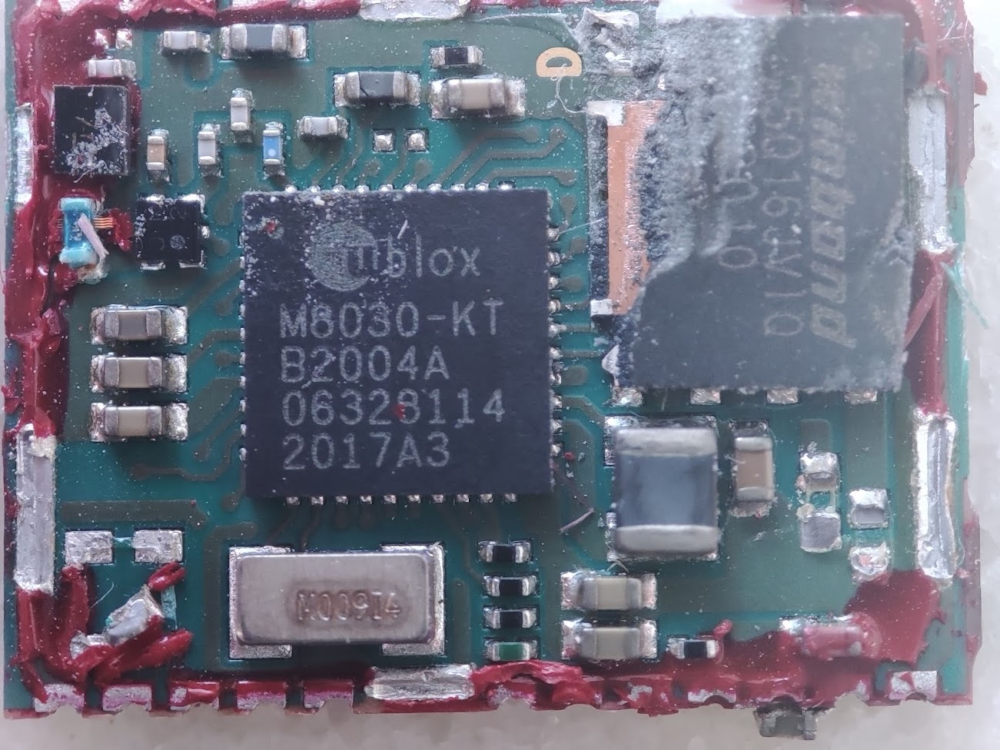
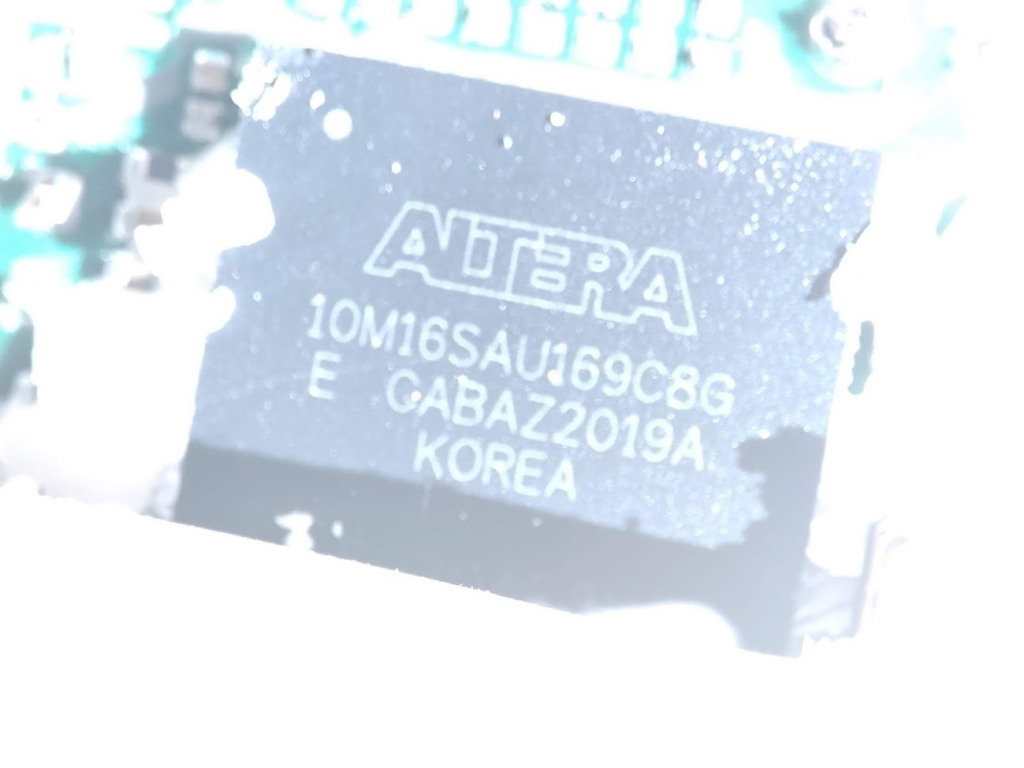
FPGA Altera 10M16SAU169C8G:

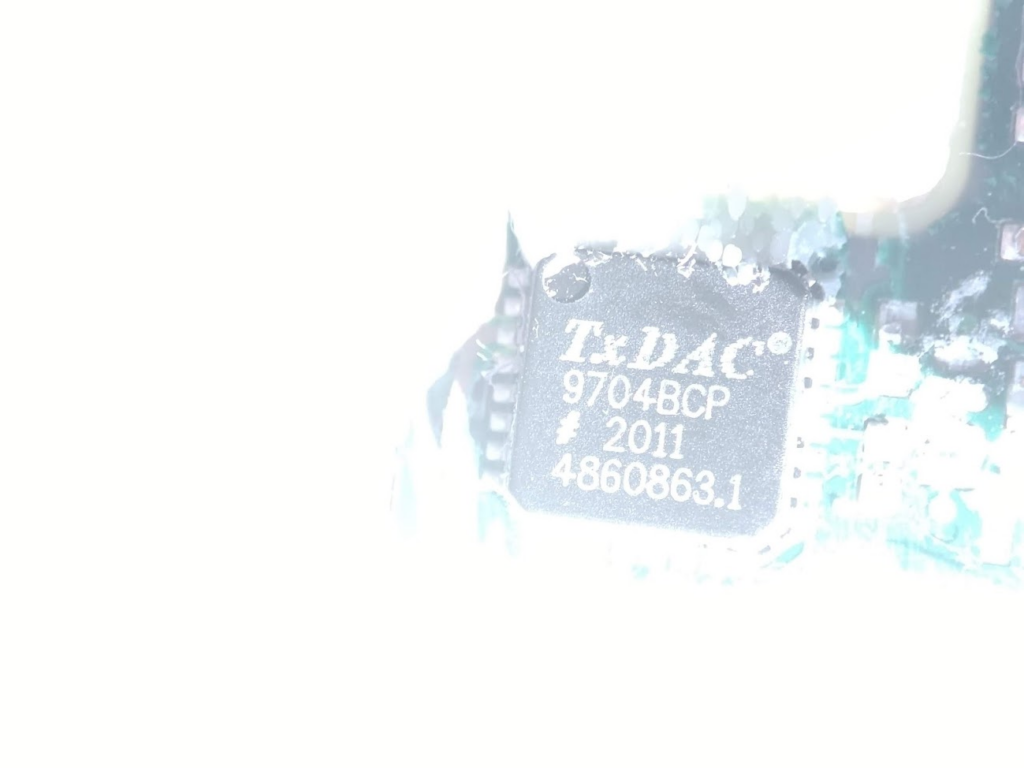
DAC conversor TxDAC AD9704BCP: